Adding Search To Your Site In 15 Minutes

Email Newsletter
Weekly tips on front-end & UX.
Trusted by 200,000+ folks.
This article has been kindly supported by our dear friends at Site Search 360 who help folks optimize their search and boost their best content by using powerful analytics to reveal the intention behind every search. Thank you!

My site has been created using a static site generator and deployed to a CDN, so I’m super happy with how fast it is. But there has been a functionality that I’ve been missing all along: search.
As it’s been mentioned many times, Jamstack doesn’t mean “static” — we can perfectly create fully dynamic sites powered by JavaScript on the client-side interacting with (mostly third-party) APIs. Search falls within this category.
All this time, I hadn’t added search to my site because I was weary it would prove to be a difficult task. I’m not exceptionally skilled in JavaScript or CSS, so I feared that creating an elegant (or, at least, respectable) search input that suggests results as the user types, and integrating it into my site, would fall outside of my abilities.
And then, all of a sudden, in actually less than 15 minutes, I had search on my site!
This was made possible thanks to Site Search 360, a service providing search for any site, whether based on Jamstack (like mine), WordPress (for which they have a plugin), or any other stack. I had planned to do some research on this service first, but as it turned out, even before my research was over, I ended up installing their service and having search on my site, to my absolute (and initially unexpected) delight.
The gist of the whole process is: As I signed up for a free account, this service indexed my site straight from the open Internet without asking me to provide any configuration. It then drove me through a few steps to configure the search user interface and finally produced a link to a JavaScript file with my custom configuration. As I included this JS on my site and refreshed the browser, voilà, I had search!
It really took no time, and it also looks great. In this article, I’ll show you how to add search to your site using Site Search 360, as I’ve done. By the time you finish reading this article, if you follow along, you may already have search. 🙏
Adding Search To Your Website With Site Search 360
On the homepage of Site Search 360, there’s an input asking to “Enter your domain (site.com).” Do it, and click on “Free test.” Then it will say, “Yeah! Your free trial is ready,” and ask you to enter your email to complete the registration. Do it, and click on “Go!”.

After this, the service will spend a minute or two indexing your site (or maybe a few more, depending on how much content your site has), and then inform you that it’s all ready.
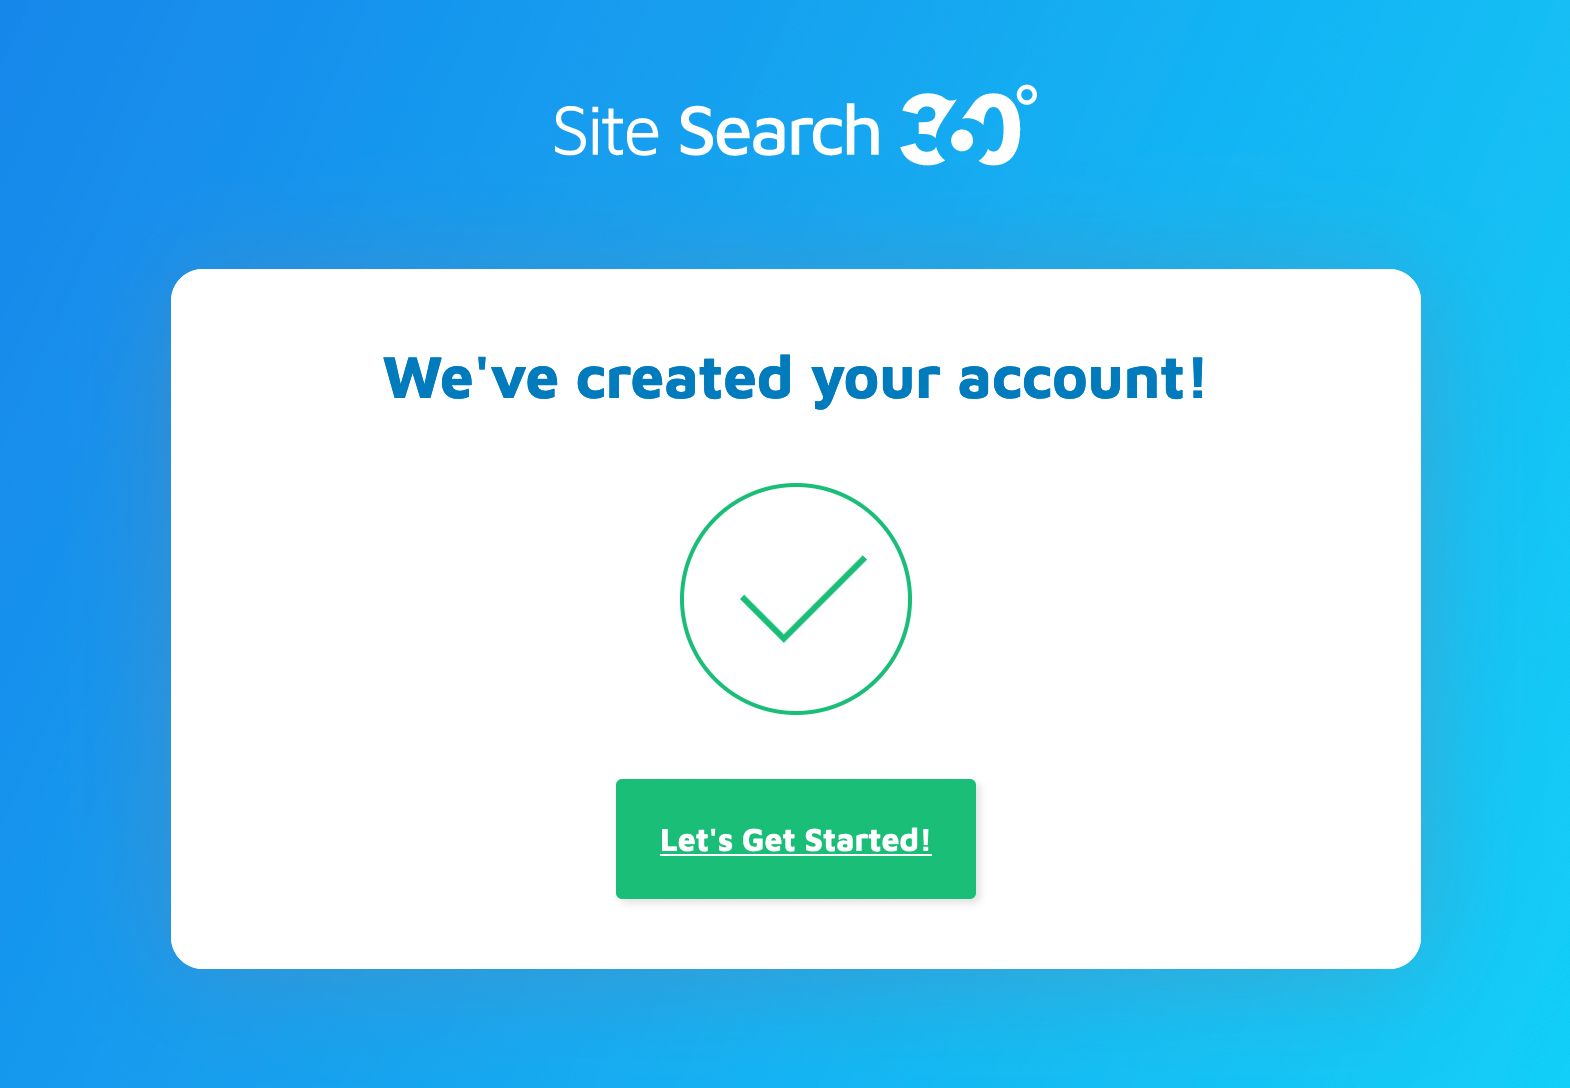
Click on “Let’s Get Started!” to go to the application dashboard, where an onboarding process will guide you in setting-up search for your site.
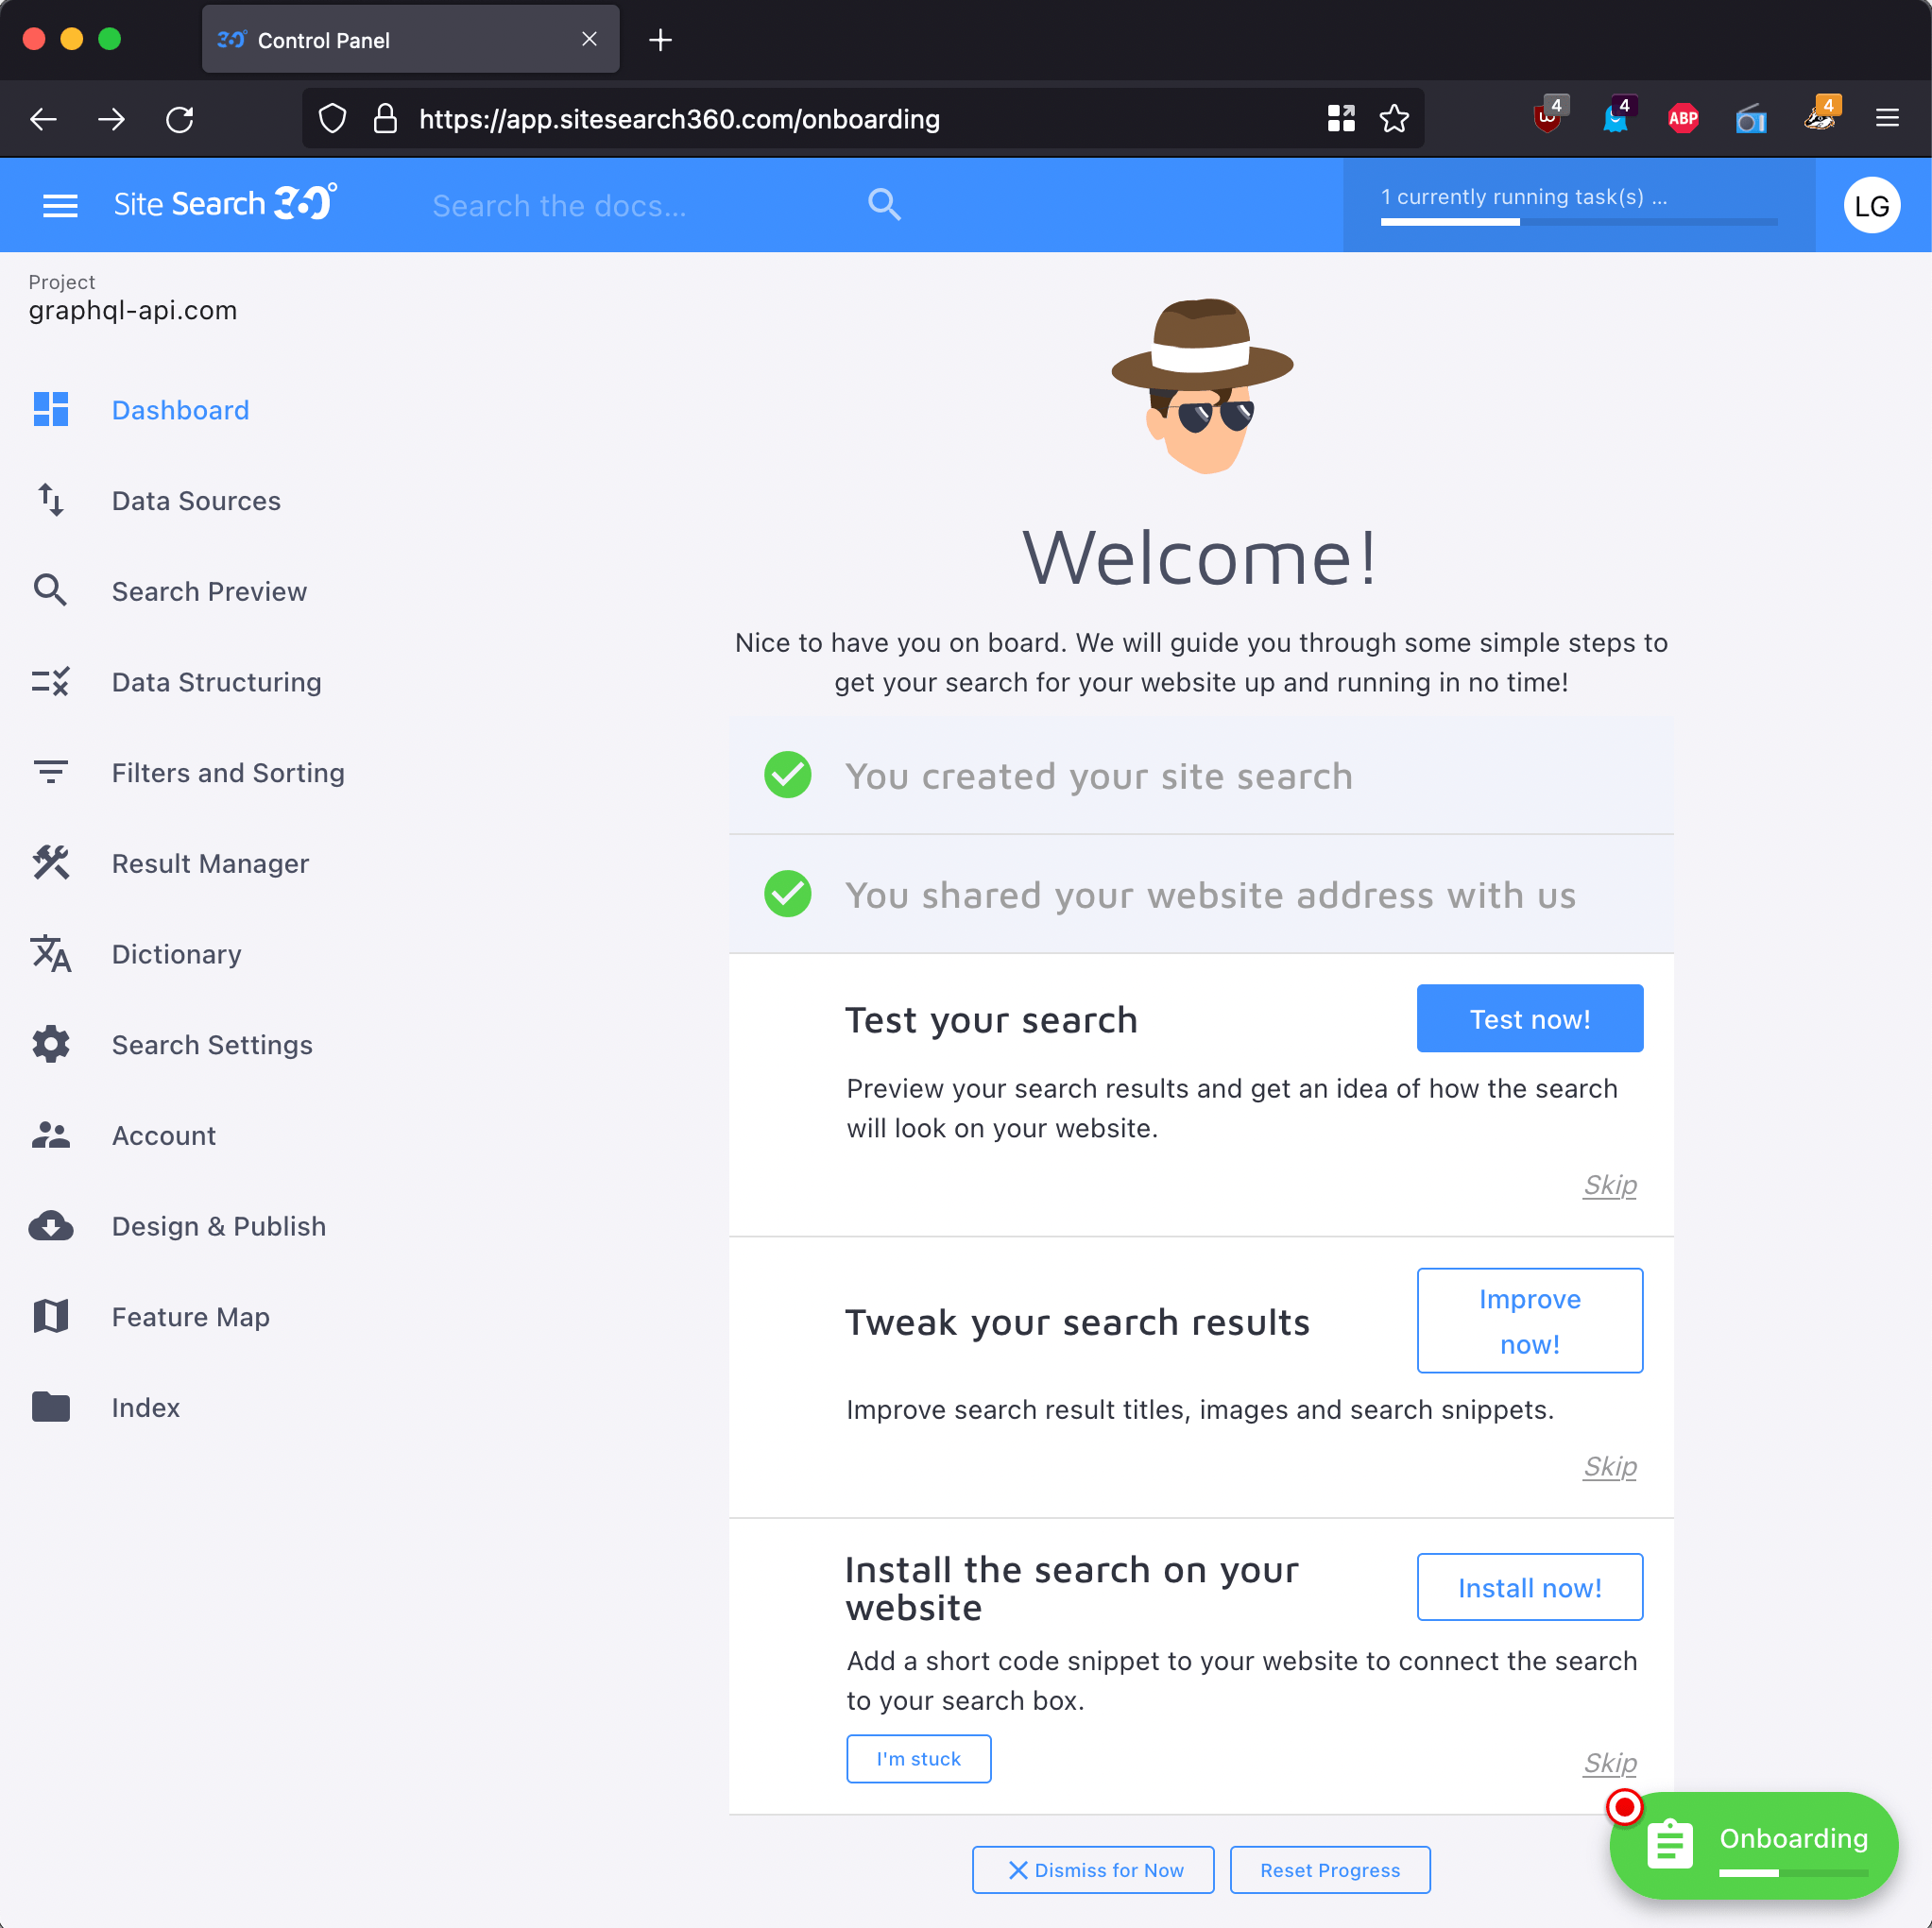
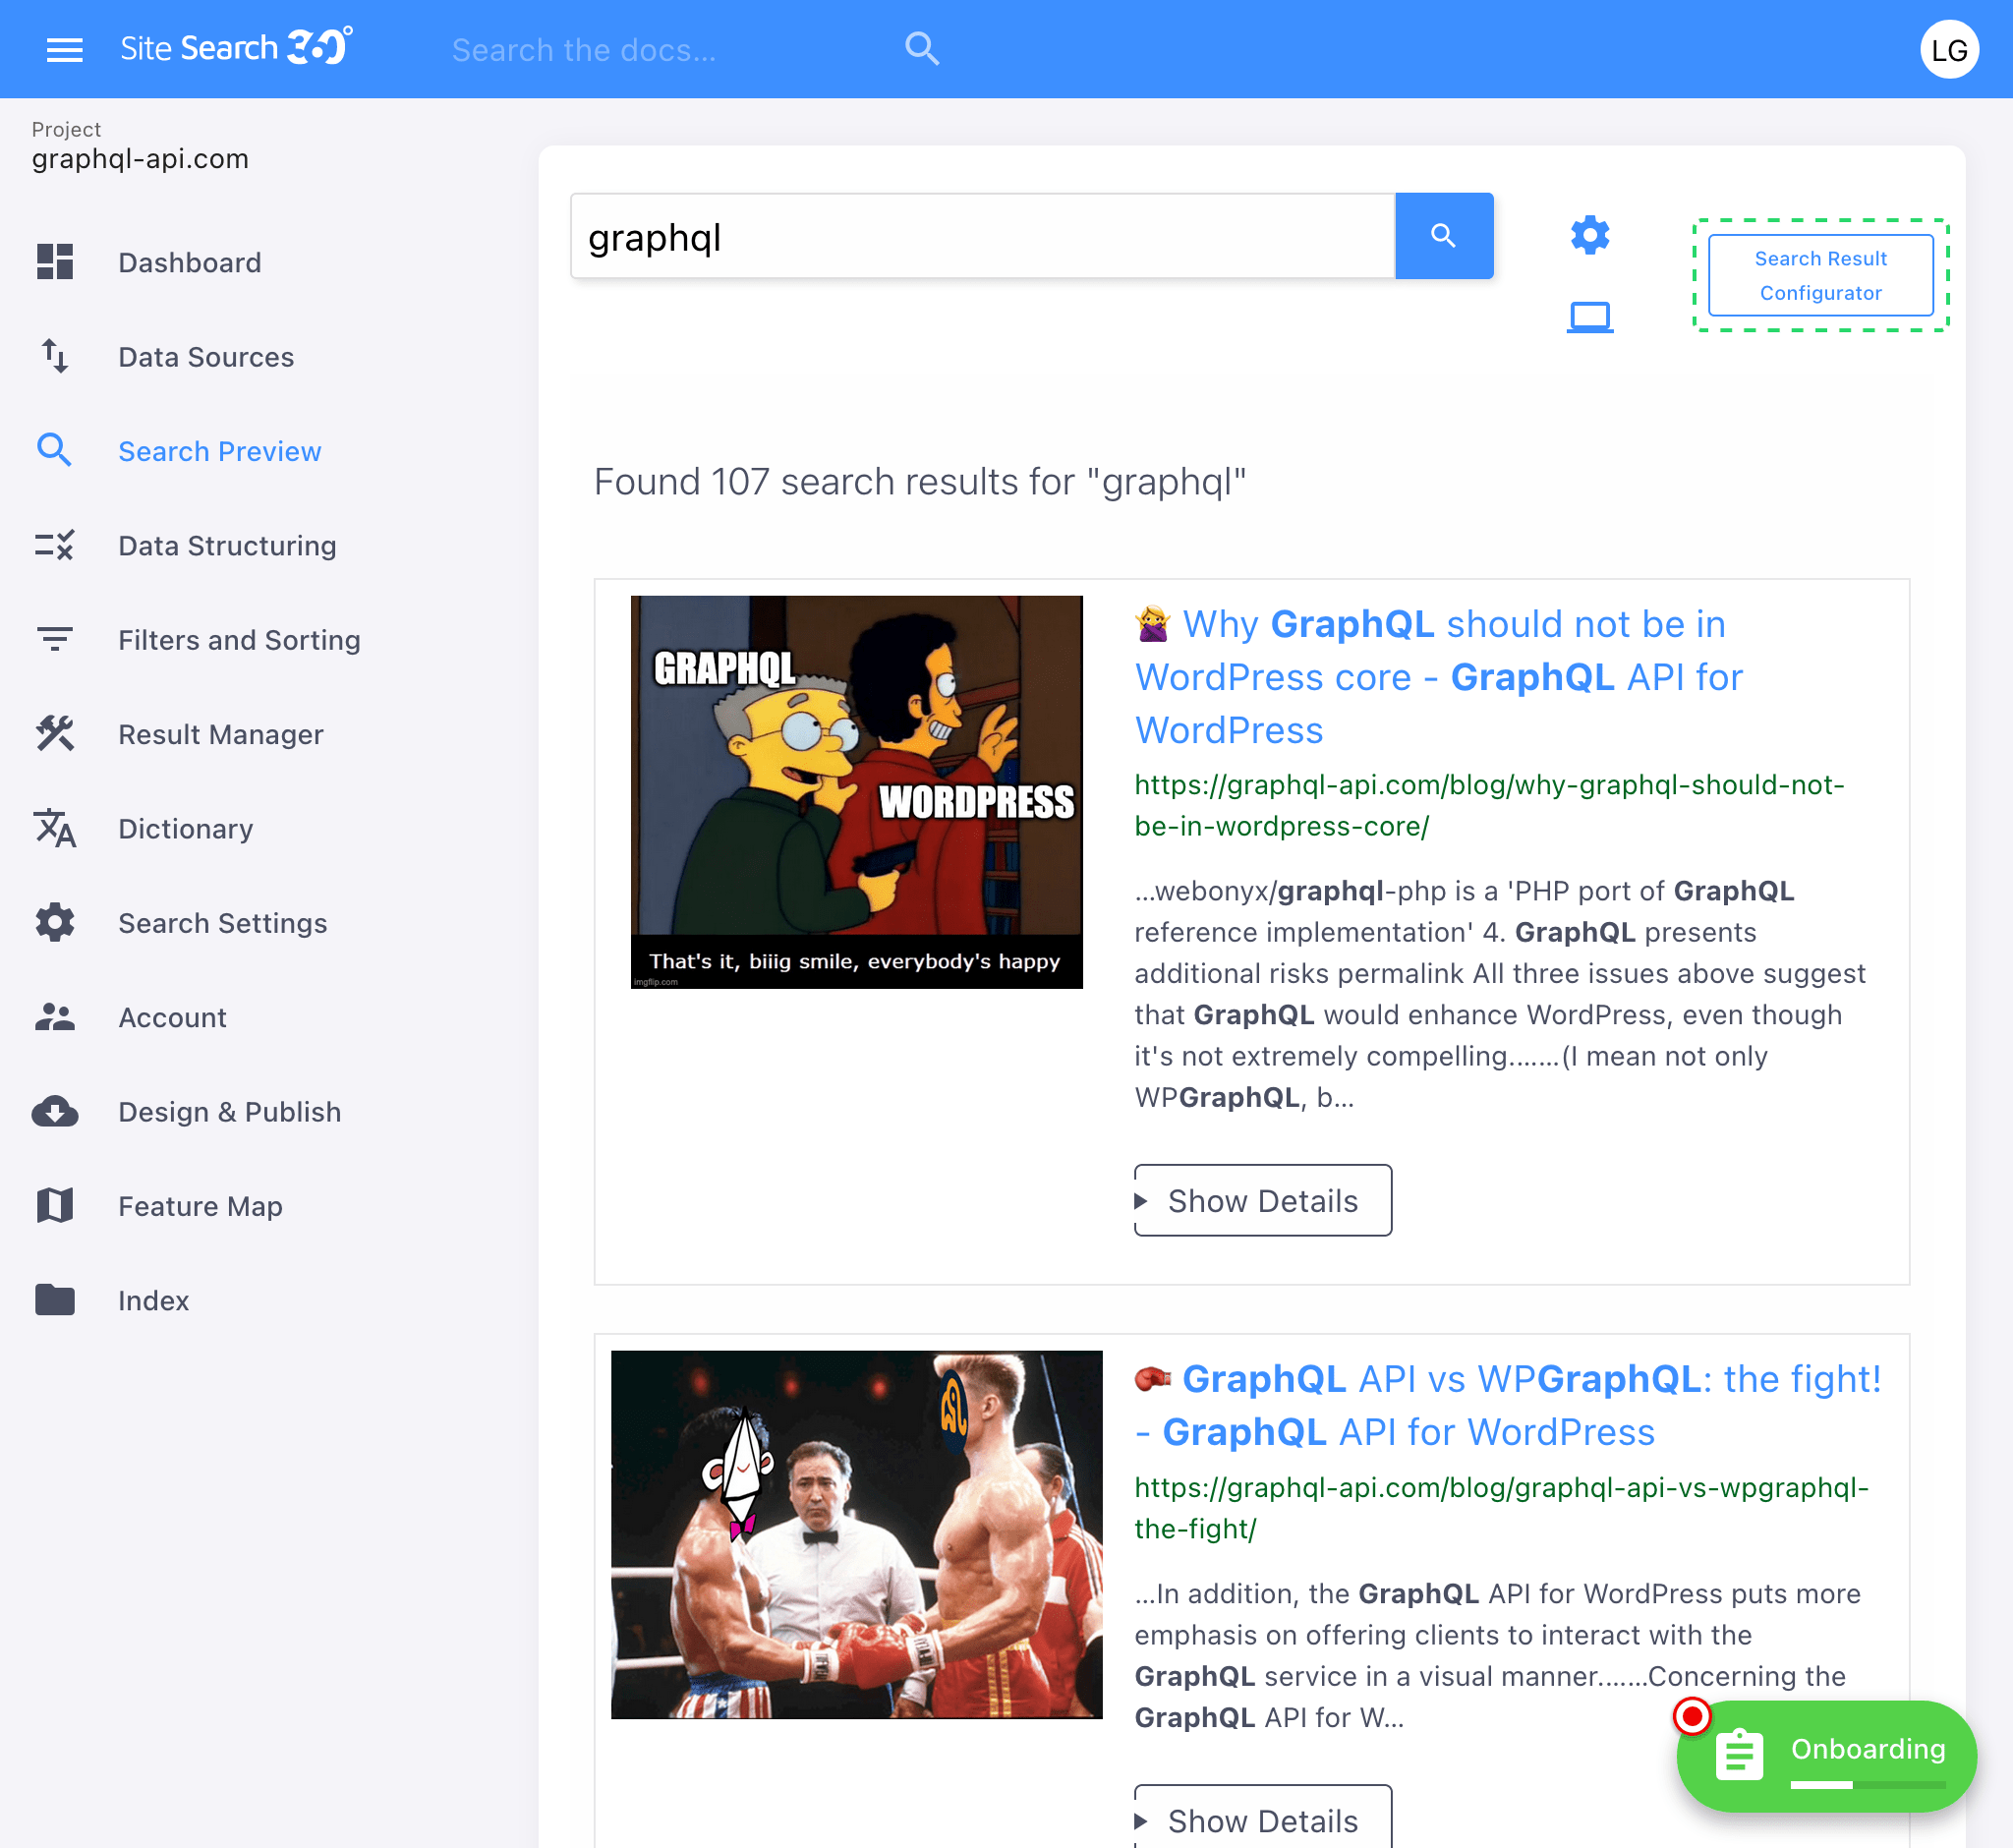
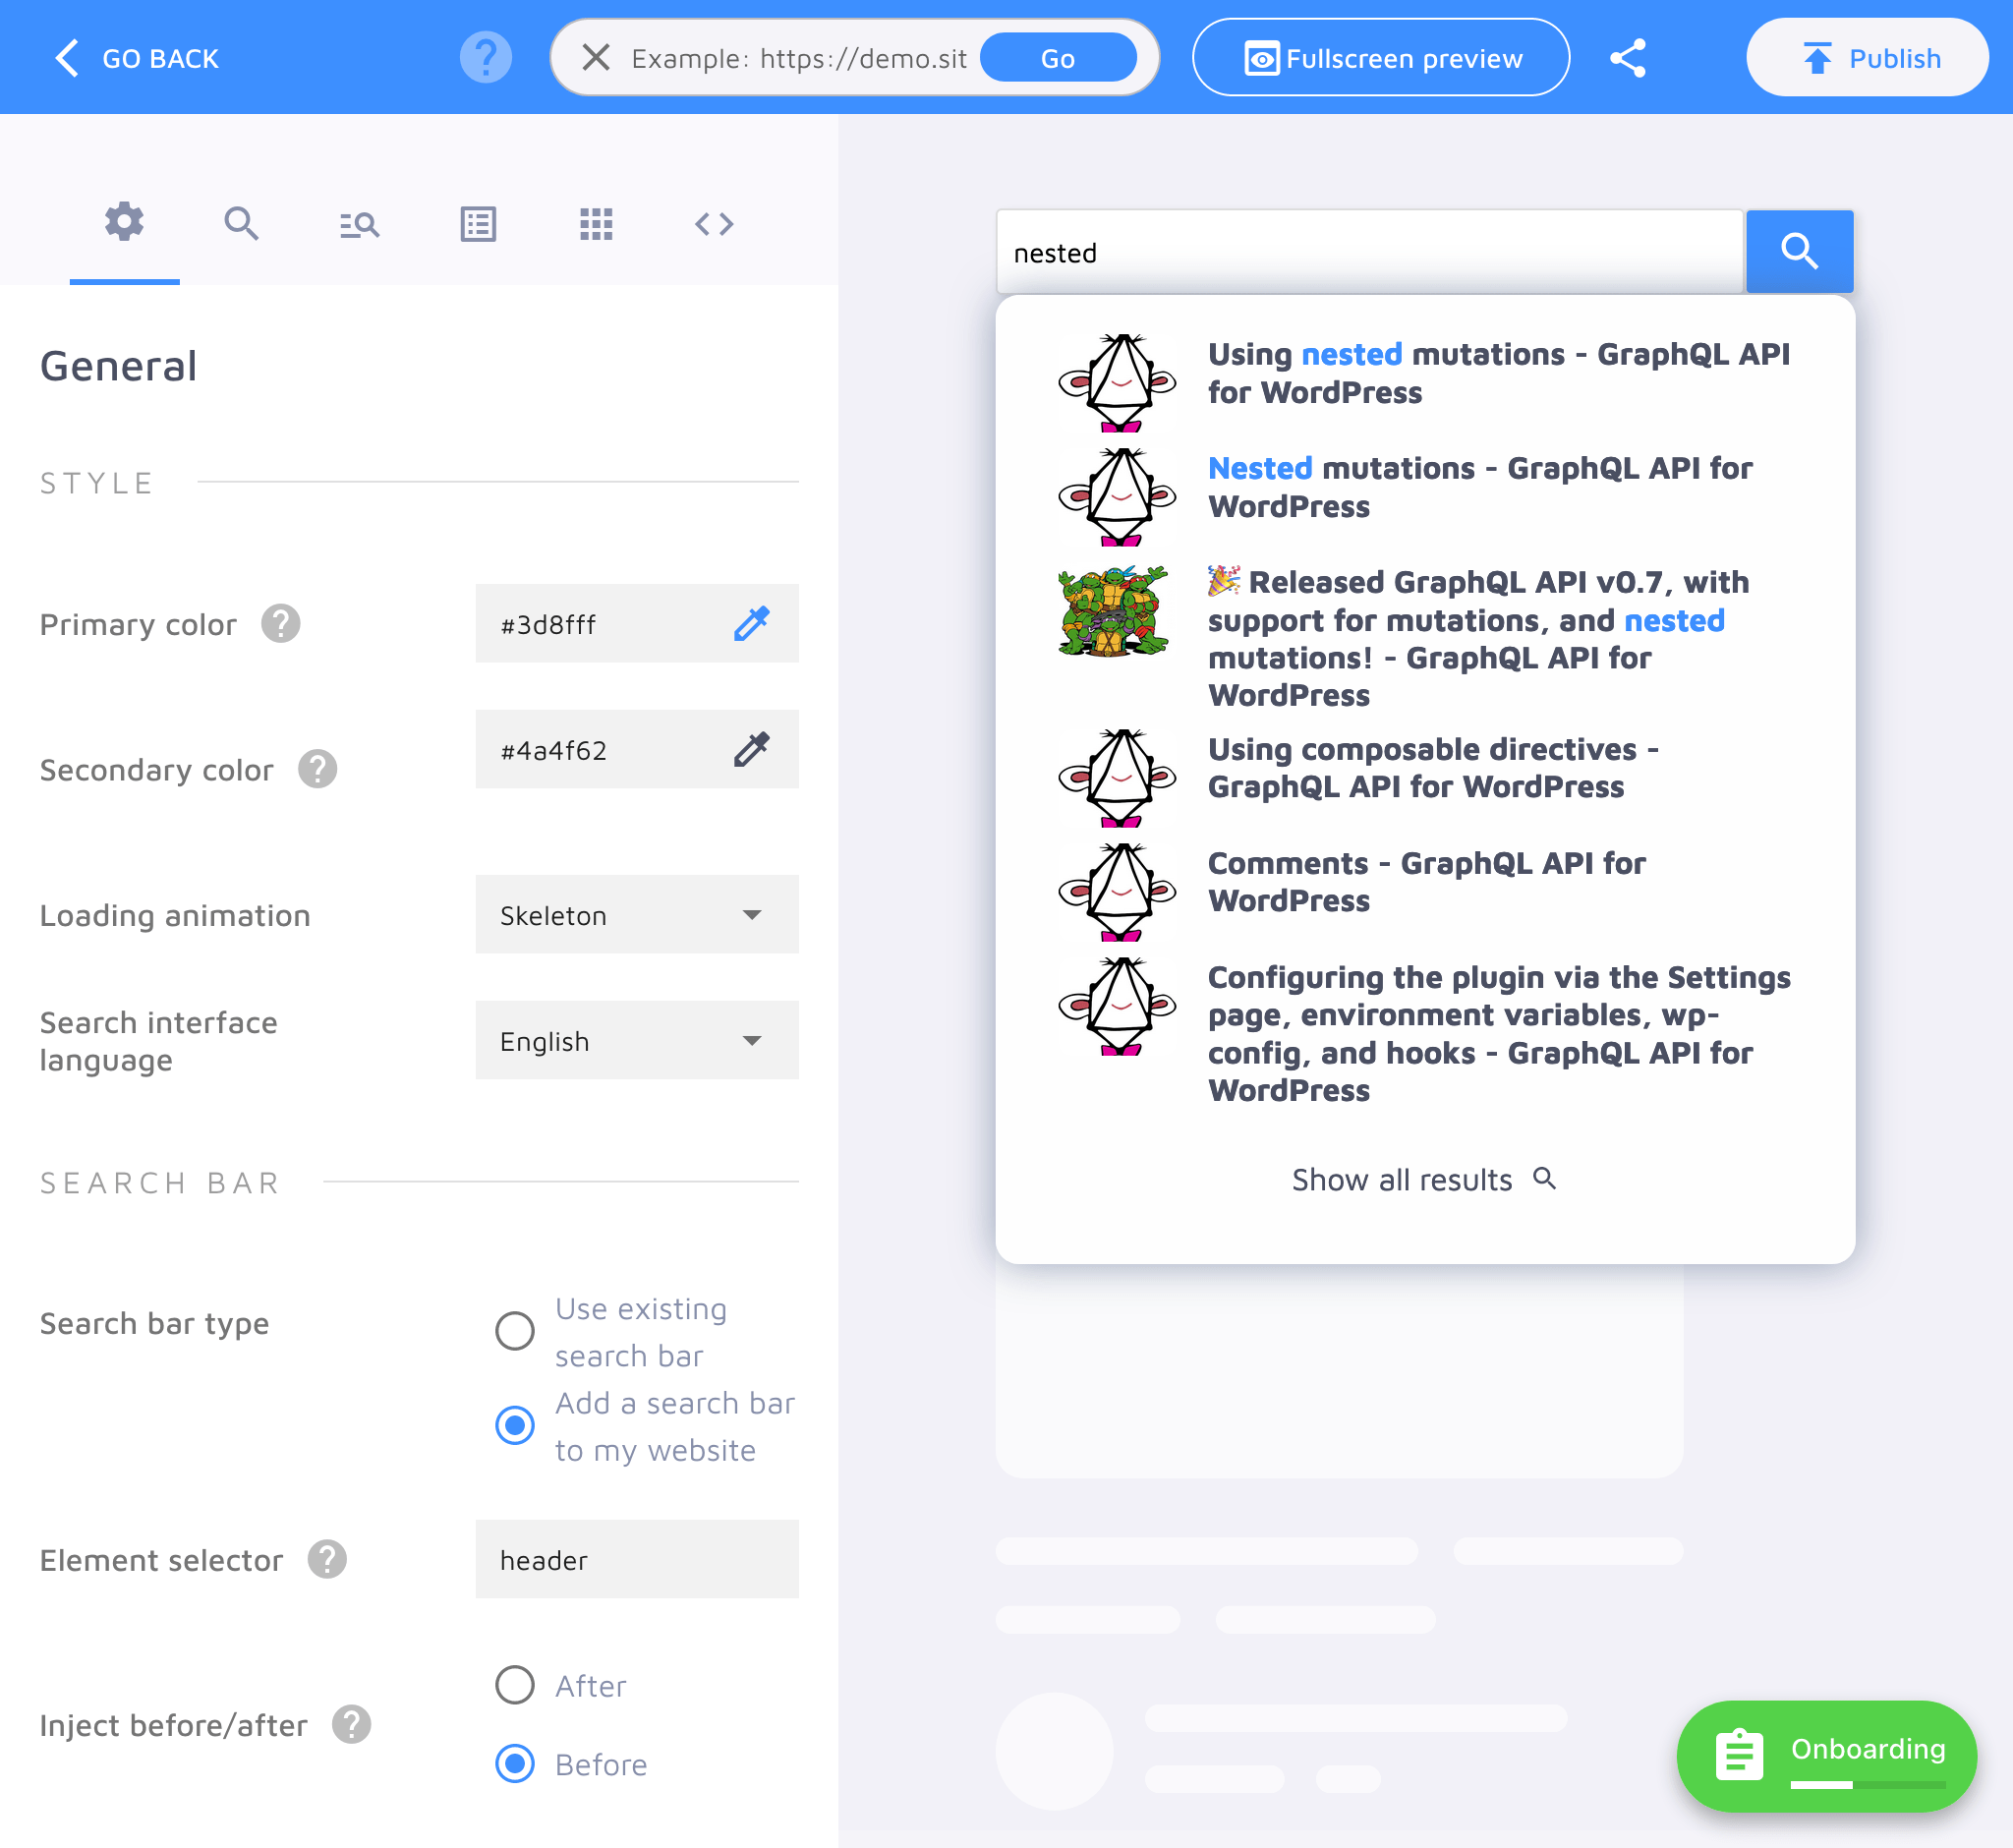
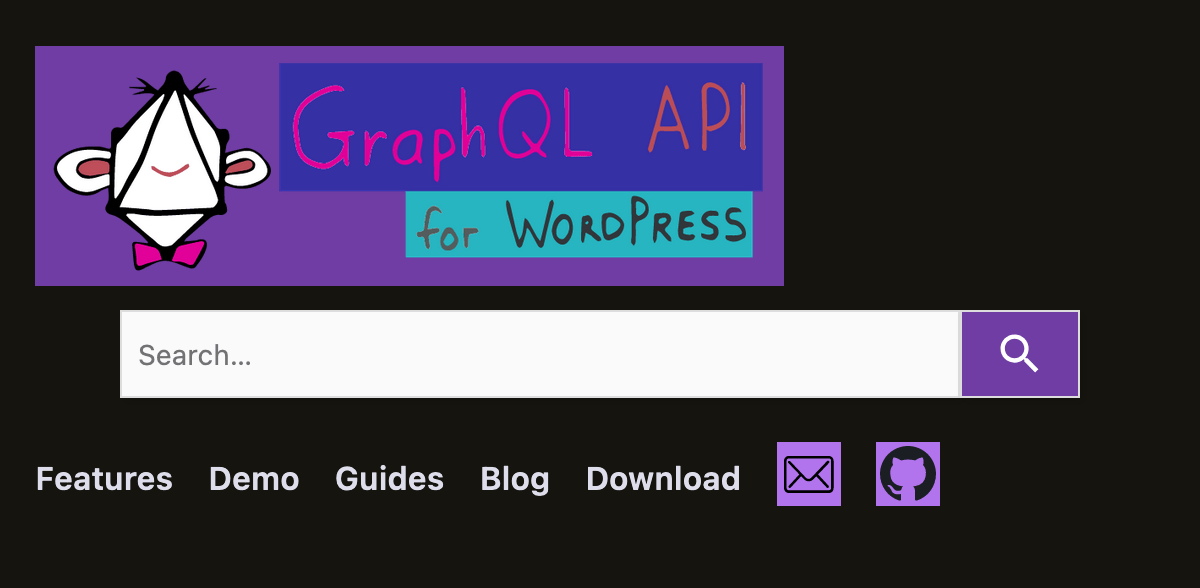
Since your site’s content has been indexed by now, when clicking on “Test now!” the preview of the search UI will already use your site’s actual content. Notice how, even before you start customizing the look and feel, it looks great!

Click on “More results” in the suggestions dropdown to visualize what the search results will look like. (Below, we’ll see how this list, initially displaying the item’s thumbnail, title, URL, and excerpt with the matching term in bold, can be modified.)
Click on the “Search Designer” button to customize the search UI, and replicate the style on your site. This step is not a one-time off: you can come back to it at any moment (even after your custom configuration has been published and search is already installed on your site).

The welcome screen asks how we’d like to start. Since we are new users, we must start from scratch and click on “Start now”.
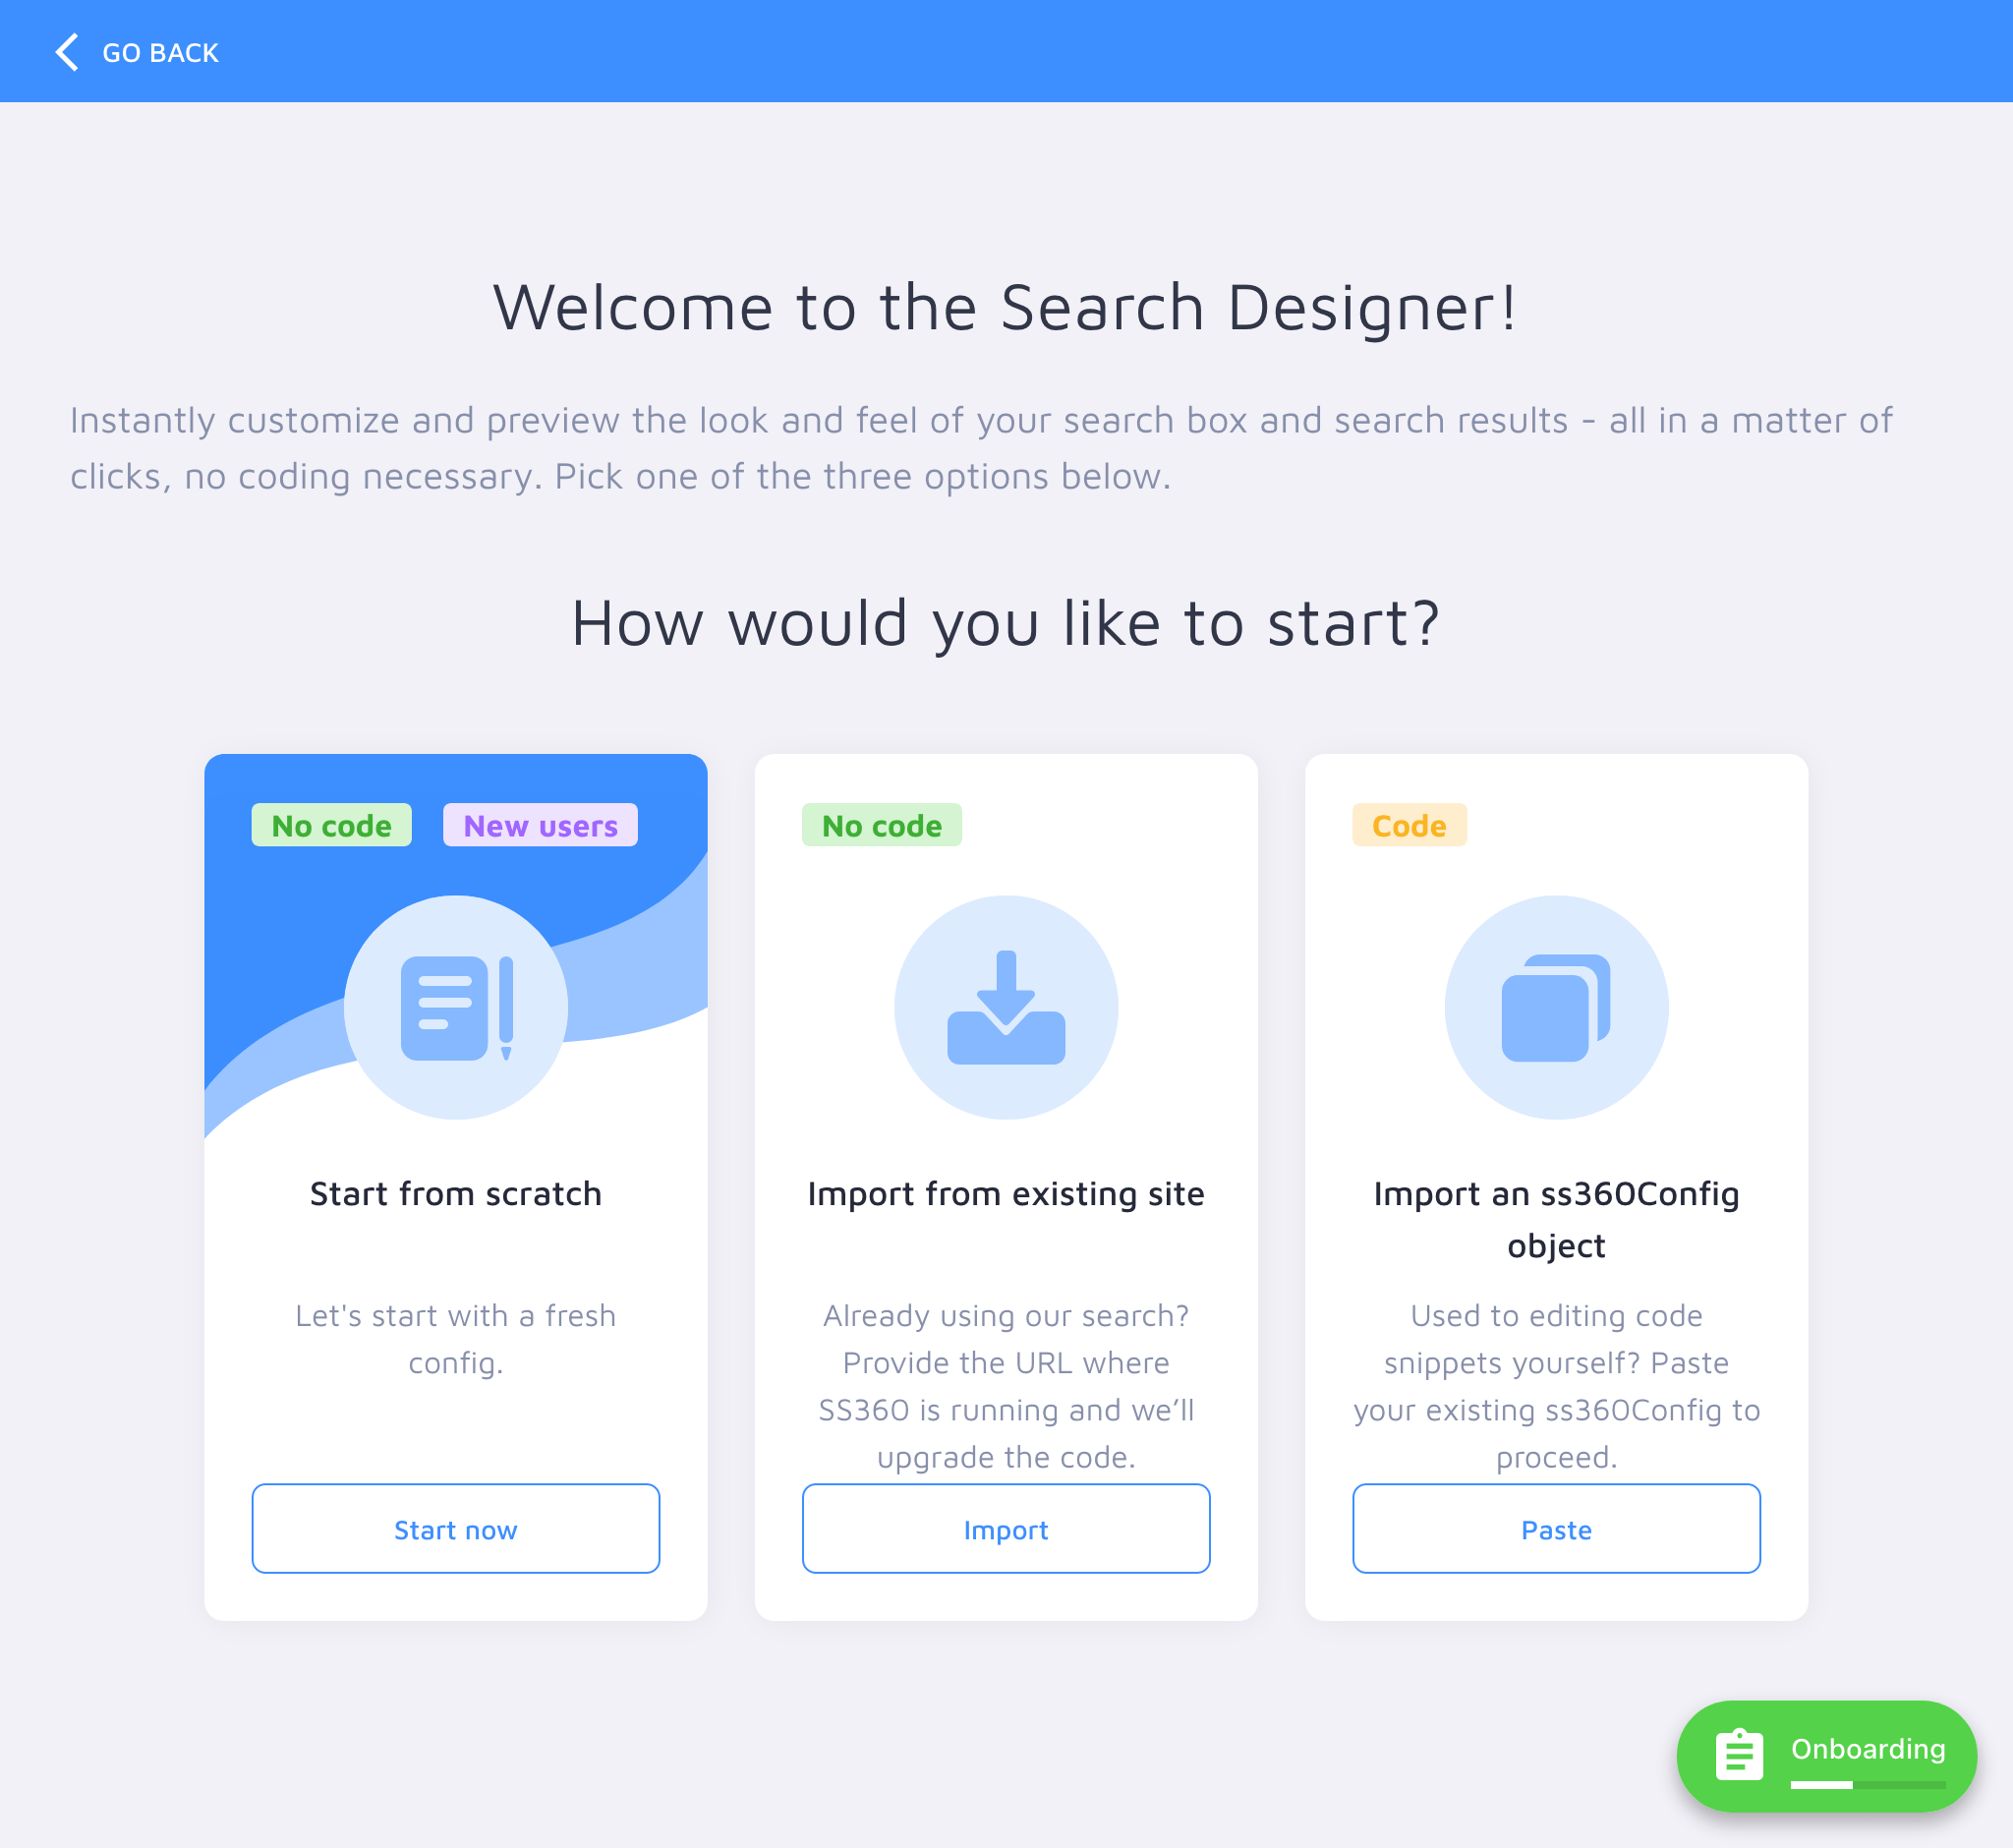
We are now using the Search Designer which will help you edit the visual appearance of the search input, dropdown, and results.
As you edit the styles, these are immediately reflected on the right-side pane.

In the Search Designer, you can configure the following elements (among many more):
- The primary, secondary, background, text, icon and border colors, text size, rounded corners size, and other styles;
- The language (from among 19 supported languages to date);
- Using a search input you already have on your site or the one by Site Search 360;
- Enabling autocomplete suggestions (displayed as the user is typing);
- Connect to Google Analytics and Google Tag Manager;
- Enabling voice search;
- Layouts to display results on desktop and mobile.
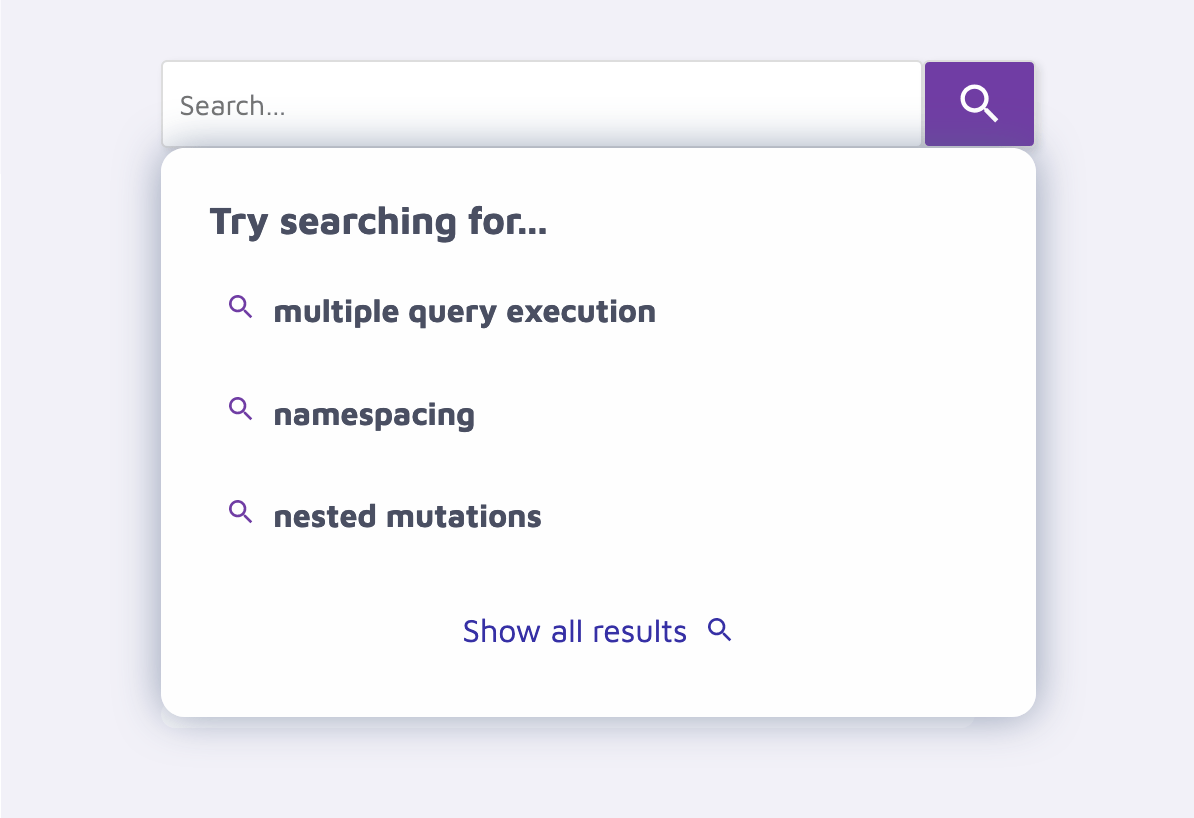
The search dropdown can be further configured, allowing to display the previously-searched queries and also predefined queries. In my case, I’ve decided to already suggest those search queries that make my site rank high on Google.
Once done with the configuration, let’s go back to the onboarding process.
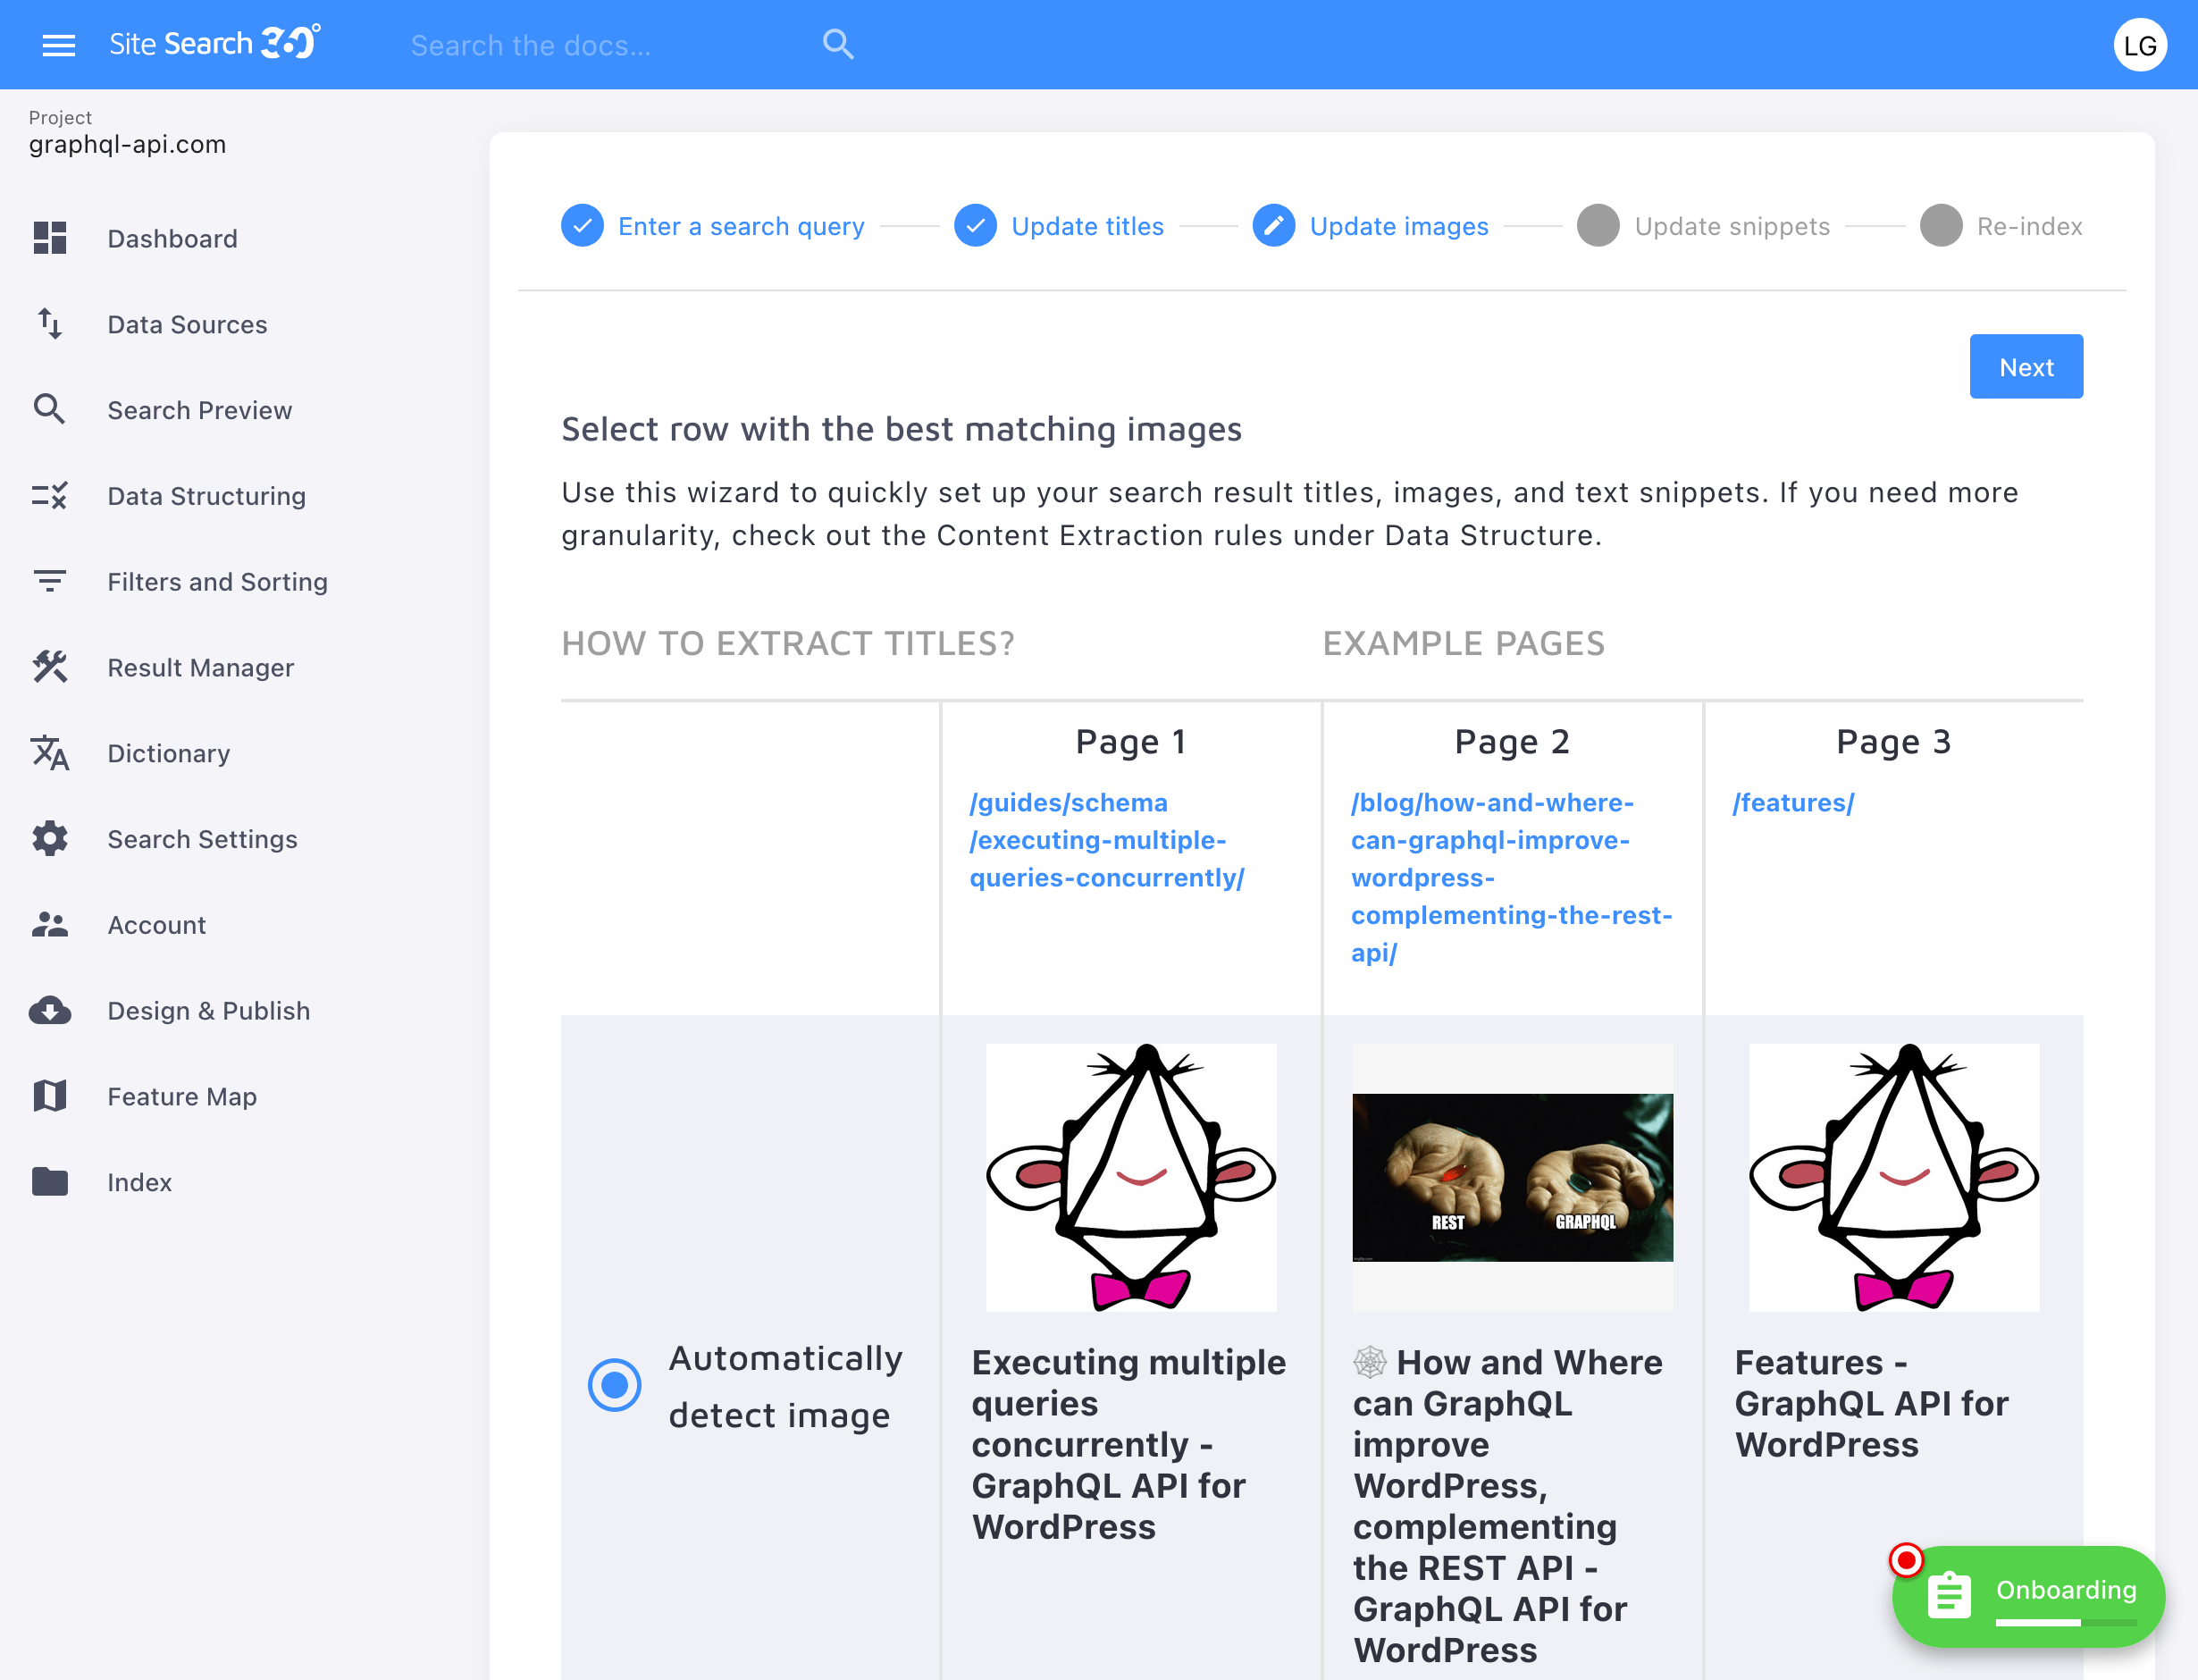
The next step is to tweak the search results, indicating how to extract the data (for the title, images, and excerpt) from the webpage. The default automatic configuration already works very well (extracting the data from the <meta> attributes), so you can quite likely skip this step.
You’re pretty much done by now! All there’s left to do is to publish the configuration.
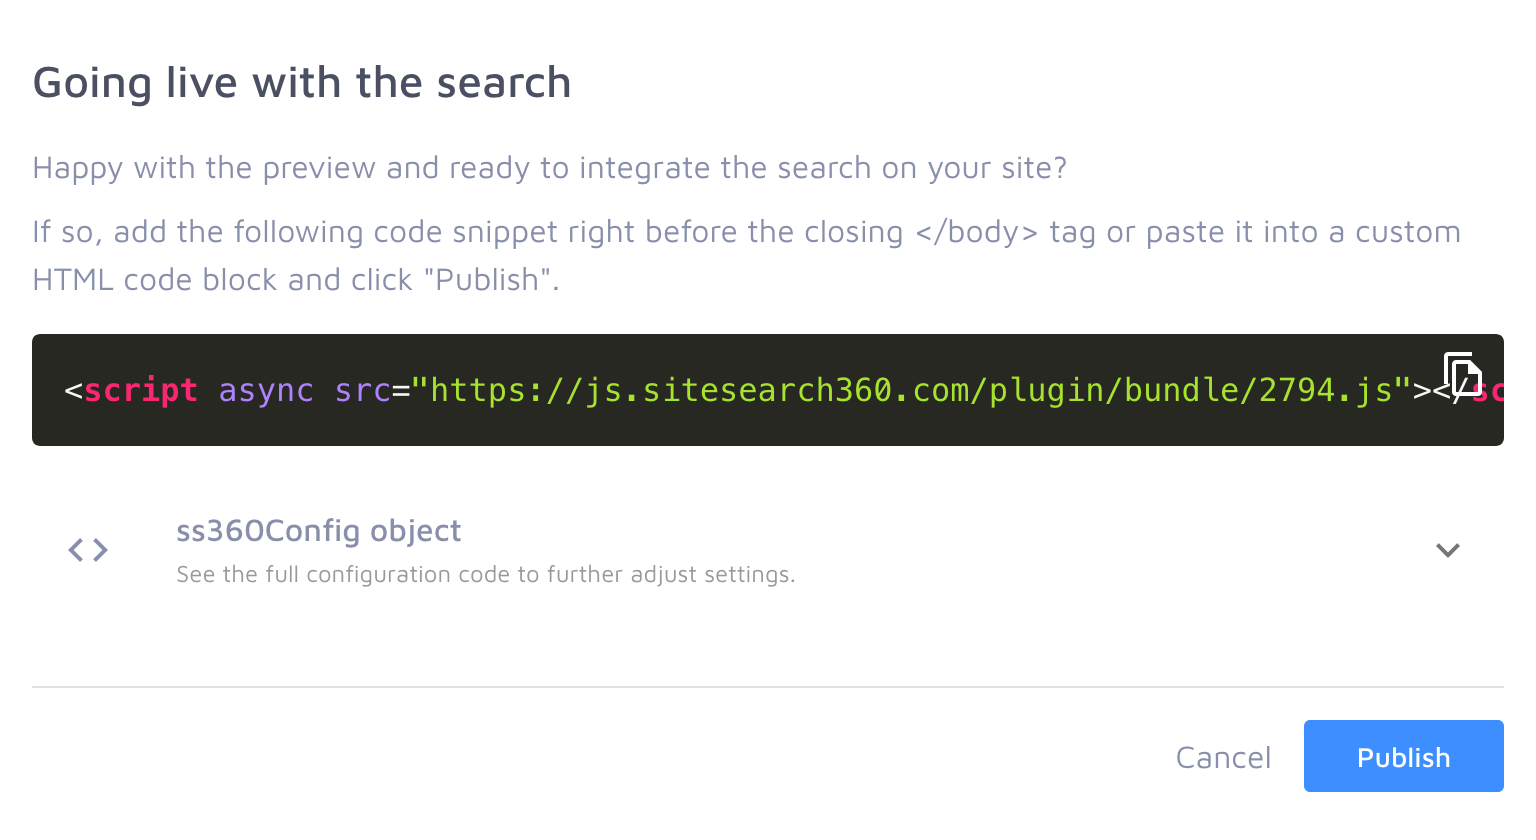
Go back to the onboarding process, and click on “Install now!”. This will open a modal window; copy the HTML code and paste it into your site’s source code (before the closing </body>), and click on “Publish.”
Re-deploy your site, refresh the browser, and what do you have? Your site now has search!

Updating The Visual Appearance
As I mentioned earlier on, you can keep configuring the search UI even after search is live. From now on, you can easily access the Search Designer from the application menu on the left (under the item “Design & Publish”). After doing some modification, clicking on “Publish” will already apply the new style on your site without having to copy/paste any new code or re-deploy the site.
In my case, I tweaked the configuration a bit more. I changed my mind about the position of the search input, preferring to display it on top of the navigation. The solution was to wrap the navigation menu in a new <div id="nav-wrapper"> element and then inject the input “Before” the #nav-wrapper selector.

I also noticed that the layout didn’t look right on mobile because the search input was being aligned to the center, while the logo and navigation menu were aligned to the left.
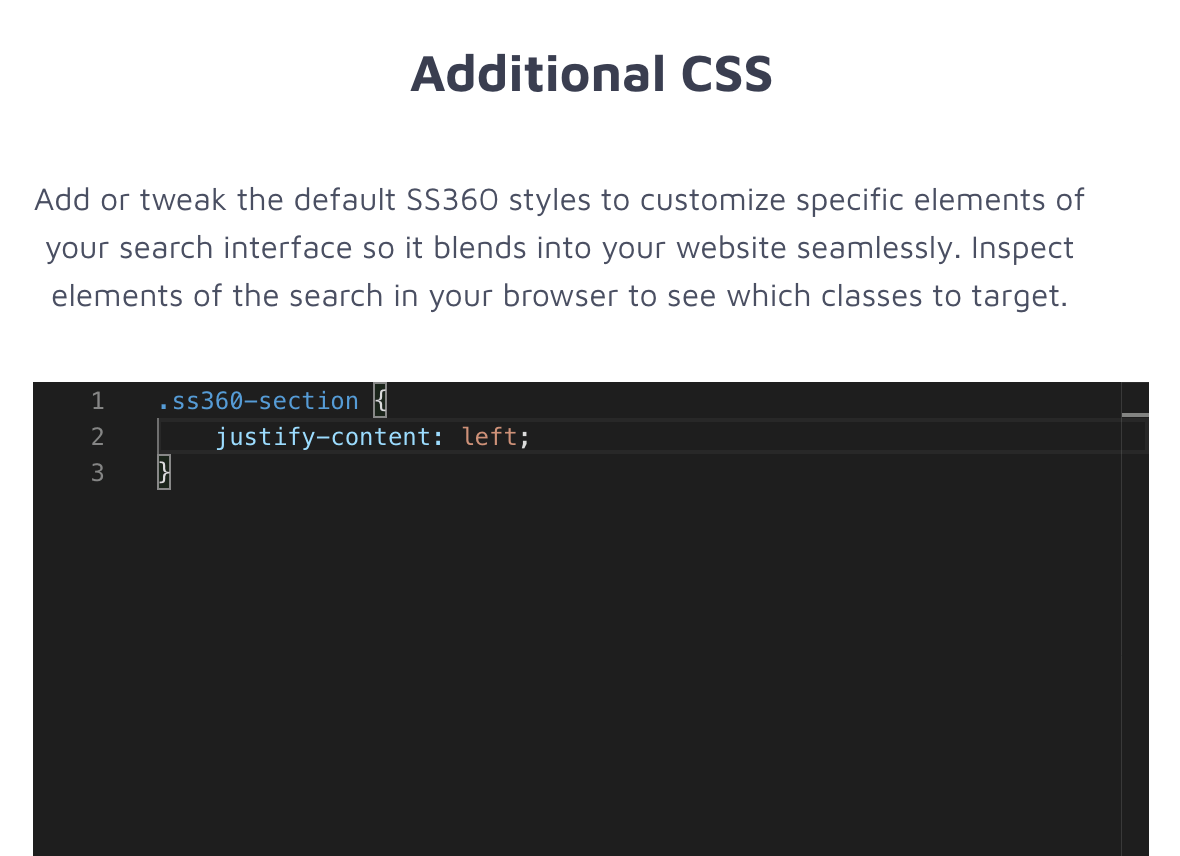
The Search Designer accepts custom CSS, so I could provide a snippet of additional CSS code to override the default style of the search input, aligning it to the left.
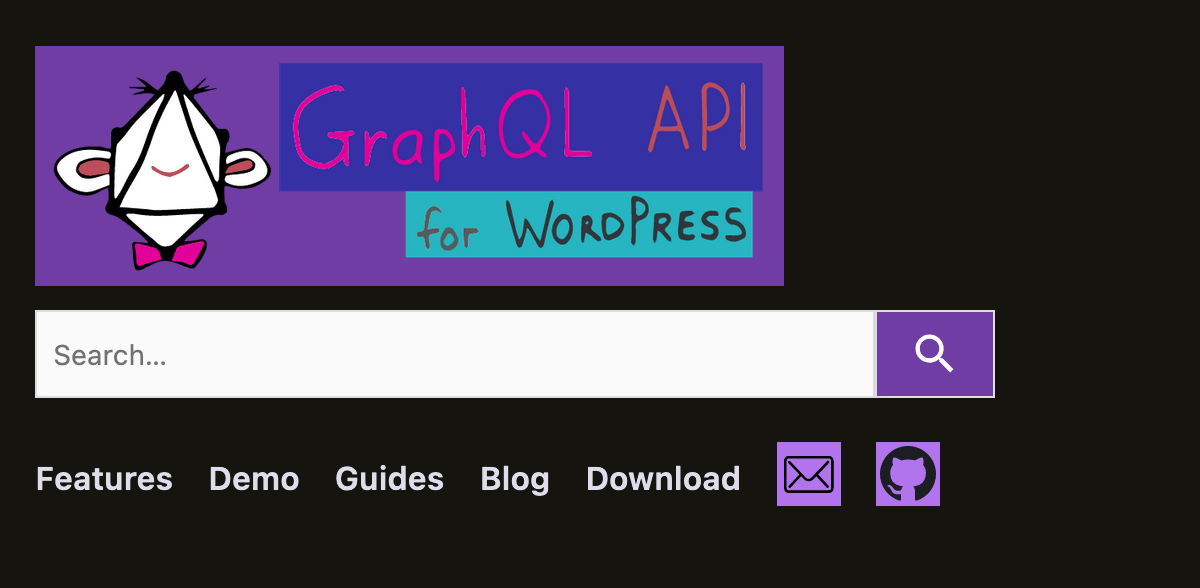
I clicked on “Publish”, refreshed the browser, and now the style in mobile looks right.
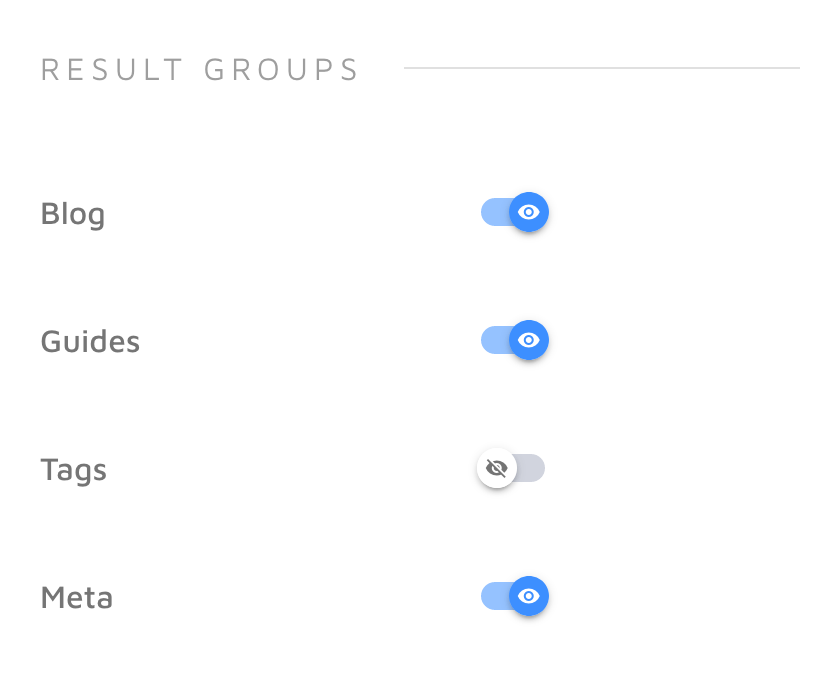
Finally, I also decided to enable the “Result Groups” feature, which splits the results into different categories of our own choosing. (What pages are contained in a group is defined via a URL pattern; for instance, I’ve set group “Blog” to contain URLs of type /blog/....) In my case, I want to display results from groups “Blog,” “Guides,” and “Meta” and hide results from “Tags.”
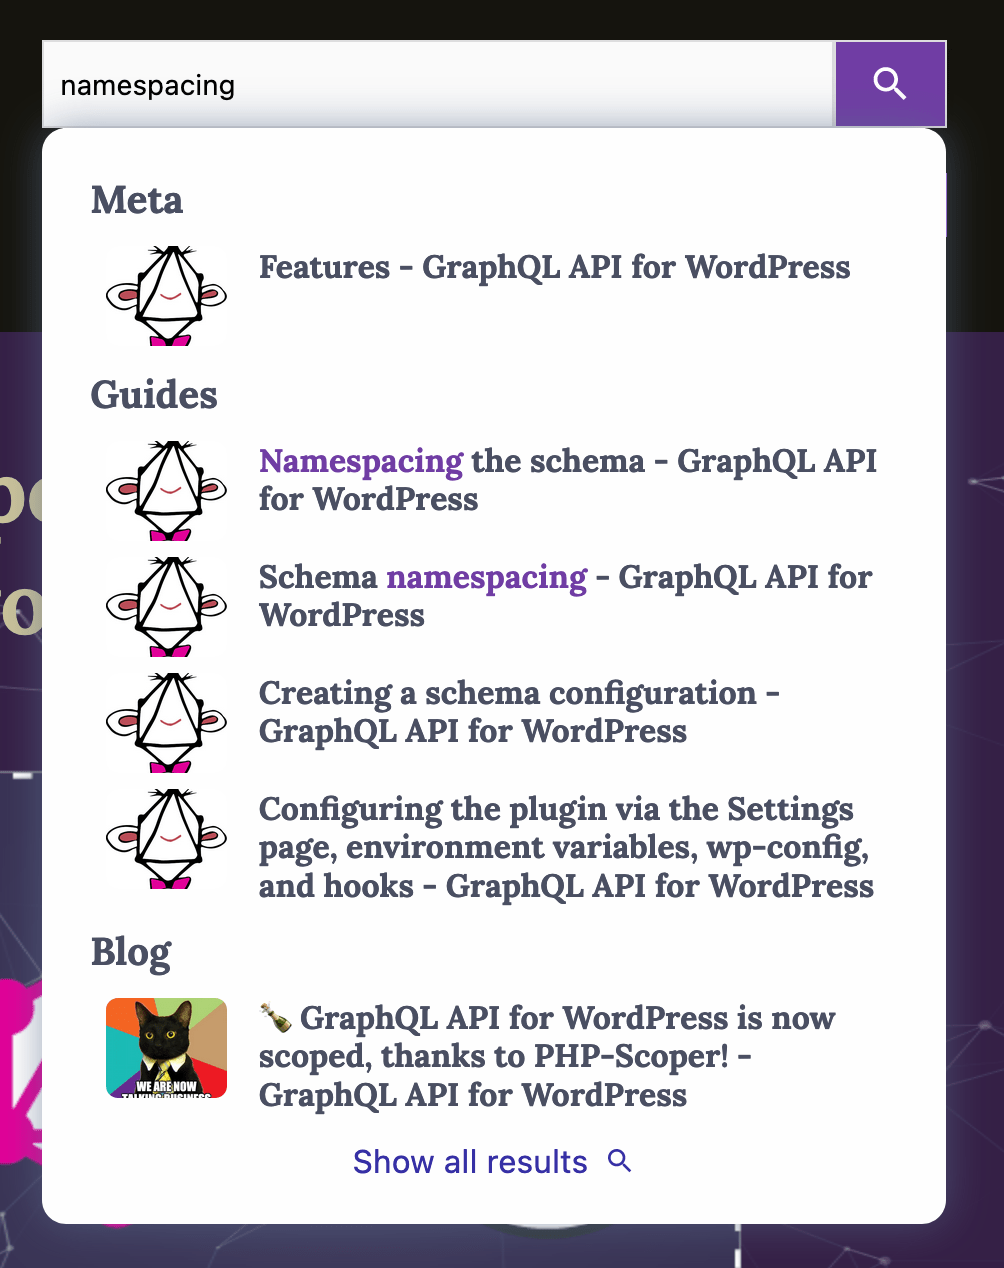
Now, when the visitor inputs a search query, the results in the dropdown are organized by the chosen groups, which makes it much easier to find the desired information. For instance, when searching for “namespacing”, “Meta” will contain a page describing the feature; “Guides” will contain pages explaining how to use and configure this feature; and “Blog” will display those blog posts announcing the feature.
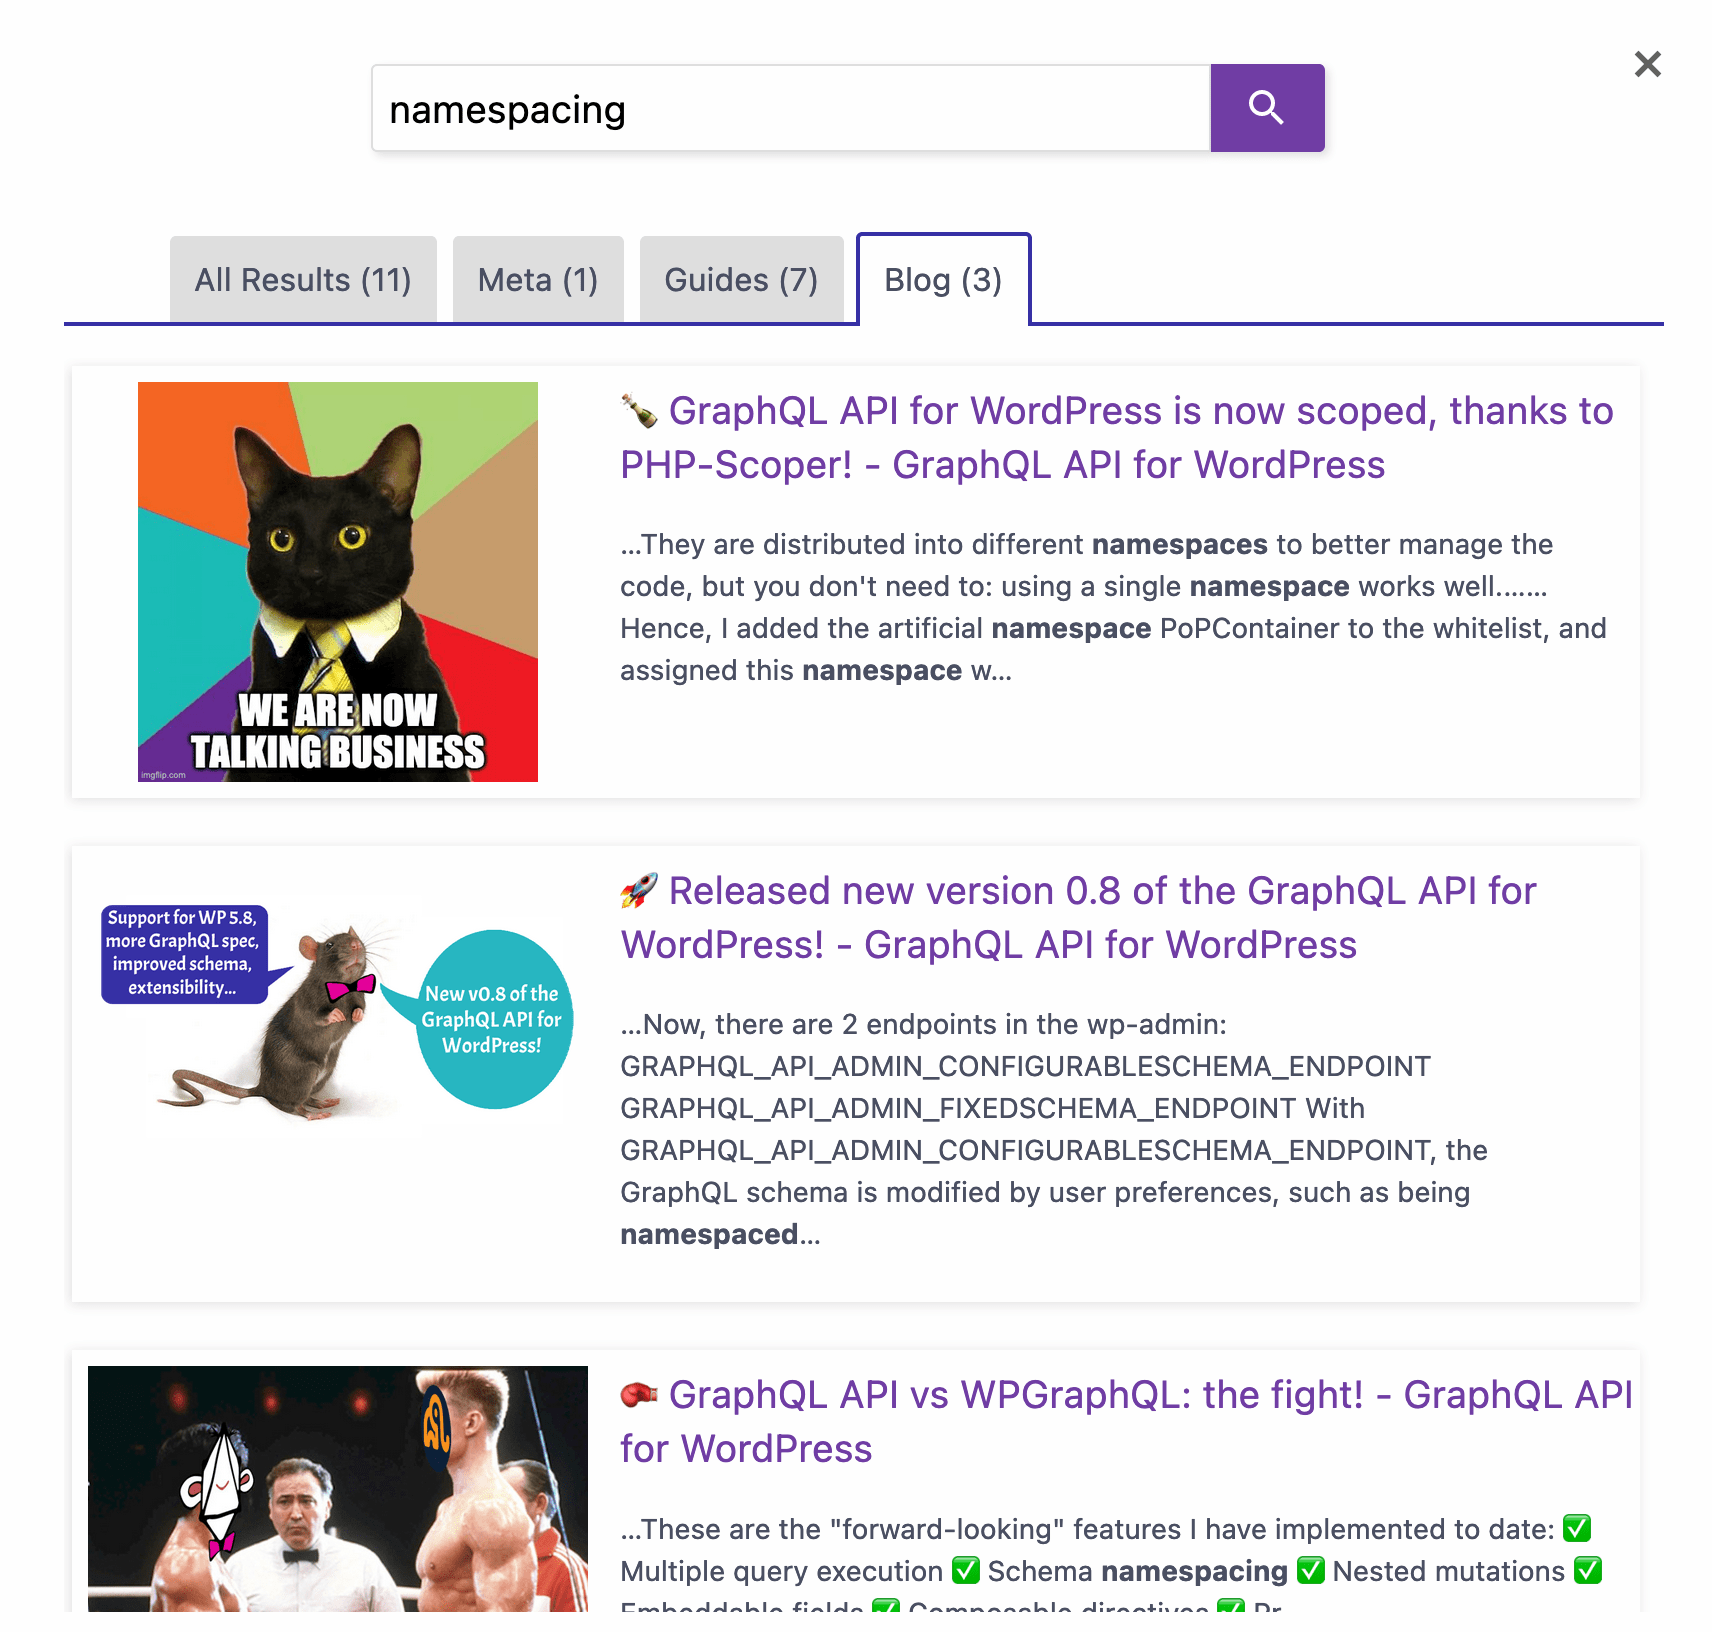
Likewise, when clicking on “Show all results”, the modal window is organized into tabs (at one tab per group), which makes it easy to scroll down and browse the results within each group.
I’m super happy with these results! It took just 15 min to go from 0 to 100, the user interface looks really good, and the search is super fast. Overall, the experience for my visitors is compelling. Head over to my site and play with the search input to understand why I’m so satisfied with it.
Refining Search
What I showed above is barely scratching the surface, as it’s what’s included in the free plan! Check out the pricing page to see all the other features available in the service for each of the different tiers.
For instance, if you have a content-rich site, such as a blog or an online store, and would like to filter your search results (by category, date, price, and so on), you can do so:

And then, Site Search 360 has a superpower that makes it stand out from its competitors: its AI-powered semantic product search engine continuously optimizes search result rankings, promoting the most popular results to the top. If you have eCommerce search enabled, just indicate what’s important for you to sell in your online store, and the engine will automatically re-arrange the results based on multiple ranking factors.
Wrapping Up
I was personally quite impressed by Site Search 360’s powerful search offer. In only 15 minutes, my site had a search functionality which I had been postponing for such a long time. Problem solved!
If you too want to effortlessly add search to your site, then go check it out.