Copy Docs: Make Your Microcopy Full And Consistent, And Maintain It

Email Newsletter
Weekly tips on front-end & UX.
Trusted by 200,000+ folks.


 Flexible CMS. Headless & API 1st
 Register!
Remember all of the times you had to multiply your Figma or Sketch frames just so you can demonstrate single-word changes? Or having to mingle with the .json file in VS code whenever you needed to update that button text? What about irritating typos due to a lack of grammar checking plugins in most of the graphic editors? I’m afraid that calling copy docs (like any other framework) a silver bullet will be too much, but at least this technique can ease these struggles.
Let’s have a closer look.
Some History And Credit
One of the early public mentions of copy docs belongs to Andrea Drugay, a then UX writer at Dropbox. I encountered it during my certification in UX writing at the UX Writing Hub Academy (hi Yuval!) in 2019.
Since then, I’ve been largely using copy docs as a product designer and built on it to modify it to the needs of UX specialists at large, especially in small teams.
What Is A Copy Doc?
It’s a document where you keep and update all your in-product texts, their instances, and describe their behavior.
In this flow, Figma or Sketch is the ultimate source of UI elements while the copy doc is the ultimate source of in-product copy. It makes more sense: you use design tools for designing, and editing tools for working with content (including the handout process). All in all, it brings the work with in-product copy to the next level, both for the design specialist and the whole team.
Reasons To Use Copy Docs
Right now you might feel a bit curious about using this technique but still skeptical. Right you are: there should be a very good reason to make your workflow more compound.
So let me give you some motive.
Copy Docs Can Go With Any Design Tool
It can be used along with any software you like. Figma, Sketch, XD — you name it.
You Can Zero In On Content Solely
On one hand, a UX specialist’s focus is their dearest resource. On the other, the efficiency of the environment they are working in has a great impact on their ability. Copy docs level up both aspects.
Switching environments helps to refresh one’s focus. And working with content in a content-native tool means fewer distractions.
For me, it is one of the most valuable benefits of copy docs. Especially when you are both a designer and a writer in your team.
Additionally, you will be more likely not to miss out on “hidden” states (error or success feedback, etc.) and can use various graphic means for annotations. And it becomes easier to describe complex logic like “If event X happens… then the button copy becomes Y…” — you literally change just the text, without mingling with the graphic.
Here you can object that working with copy outside an interface feels dubious. In reality, in 9 cases out of 10, you can clearly tell what length is reasonable. As for uncertain cases, you can always try a specific line in your interface when you really need it.
Consistency Is Easy
While in IELTS the more synonyms you use the better, it is not the same in the UX field. For example, if you use the “Delete” term across your designs to mean an action of removing an item, but in a particular spot “Erase” for the same action pops in, it may confuse users: they might think that some other action is implied.
In a copy doc, you can quickly highlight all the instances of a word. It becomes handy when you want to check yourself. And if needed — say, you ran usability tests and discovered that in your very context “Erase” will do better, — you can do a bulk rename quickly and hand it out to developers or align your designs. Indeed, it is much better to fix a term in a doc and then just adapt your Figma or Sketch frames than to crawl over there hastily and peck at each element with the fear of skipping one.
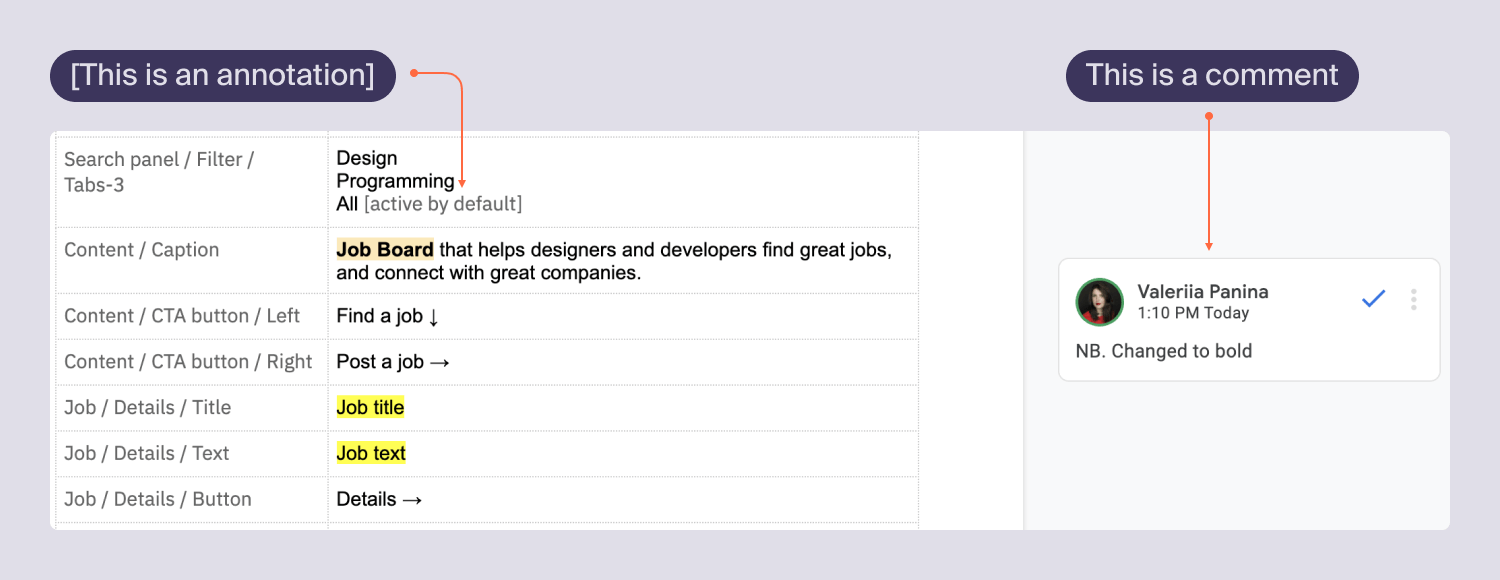
And it works in the opposite direction: sometimes you may want to split a term. For example, first, working with my own copy doc, I used the word “comment” to denote two different ideas: in the first case, I meant the native Google docs commenting tool, and in the second case I referred to my remarks in the body of the copy doc. Essentially they are different: the first one implies a ping-pong discussion with my team while the second one means my only informational notes to the developers on the item behavior. So now I am using “comments” and “annotations” correspondingly.
Proofreaders Are Happy
The majority of language specialists usually work in Word-like formats. And here they can do an estimation based on word-count.
Collaboration Is Nice And Deep
Since an editing soft provides a wonderful toolset catered for content-specific cooperation, now your team is taken to the next level of collaboration.
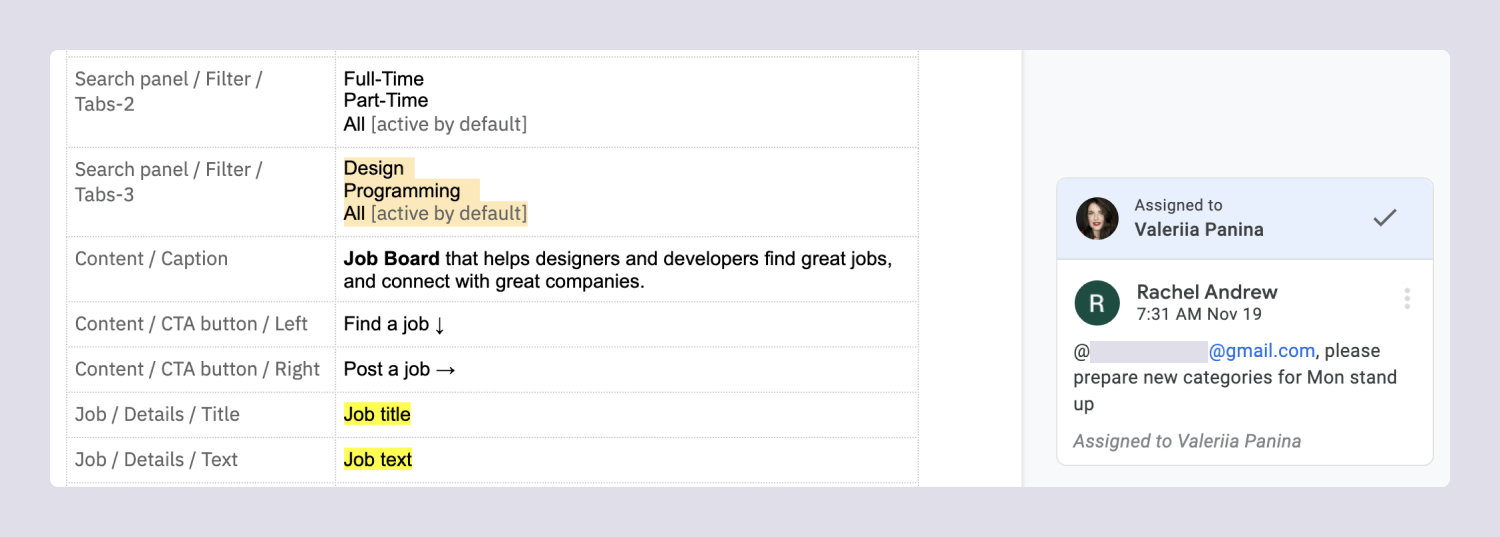
And I already mentioned the benefits of the handout process. Now, in order to update the microcopy in live components, you actually hand out just the copy, organized and annotated.
Files Are Light
With copy docs you avoid redundancy when you copy-paste frames with only textual changes — now you keep it in a separate dedicated document. Needless to say that it boosts performance.
It means a “built-in” Grammarly for your designs
Haven’t you been dreaming of it every time you type a string of text in your Figma, Sketch, or XD mockups?
How To Create A Copy Doc
These are the steps I follow when creating my copy docs.
1. Draft Your Interface
To start with copy docs, you need the skeleton of your interface. I prefer creating copy docs at the stage of mockups but you can start at the prototyping stage. However, if you follow a content-first approach, it is even possible to prototype with copy docs and then use them as a list of necessary elements while designing the UI.
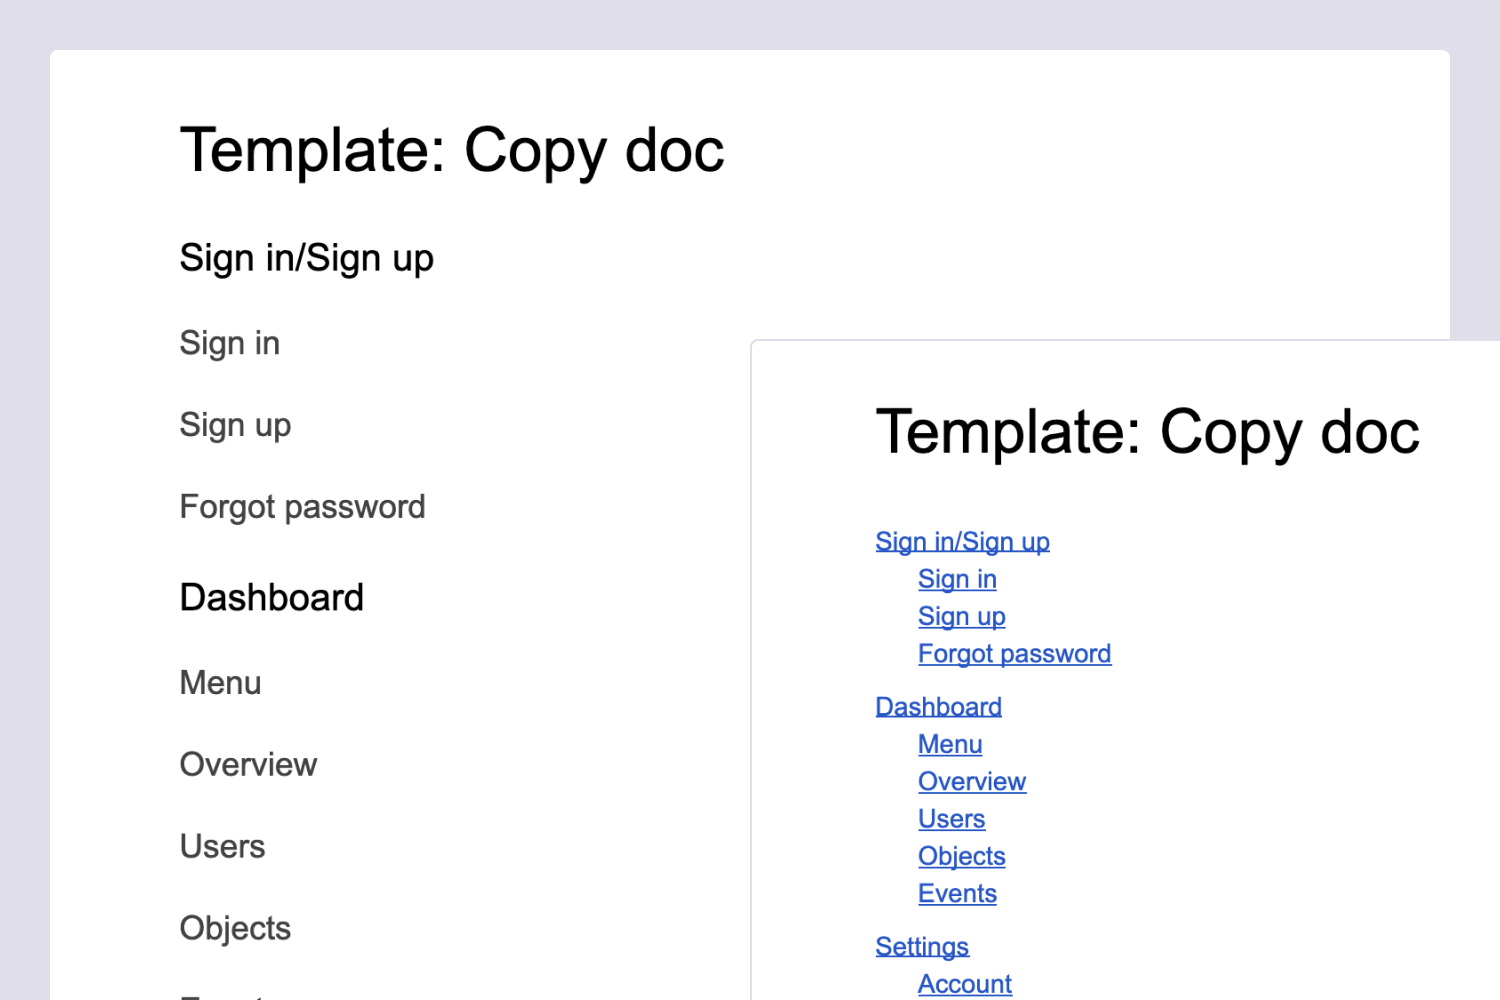
2. Create An Outline Of The Copy Doc
Create sections matching the names of your screens.
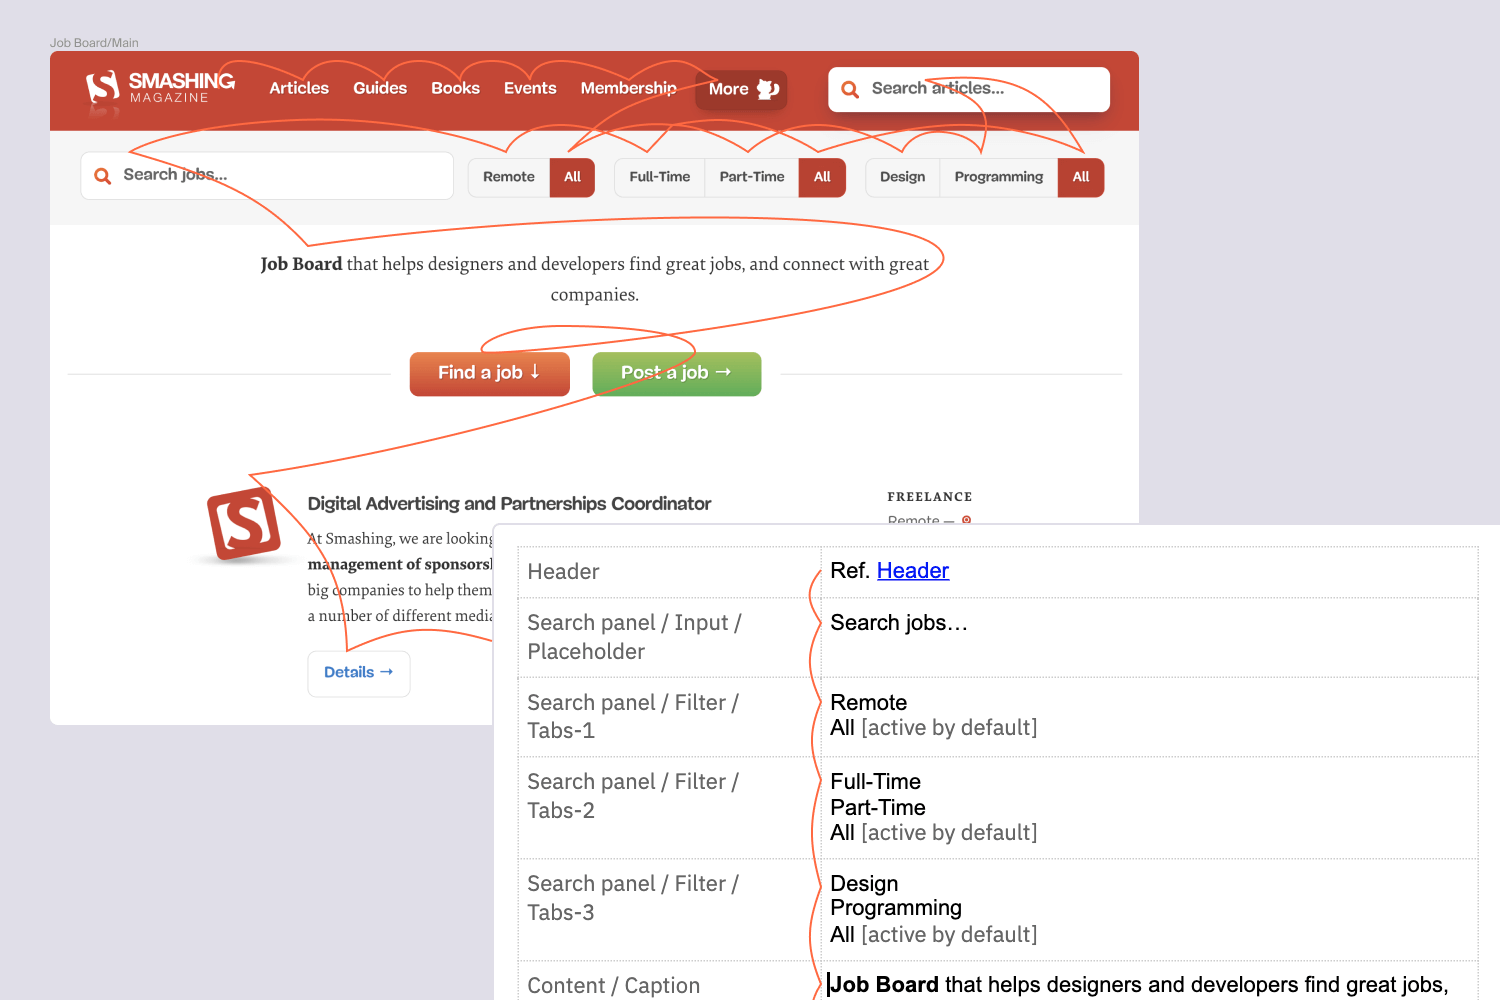
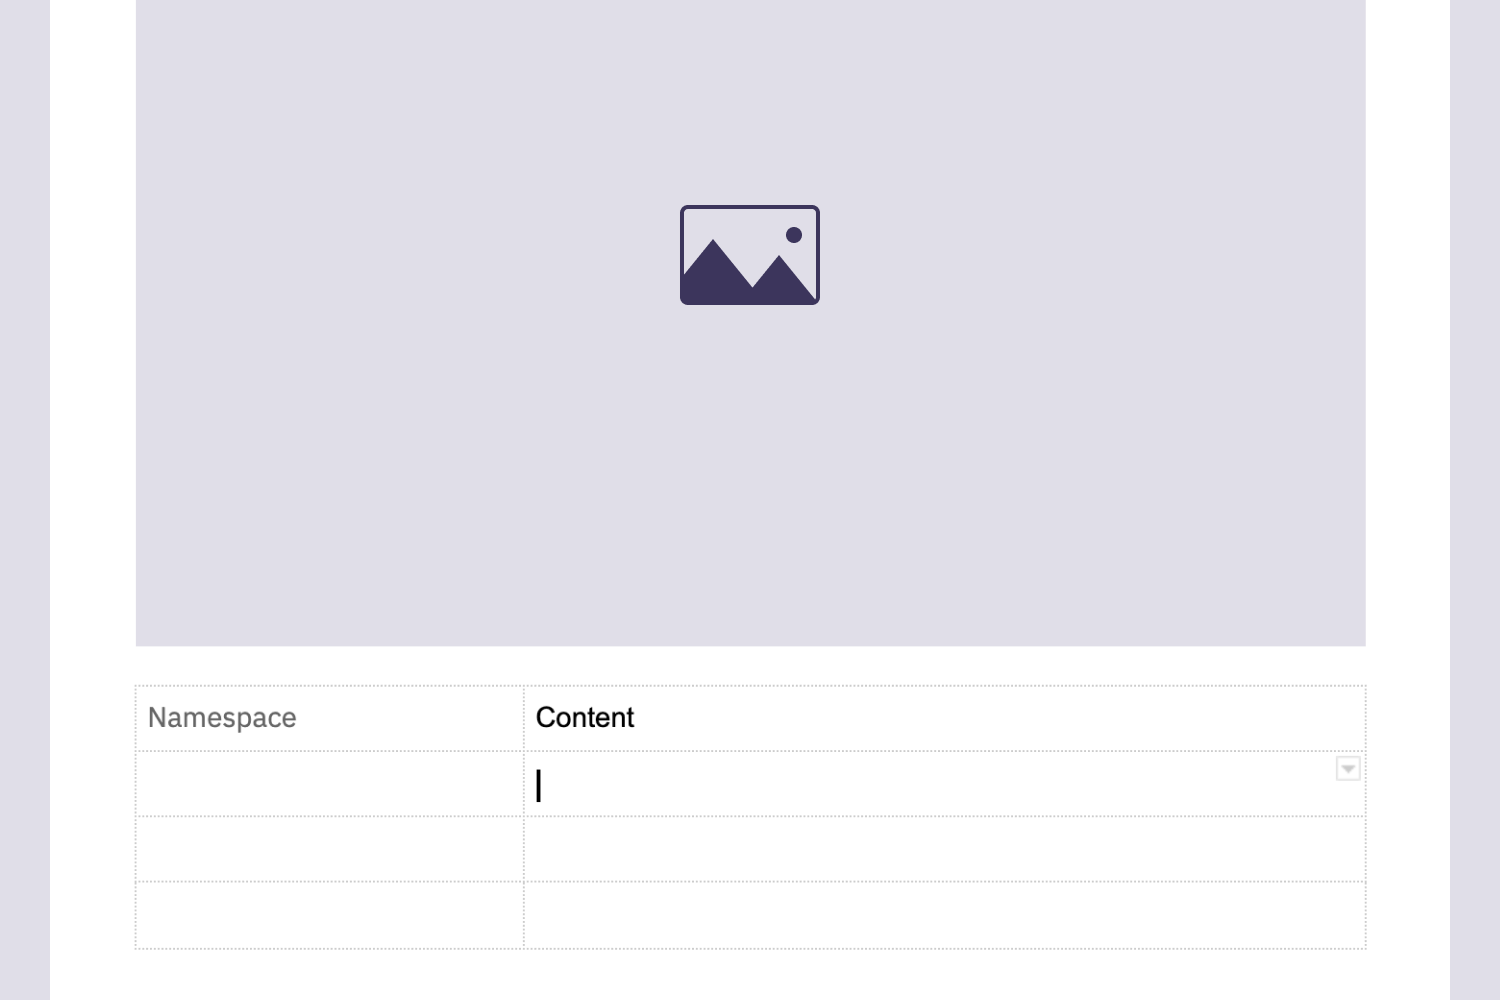
3. Paste Screenshots
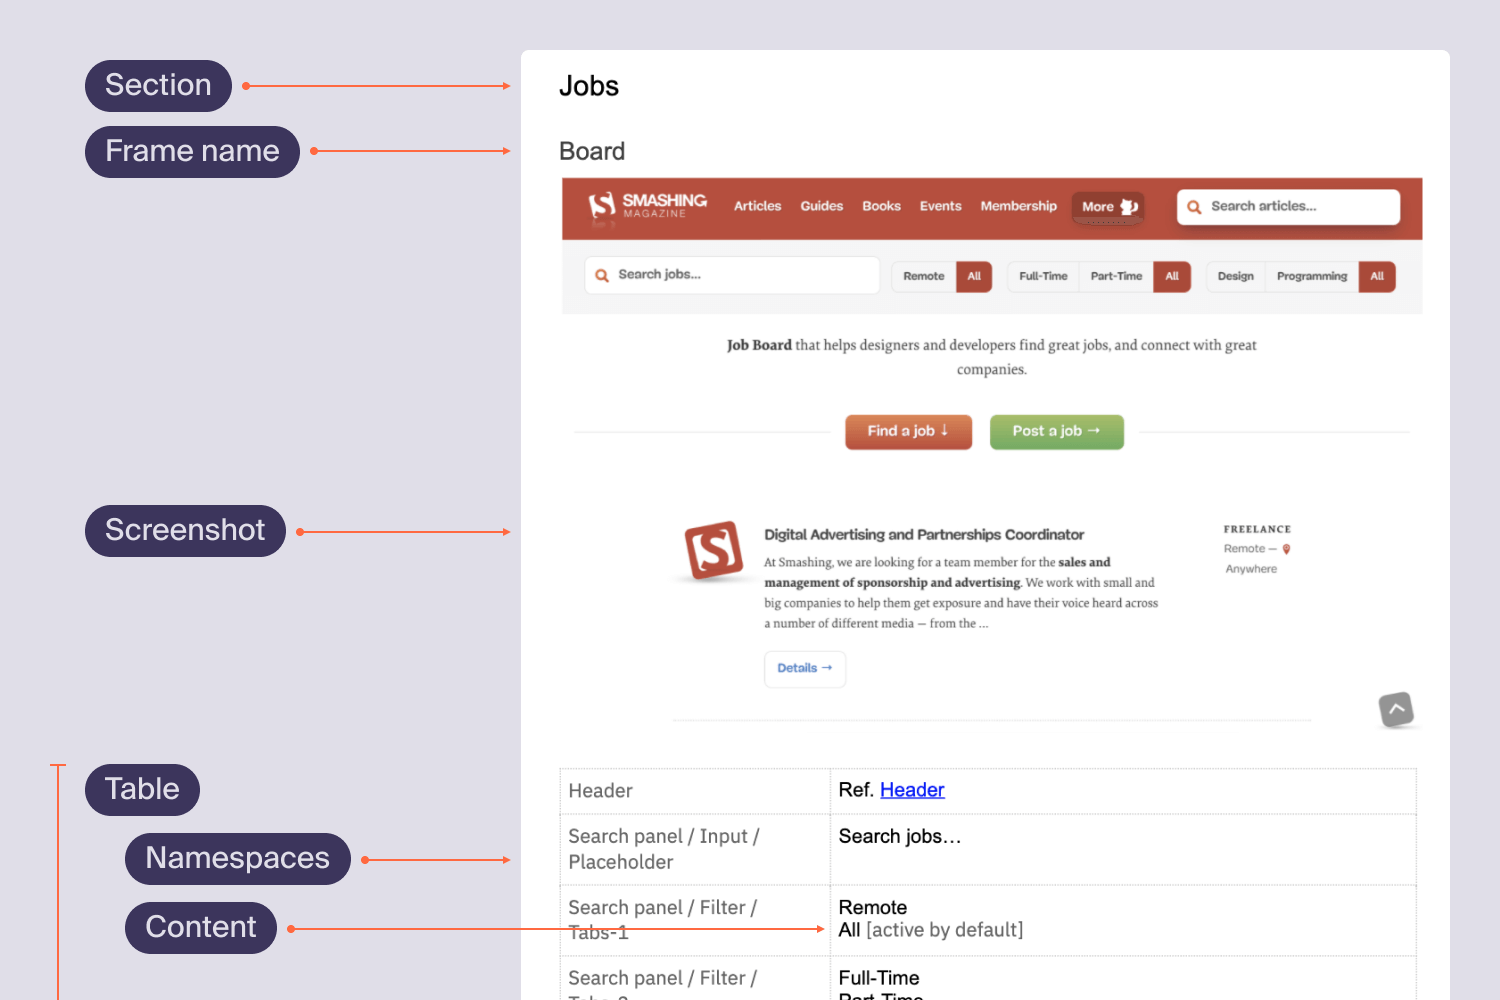
You should follow a “Heading + Screenshot + Table” pattern for every unit.

4. Paste Tables
Ideally, you want to create an empty table with pre-set styles under each screenshot. For this, create a table for your first screen and fill it in. Then copy-paste the filled table under the second screenshot, clear, copy it again, and paste under the remaining screenshots multiple times.
5. Fill It In
All set for your copy work.
Work screen by screen. Start with namespaces. Then, fill in the very microcopy, avoiding common pitfalls that I share below.
6. Keep Your Copy Doc Up-to-Date
So, your copy doc is all set. Now you should pick up a habit of reflecting all the copy updates immediately. Anytime your copy doc is opened, it should show the most actual in-product copy.
It may require some work but the good news is that you need not update the screenshots unless they undergo dramatic changes.
As for your Figma, Sketch, or XD files, it is strongly advised that you reflect changes in copy as well, but now it is your second priority — you work with the copy in a copy doc and then just align your design files later.
Tips And Pitfalls
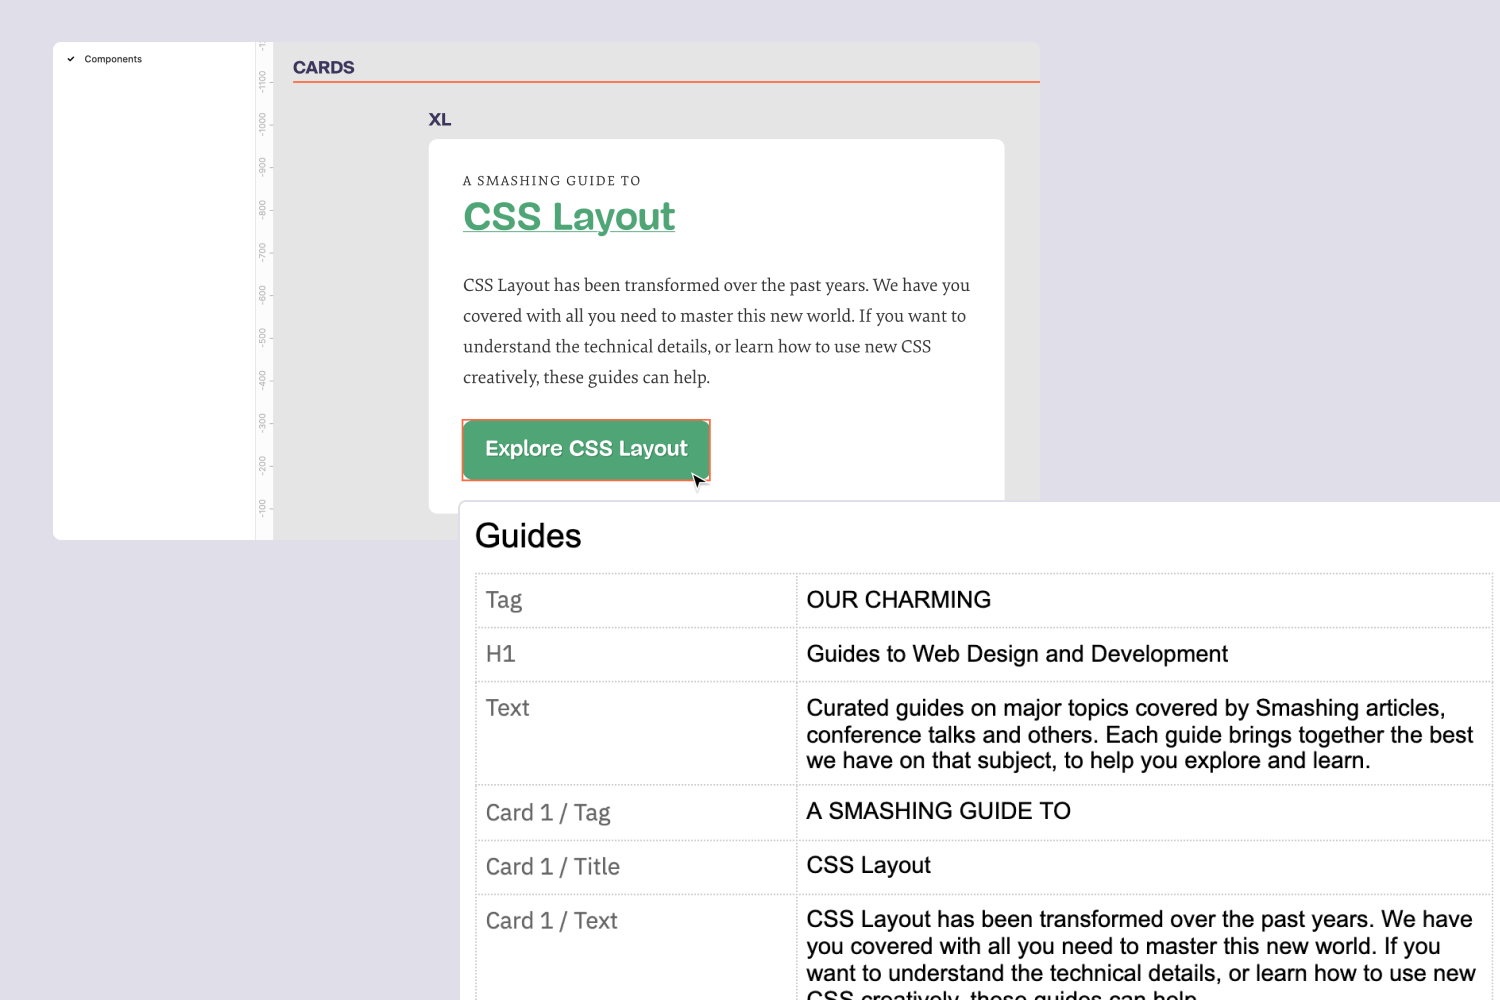
Pay Attention to Taxonomy
The common namespace for a content item will look like:
Section / Subsection / Group / … / Item
Table / Head / 1st column
Make sure you match names with your UI components’ names.
And, in their turn, the components should match the development framework. If you are not sure what name to pick up, consult with your developers.
Create The Legend
Being outside the design tool, you can use a variety of graphics to communicate ideas, not esthetics.
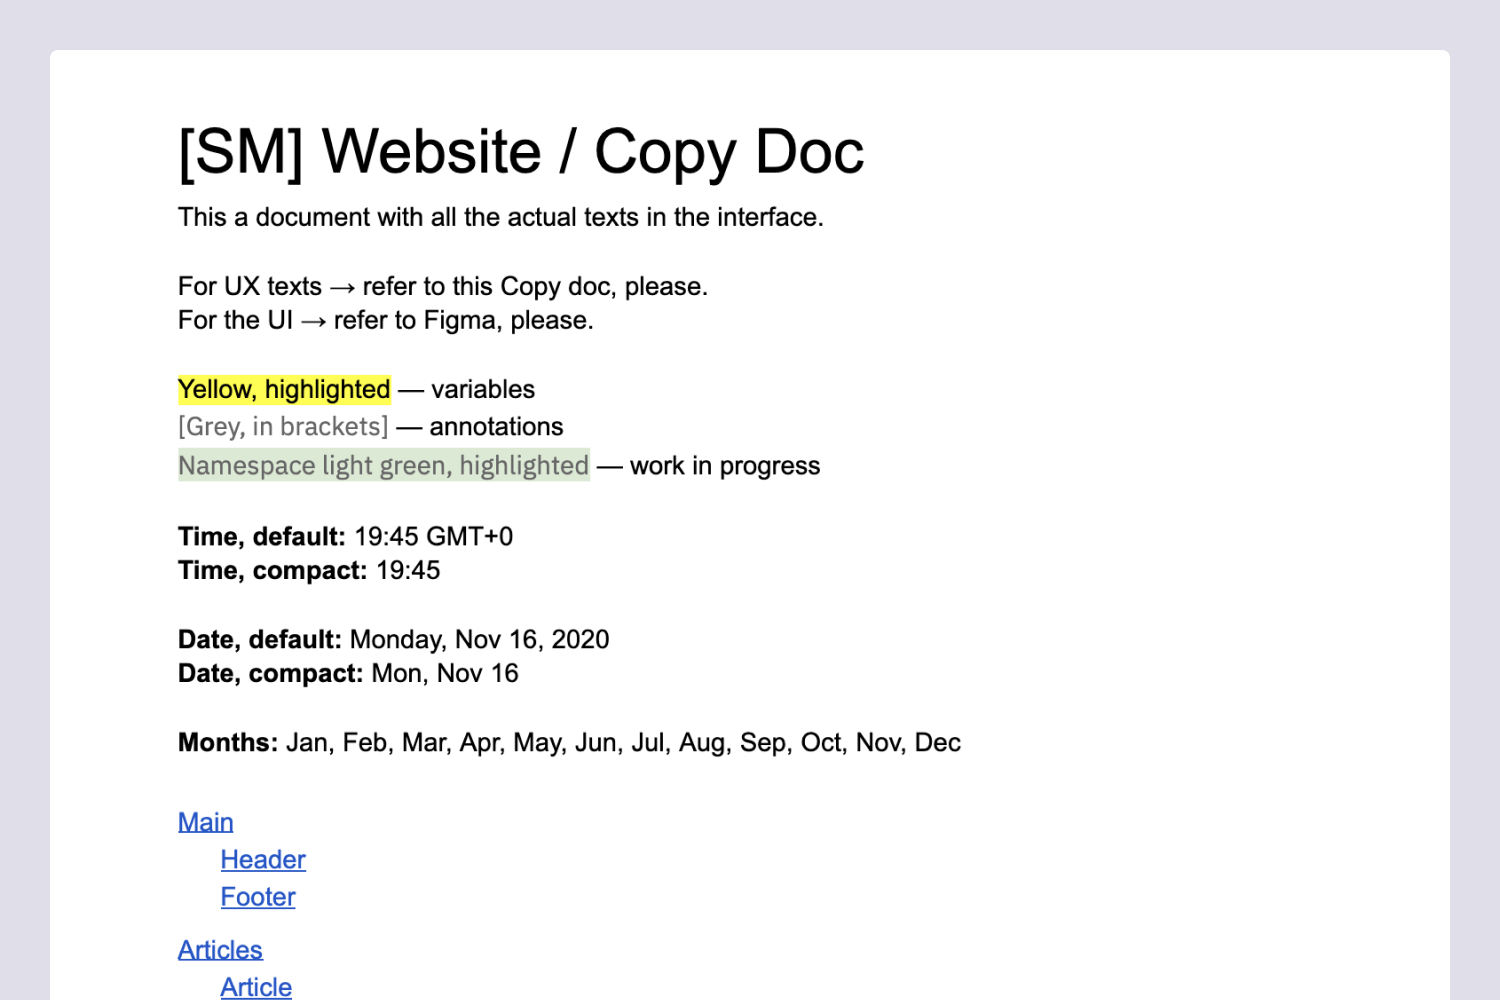
For example, use:
- Highlights for variables
- Brackets for annotations
- Emoji or Unicode symbols for states
And be consistent — use the same highlighting method for every corresponding event. Remember about synonyms?
Also, remember about accessibility: it’s a good idea when different items differ with several parameters.
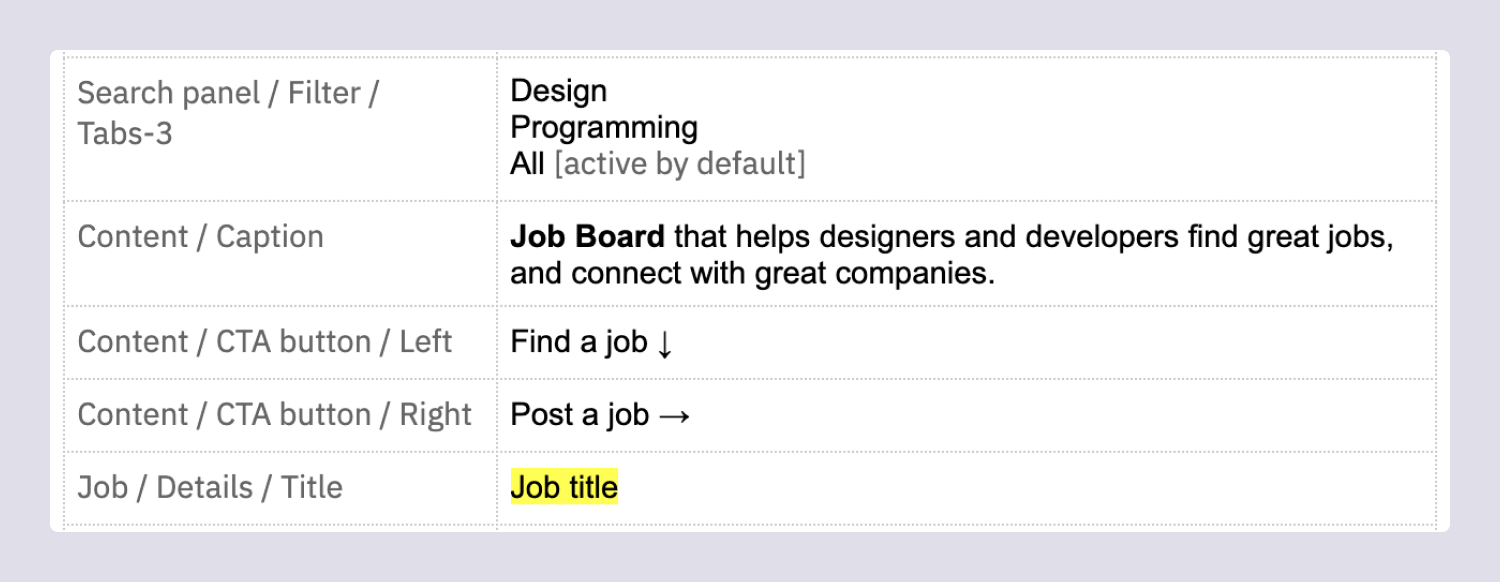
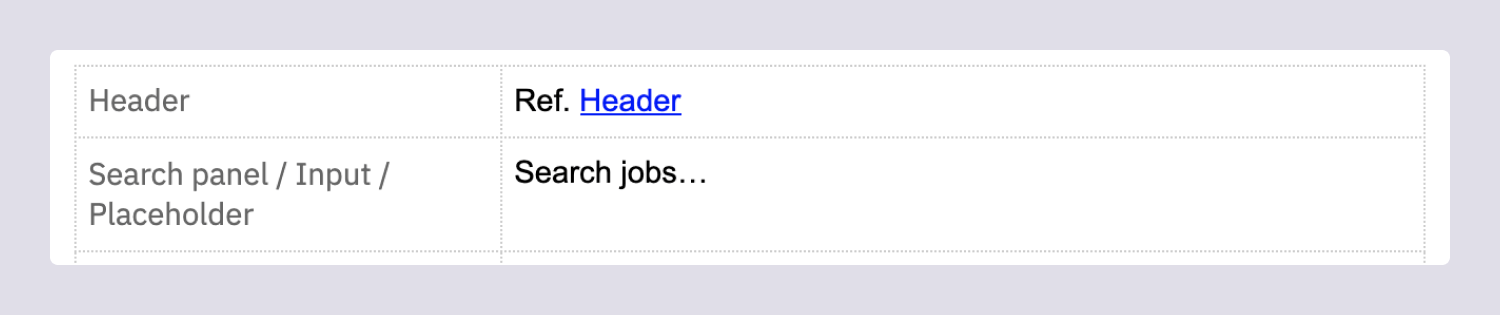
Avoid Redundancy And Conflicting Strings
Don’t reuse identical items.
For example, if you have a page with a common title and tabs, mention the title in the first unit, and later in other units don’t mention them again but reflect only changes on those pages.
Think Of States
Surely, the instances of your elements can vary, but below are the most common ones you need to think of.
Feedback: messages, alerts, notifications, etc.
- Info
- Success
- Warning
- Error
Inputs and the like:
- Placeholder
- Typing
- Filled
- Null
- Various errors
You get the idea.
Literally use them as a checklist to provide exhaustive content for every change of your elements’ state.
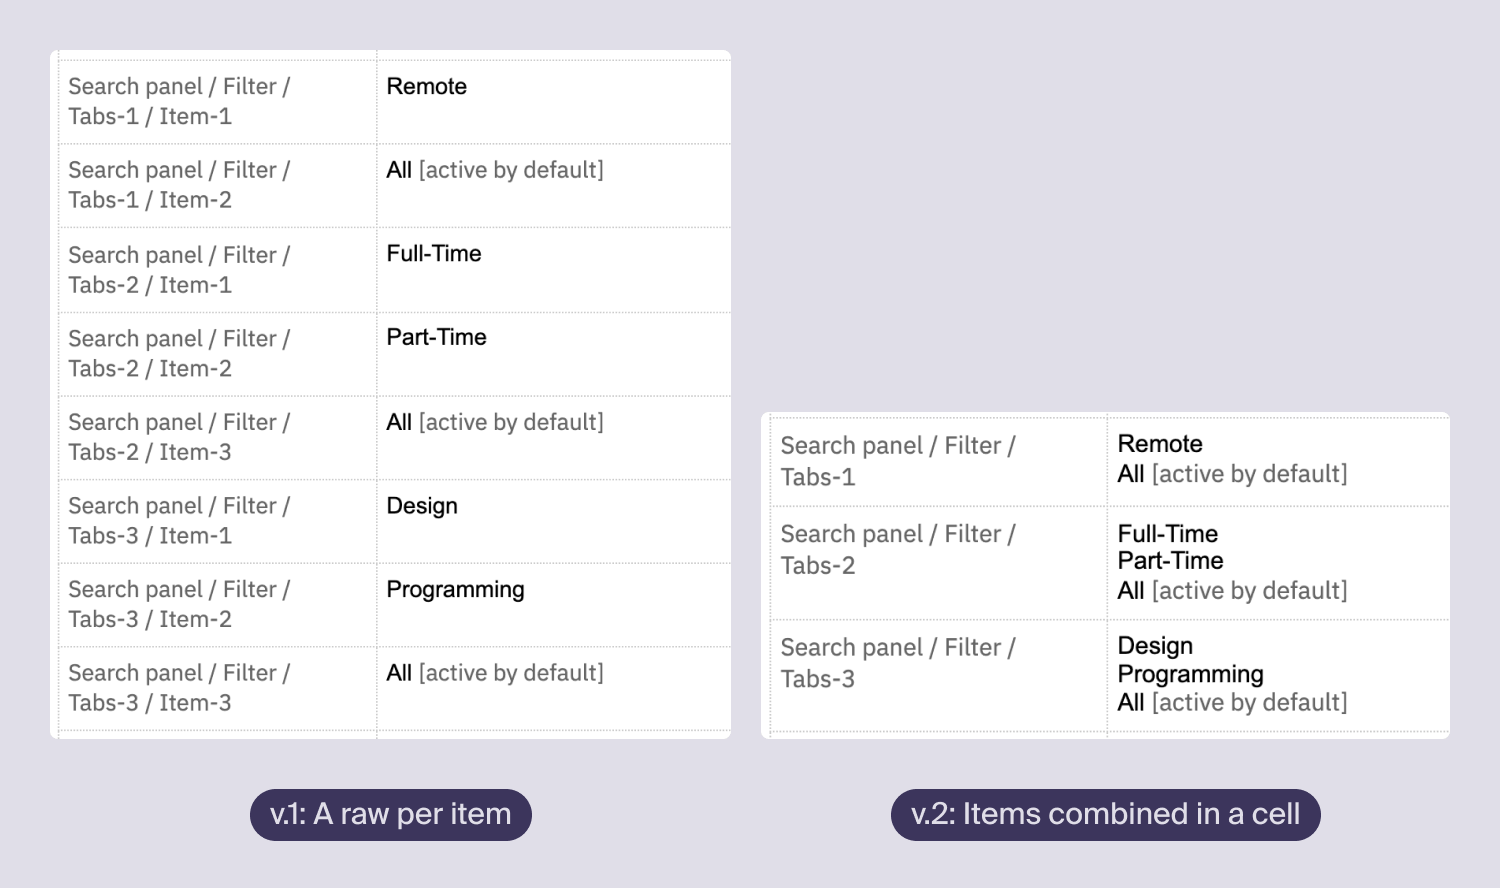
As for their appearance, you can either create a separate row for each instance or group them in one cell, annotated.
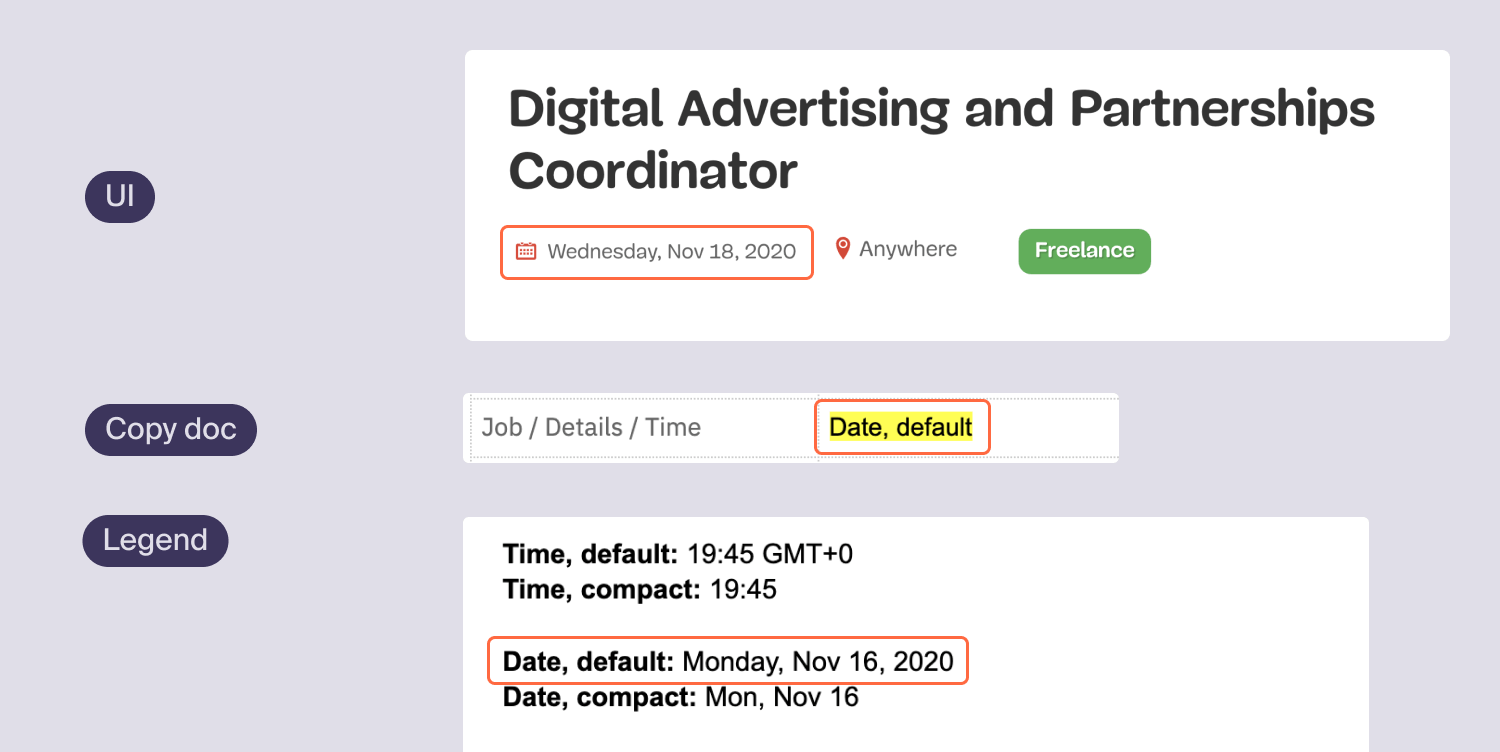
Think Of Variables
Variables are those parts of copy that change with the context. Usually, it is date and time, users’ names, numbers, etc.
Probably, you already considered them at the stage of Information architecture or, partially, in Editorial policy. And now a copy doc is just the place to reflect what data is constant, and what data changes depending on the context, and how.
Highlight variables and choose their form. Follow the same counter-redundancy rule: state the variable’s form once, preferably at the beginning, and then refer to it across your doc.
Do not forget to think of the minimum and maximum value of every variable — if you spot that it affects the UI in some way, you can leave a corresponding annotation.
Afterword (And A Bonus)
This is pretty much it. The copy docs technique was a game changer for my workflow and I’d be happy if it boosts yours, too!
And please, let me know how you use it or, maybe, cater this framework to your needs. Screenshots, description of your experience, audio or video messages — anything will be great! I mean it.
And I prepared a template for you. So, copy your [Template] Copy doc — and stay safe!


