Building An E-Commerce Site With October CMS And Shopaholic

Email Newsletter
Weekly tips on front-end & UX.
Trusted by 200,000+ folks.
This article has been kindly supported by our dear friends at October CMS, a free open-source, self-hosted CMS platform based on the Laravel PHP Framework. Thank you!
October CMS is flourishing: With over 9000 stars in its GitHub repo, 2000 forks and 300 contributors, it is becoming a major force in the CMS space. It won the popular vote as the Best Flat-File CMS from 2018, new plugins are published on its marketplace almost daily (covering most of the developer needs), and its network of partners is expanding worldwide. Let's see what it is all about.
Built in PHP and powered by Laravel (one of the most powerful and developer-friendly PHP frameworks), October CMS is a free open-source Content Management System (CMS). It benefits from Laravel's clean code and sound architecture to provide a great developer experience, over which it adds simple and flexible CMS functionality to provide a great user experience. This combination makes it possible to launch new projects in a matter of minutes, without having to build the project from scratch. Due to all these features, October can minimize the costs of developing and maintaining websites, making it particularly valuable to businesses and digital agencies.
Yet, in spite of its power, October CMS is very easy to use. Since its inception, October has strived to be “as simple as possible, but not simpler”. For this reason, it is based on one of the simplest stacks for the web: PHP to render HTML, plus CSS and JS assets. In the words of its creators, October's mission is to prove that “web development is not rocket science”.
In this article, we will do a tour around October CMS: We will first see how to install it, then check some of its coding and usability features in a bit more detail, and finally get our hands dirty implementing an e-commerce website through one of its most popular plugins, Shopaholic.
Recommended YouTube Channel
Are you looking to learn more about e-commerce development? You can do so with the help of live streams that explain the main aspects of the development process based on the Shopaholic platform for October CMS. Watch →
Installing October CMS
Since October CMS runs on PHP, it requires to have a web server running on the computer (if we don't have one yet, MAMP can provide one for free, allowing to choose between Apache and Nginx, and it works for both Windows and macOS) and a MySQL server to store the database (which can also be provided by MAMP).
The installation through October's wizard doesn't take more than a few minutes: We create a new MySQL database, download and unpack the installer files to our target directory for the website (which must be granted writing permission, and which must be set as document root in the web server for the chosen domain, such as localhost), and then invoke the script file from the web browser. From that moment on the wizard takes over, guiding us through the installation process. The wizard will:
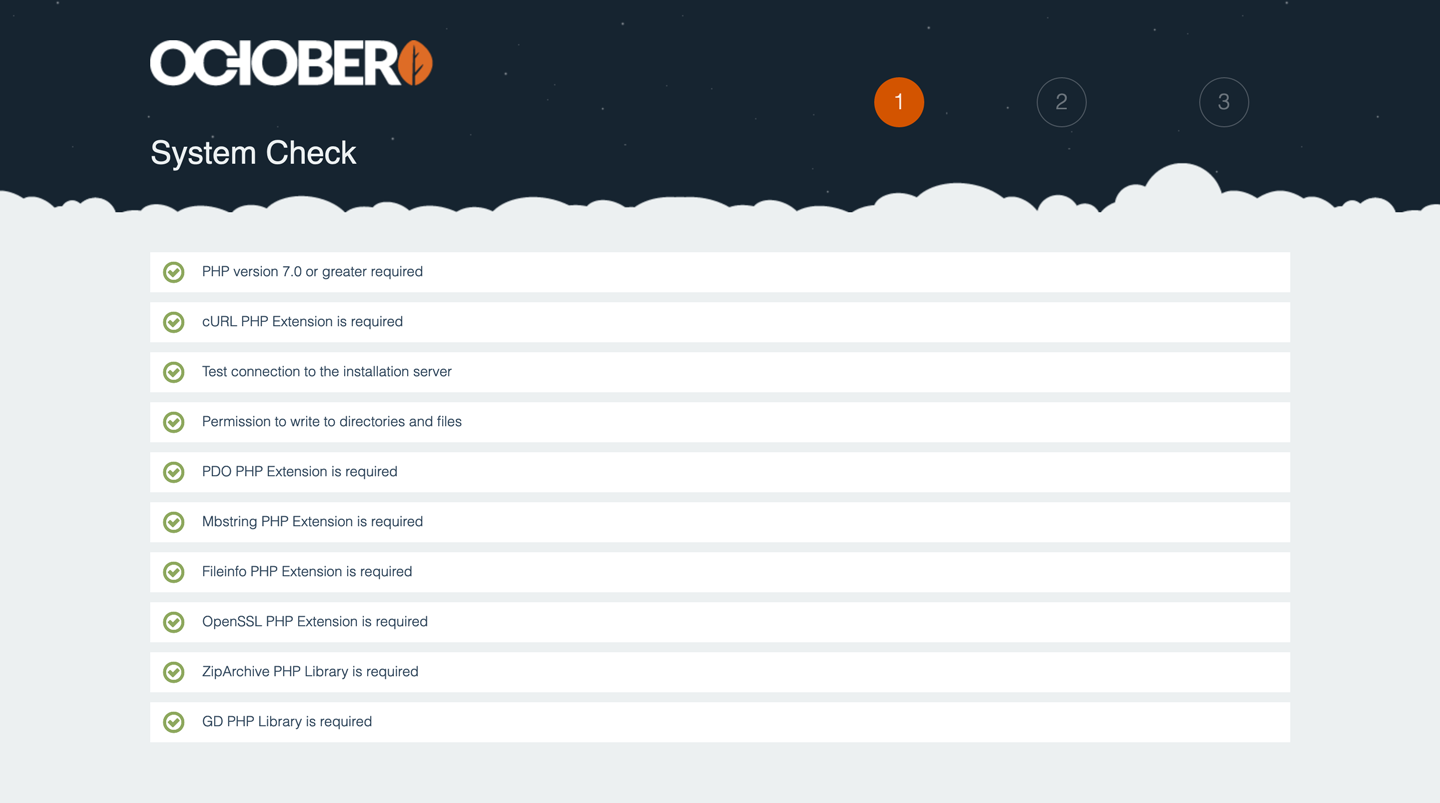
- Validate if the web server satisfies all the requirements (at least PHP 7.0, and others):

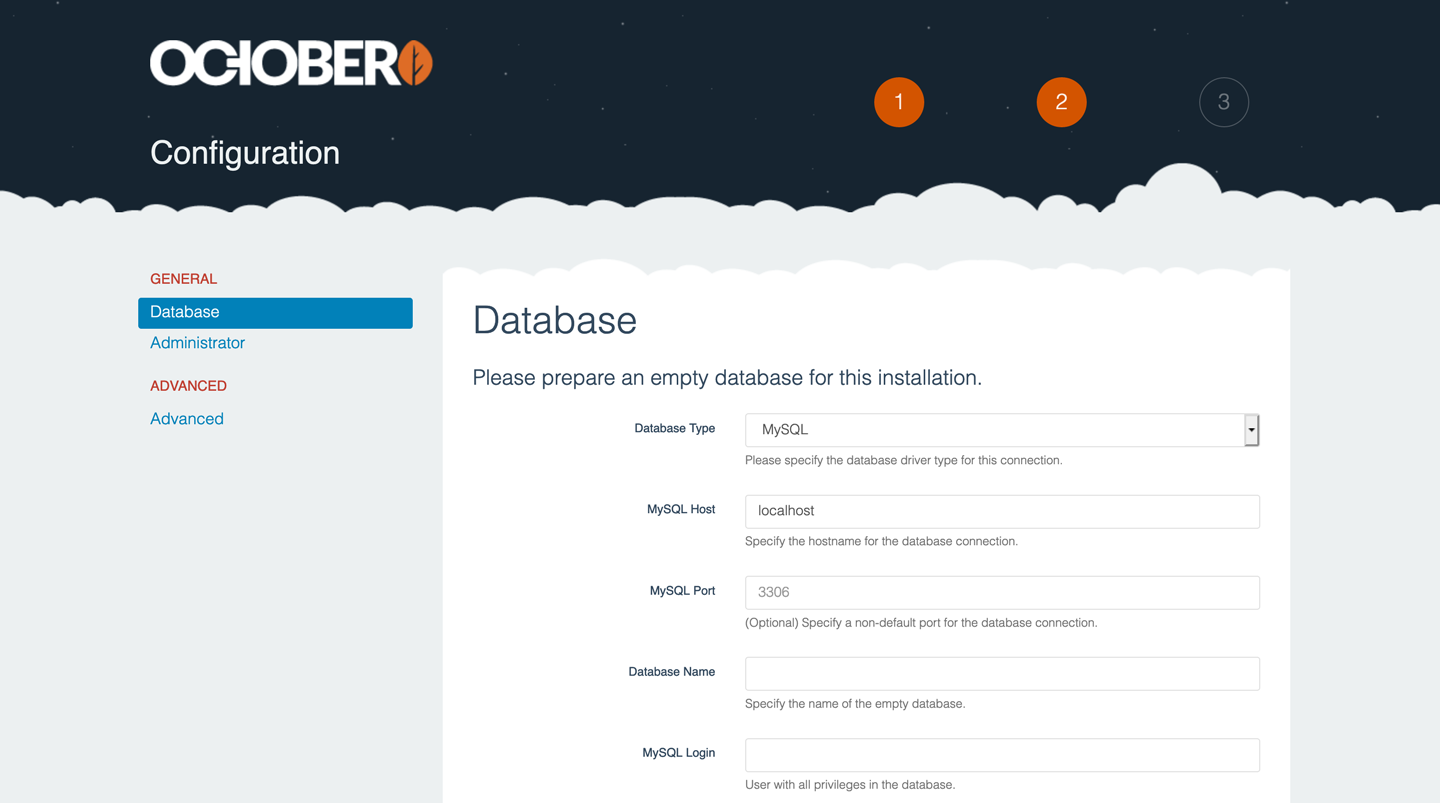
System check (Large preview) - Ask for database and site configuration values, and user credentials:

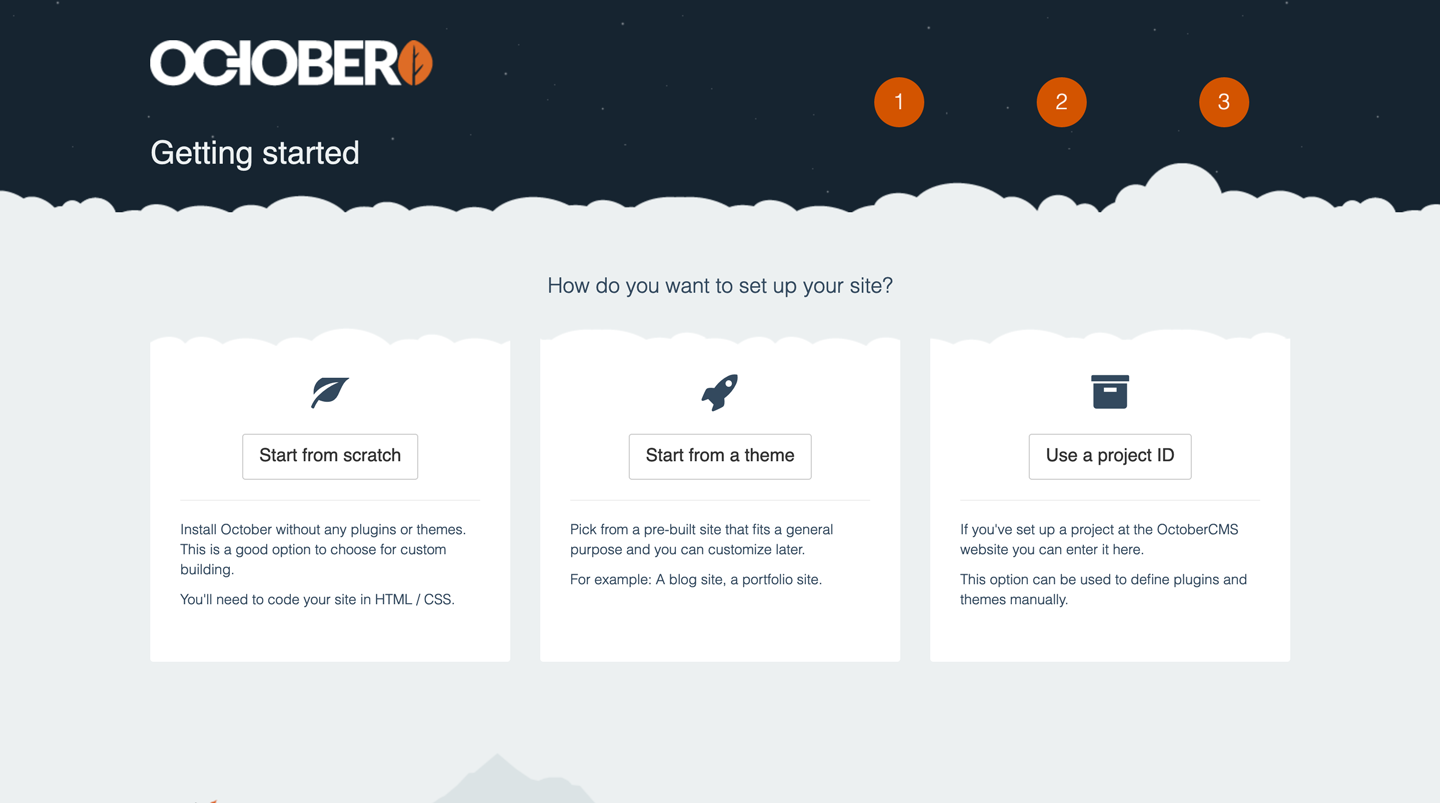
Configuration (Large preview) - Ask how to set-up the site: From scratch, already installing a specific theme, or using our own existing project (from which our chosen theme and plugins can be automatically installed):

Initial setup (Large preview) - Next, we click on "Install!", and in a few seconds (depending on our Internet connection speed) the website will be installed and ready to use:
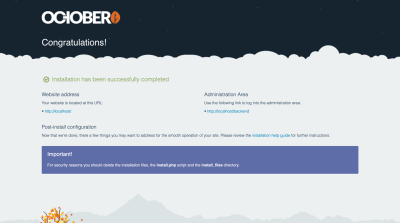
Site installed (Large preview)
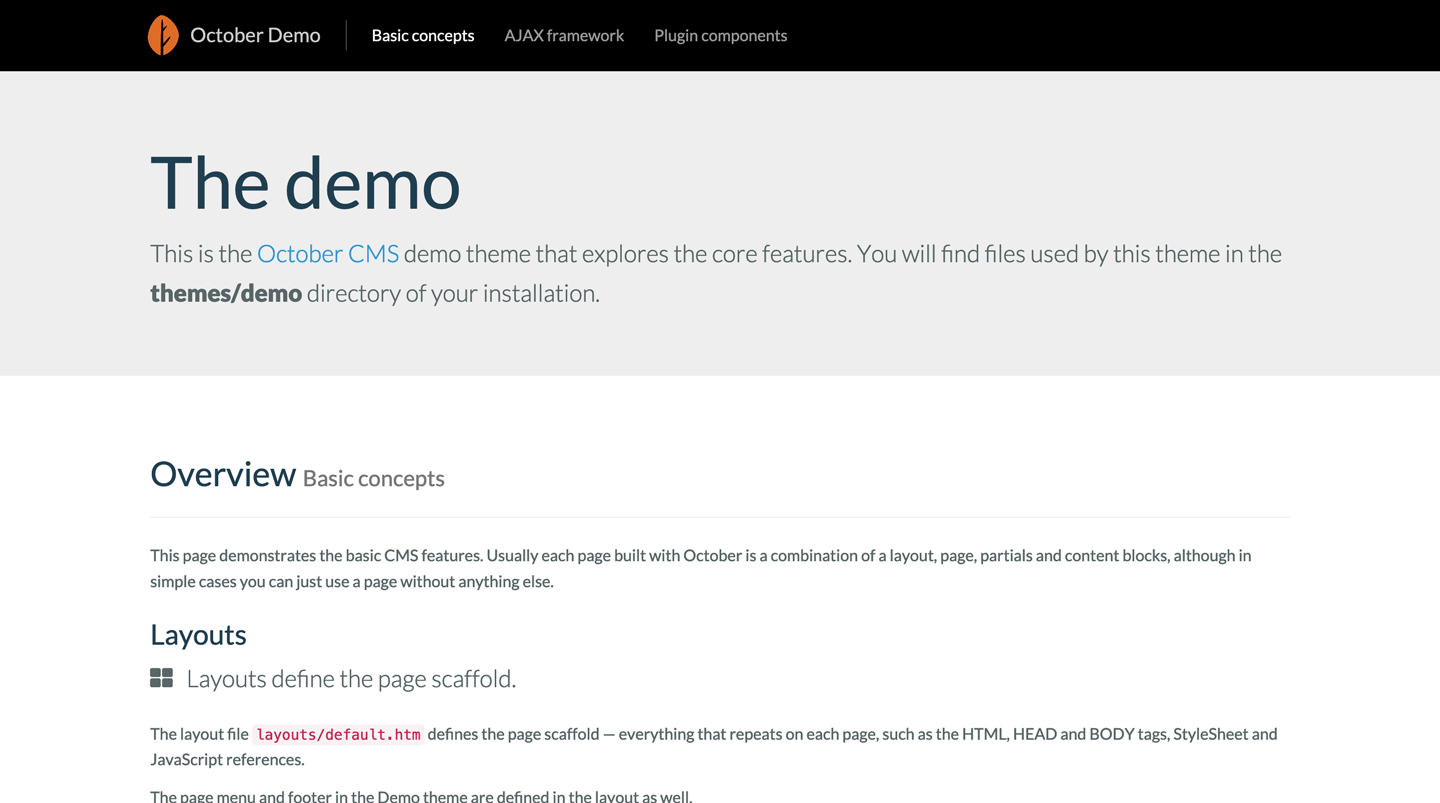
In this case, I chose to install it from scratch, under https://localhost. Browsing to this URL on the browser, we can encounter the October starter demo theme:
Browsing the starter demo theme (Large preview) - Navigating to https://localhost/backend (unless we changed this URL during the installation process) we can log into the administration panel:
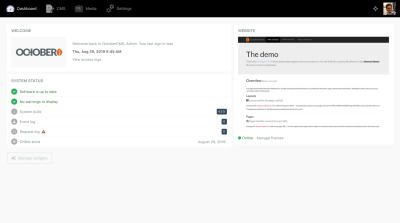
Browsing the admin panel (Large preview) - Finally, we delete the installer files from the folder. And voilà, in just a few minutes we have a fully functioning site (well, we still need to enhance it with plugins... we will do that in a while).
Alternatively, we can also install October from the command-line interface, by executing:$ curl -s https://octobercms.com/api/installer | php
This method is faster (it can take as little as 10 seconds to install) because it doesn't require to input the database configuration. Hence, it is particularly useful for setting-up October CMS as a flat-file system, i.e. a CMS fully set-up through files stored in the local disk, and without a database.


Templating System
October CMS has a robust templating system to implement layouts, re-use chunks of code and enable dynamic functionality. Its most important elements are the following ones:
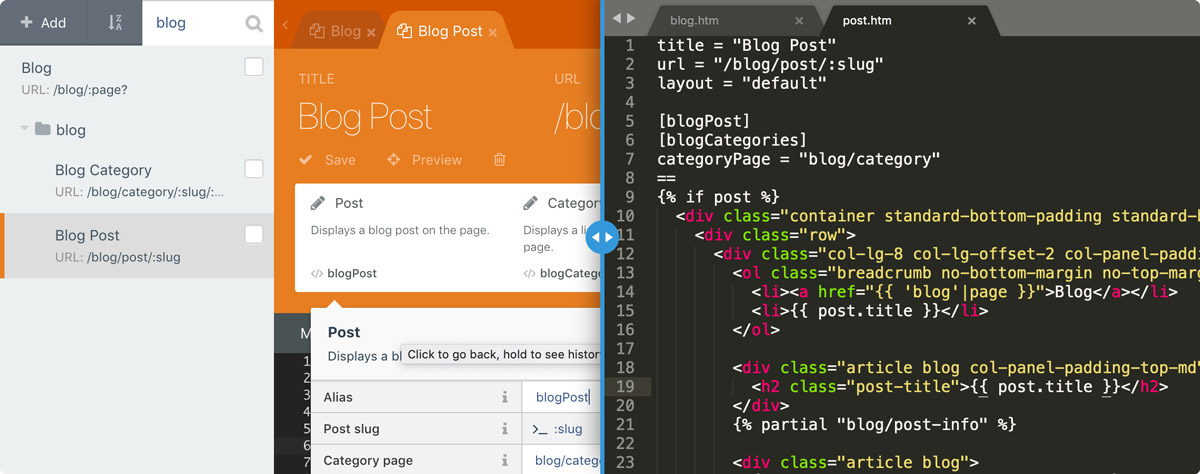
Pages are the most basic structure for storing content. These are readily available, since they are shipped as part of the core (blog posts, on the other hand, must be installed through a plugin). Pages are based on Twig, which is a modern template engine for PHP (devised by the creators of Symfony), and compiled to plain optimized PHP code, so they execute very fast.
Partials contain reusable chunks of code that can be used all throughout the website, as to avoid duplicating code on the different pages or layouts. They are particularly useful for navigation menus, testimonials, calls to action, and other common elements.
Layouts define the scaffolding, or structure, of the page. They define the <html> and <body> HTML elements, and are useful for creating the frame of the site, including the header, footer and sidebars. The actual content in the body is injected by the page.
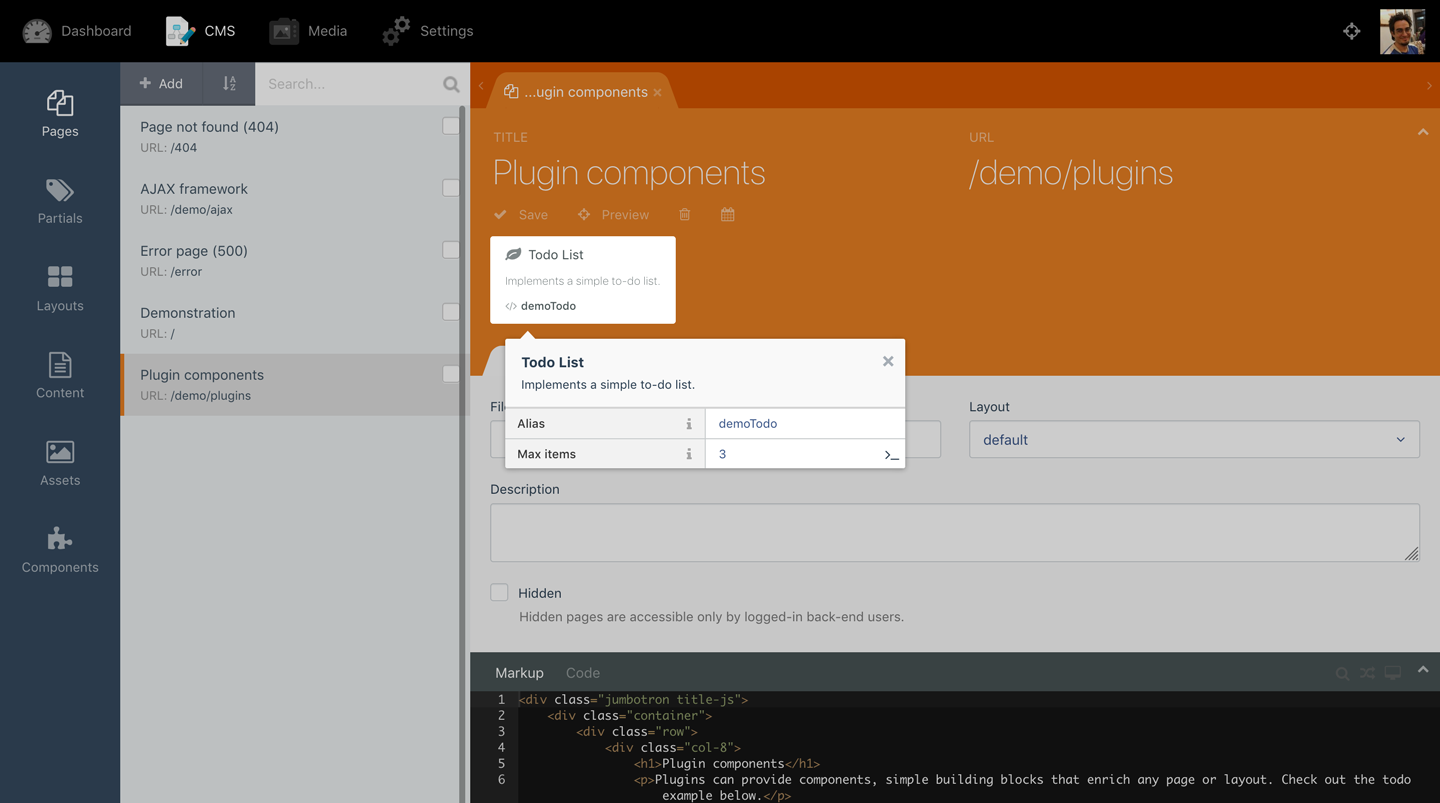
Components are the mechanism to extend functionality in October CMS. Any page, partial or layout can have attached any number of components, which are most commonly provided through plugins, and which are fully configurable. In addition to rendering HTML code on the page, components can also provide services, such as form validation, security check-up, control of user permissions, or others.
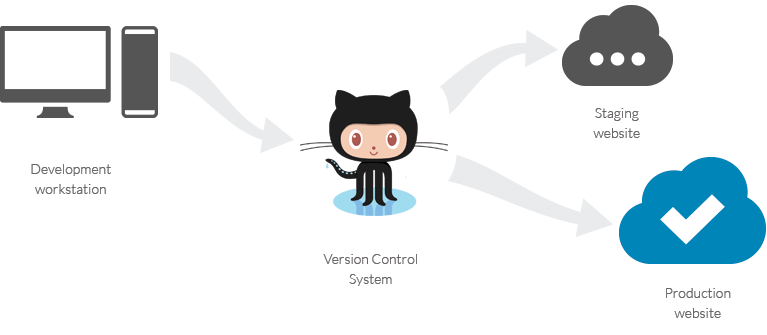
These elements are all implemented through files living in the website's folder in the local hard drive. As such, it is possible to edit them not only through October CMS' built-in editor, but also from the developer's preferred text editor (Sublime, VS Code, PHPStorm, etc).
Similarly, the October CMS project can be perfectly managed through any version control system, and it can be easily adapted to any existing workflows. For instance, a project can be set-up through continuous integration, deploying it automatically to the server after new code is pushed to the Git repo.
October CMS Marketplace
October CMS has a marketplace for themes (which allow to change the site’s look and feel) and plugins (which allow to extend the site’s functionalities), providing both free and paid offerings. By providing themes which can be used to quickly establish and then configure the design of the site, and plugins each of which implements some required functionality for the site, the marketplace ultimately leads to lower costs for creating our projects and reduced time to launch them.
The marketplace has been getting bigger! Following October's growing popularity, its marketplace has received a constant stream of new offerings: It currently boasts 915 plugins, comprising most of the functionalities required for our websites (blogging, SEO, e-commerce, analytics, email, galleries, maps, security, social, user management, and others), and 150+ themes. Both themes and plugins can be submitted to the marketplace by any independent 3rd party developer, company or agency, and they must adhere to quality guidelines, which ensures that they are performant and secure.
Creating An E-Commerce Site Through Shopaholic
Let's get our hands dirty and implement a real-life use case: An e-commerce website! For this, we will install Shopaholic, the most popular plugin to add e-commerce functionality to October CMS, and the free theme Bootstrap theme for Shopaholic to quickly bootstrap the site (which will be made to look like this demo site). Shopaholic is ideal for our needs because it provides a comprehensive e-commerce solution, which includes an ecosystem of extensions (both free and paid ones) to further enhance it. In addition, we can install the core experience for free and only make a one-time payment for the extensions that we need, which will be cheaper than using cloud solutions which have a recurring fee to use. And finally, because we are the full owners of our own on-premise e-commerce website, we can customize it as much as we need to and we own all the data, which is not possible with cloud solutions.
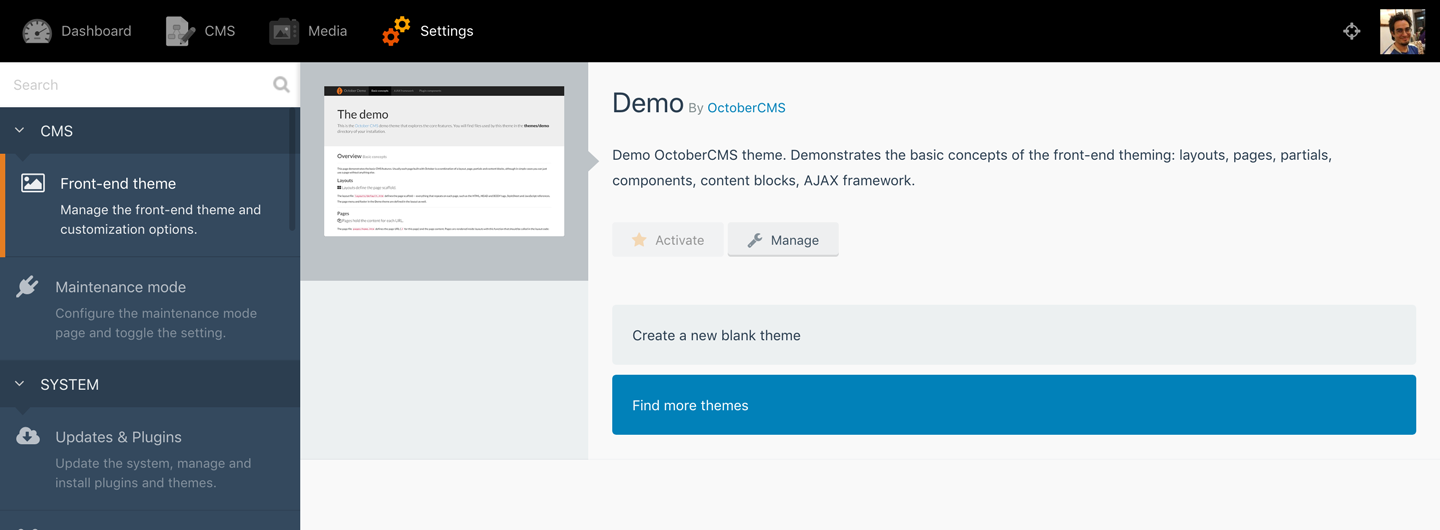
Because of the October marketplace dependency management system, we need only install the theme (the Shopaholic plugin is added as a dependency). Let's proceed to install the theme then: Inside the October CMS admin, we click in the "Front-end theme" section in the Settings, and then click on "Find more themes":
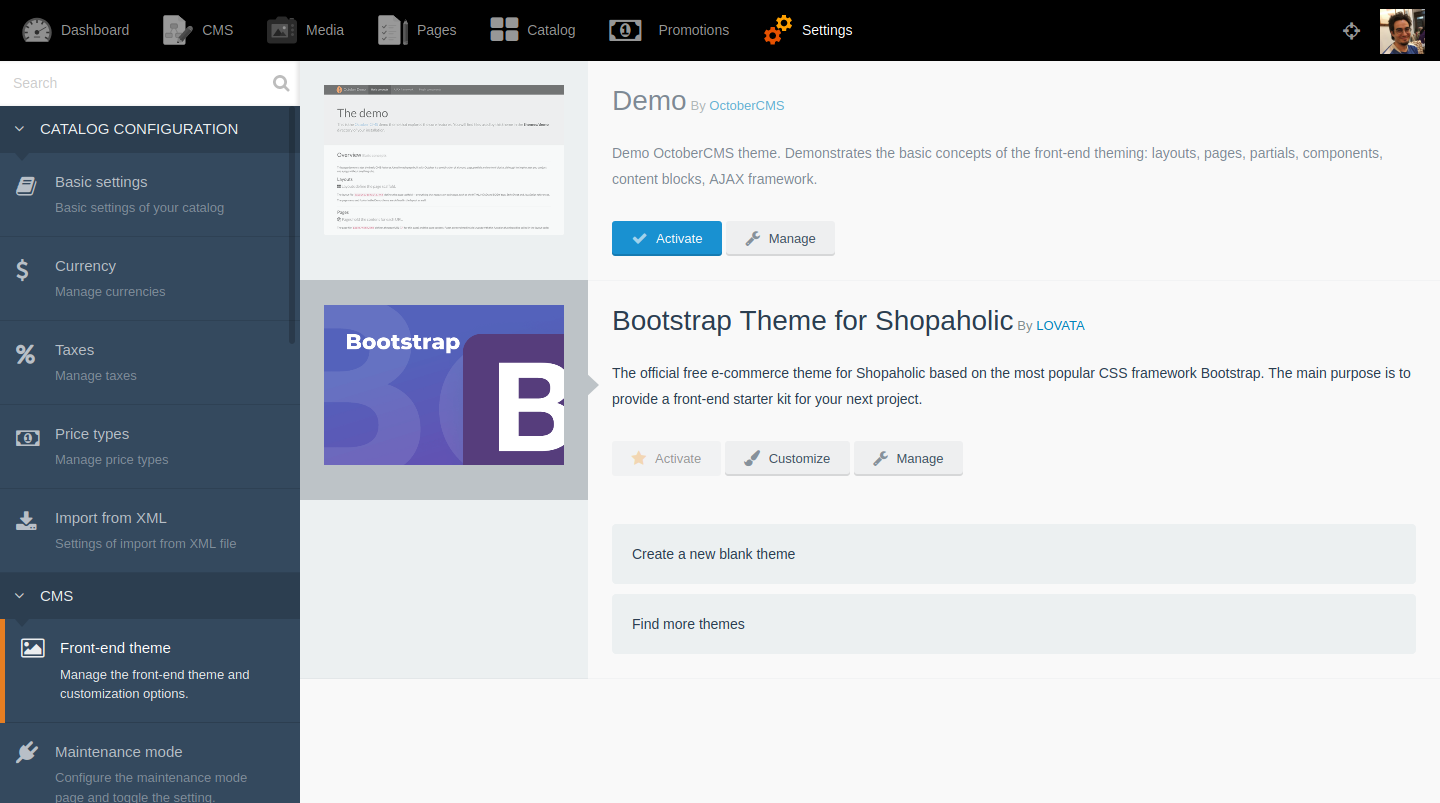
Then, we search for theme "Bootstrap theme for Shopaholic" and, upon clicking on the result in the dropdown, it will install the theme and all its dependencies. Once installed, we go back to the Front-end theme manager page and click on the Activate button on the new theme:
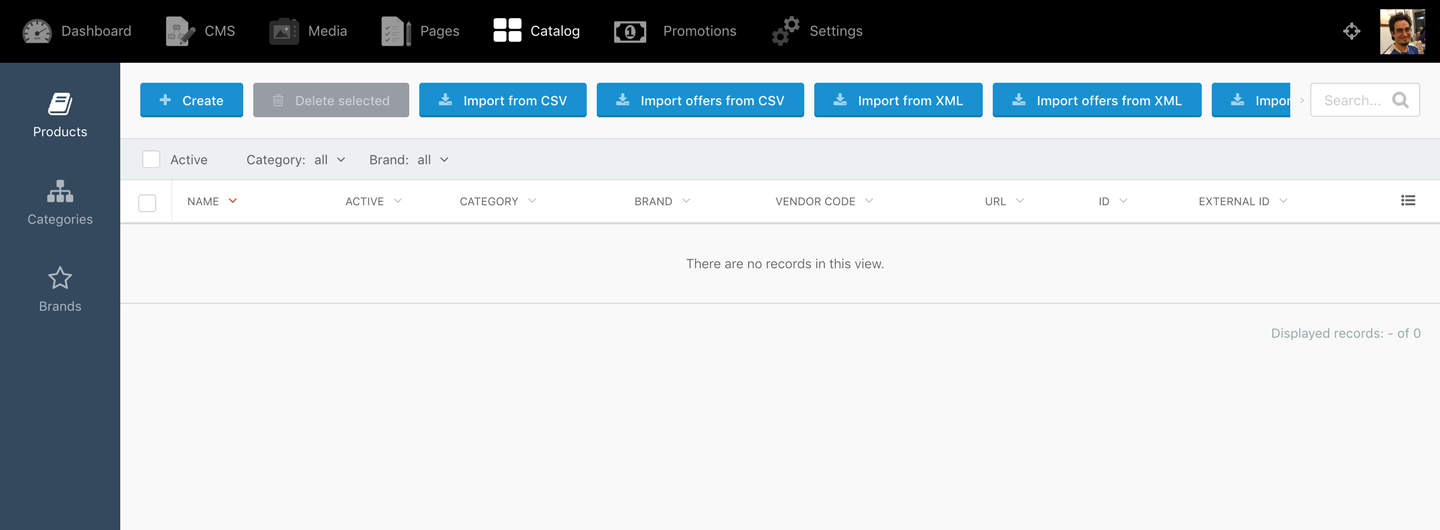
After installing the theme and plugins, we will notice a new element "Catalog" on the top menu bar. Clicking on it, we can manage the items in our e-commerce catalog, namely products, categories and brands (these are the core elements; other elements, such as coupons, can be added through extensions). Initially, our catalog will be empty:
Let's fill it up with some data. We can either create the items one by one or, quite conveniently, import data through CSV and XML files (which allows us to manage a large set of records with Excel or other tools). In our case, since we are creating a demo site for testing purposes, let's install plugin Fake Data for Shopaholic which provides large sets of mock data and an easy way to import these records to the system. To do this, follow these steps:
- Head to Settings => Updates & Plugins in October CMS backend, and install plugin "Fake Data for Shopaholic".
- Head to Dashboard, and click on Manage widgets and then Add widget.
- Select widget "Fake data for Shopaholic", and click on Add.
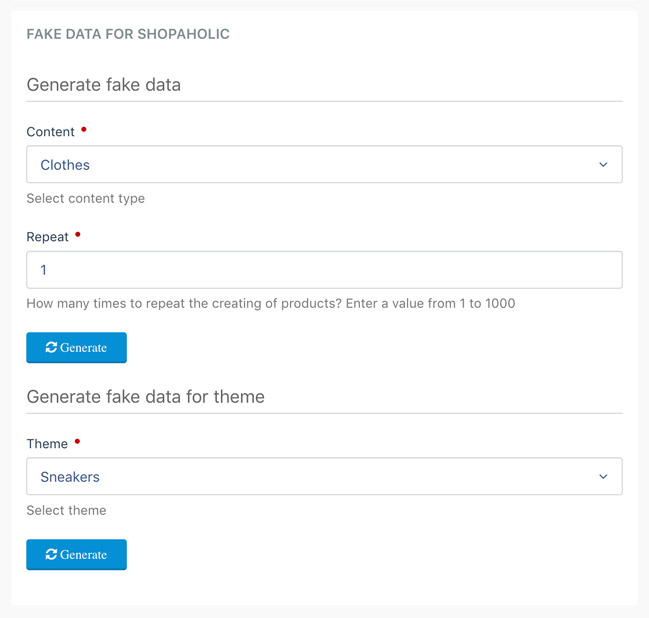
- In the newly added widget, clicking on Generate under section "Generate fake data " will run the process to import the fake data.
The last step will ask how many times should the insertion be repeated (as to create bulk and be able to test the performance of the site when loading many records) and which data set (clothes or sneakers):
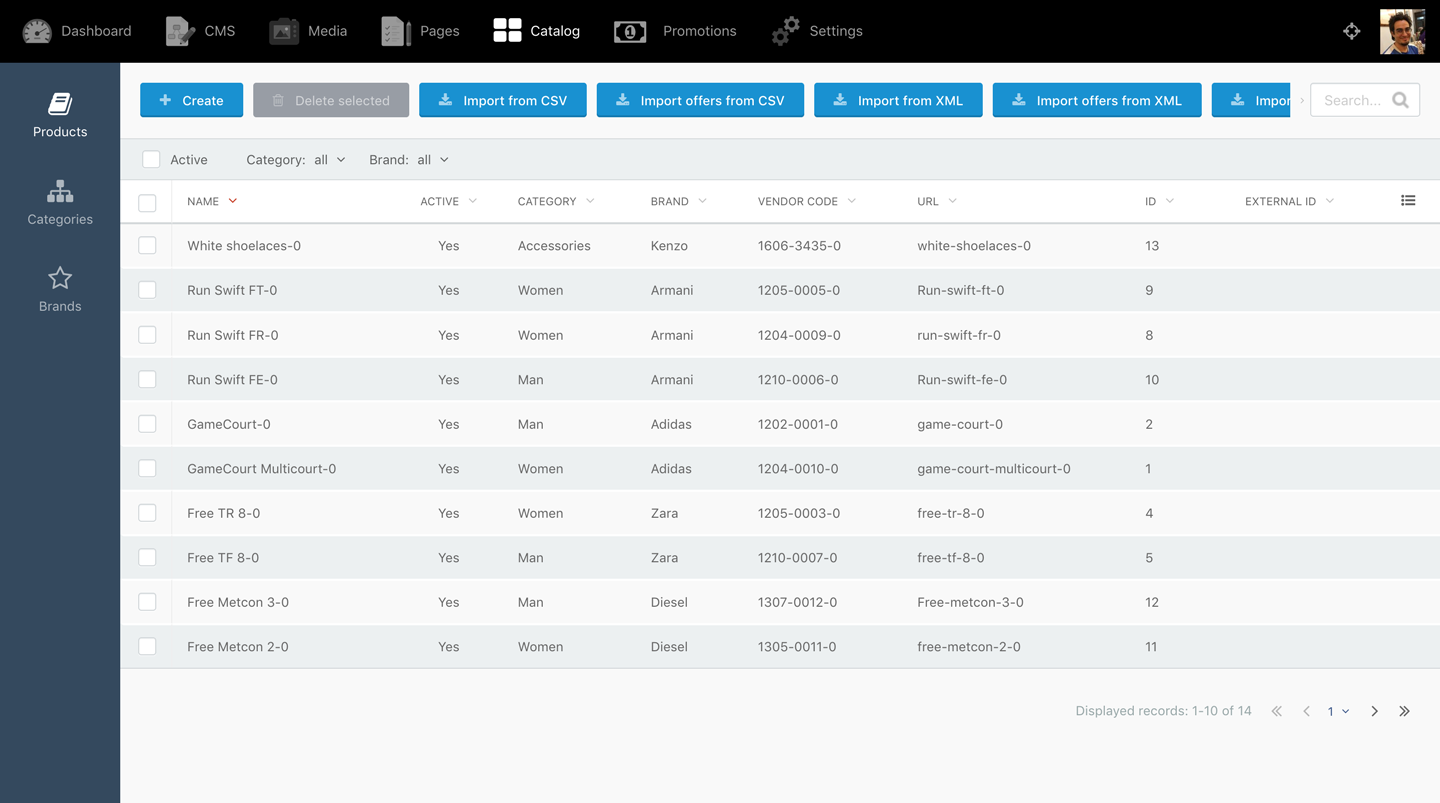
After running this process, our catalog will look better stocked:
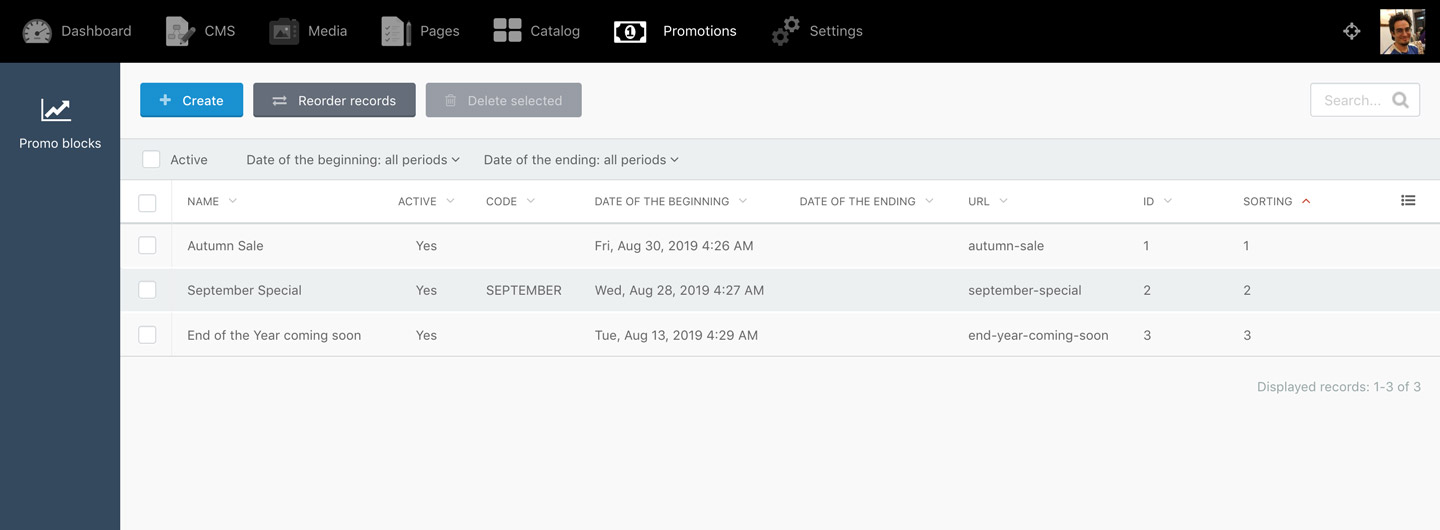
The next step is to create some promotions. To do this, we click on Promotions on the top menu, then on the Create button, and fill the required information. Once each promotion is created, we must edit it again to add products to it. After creating a few of them, our promotion list will look like this:
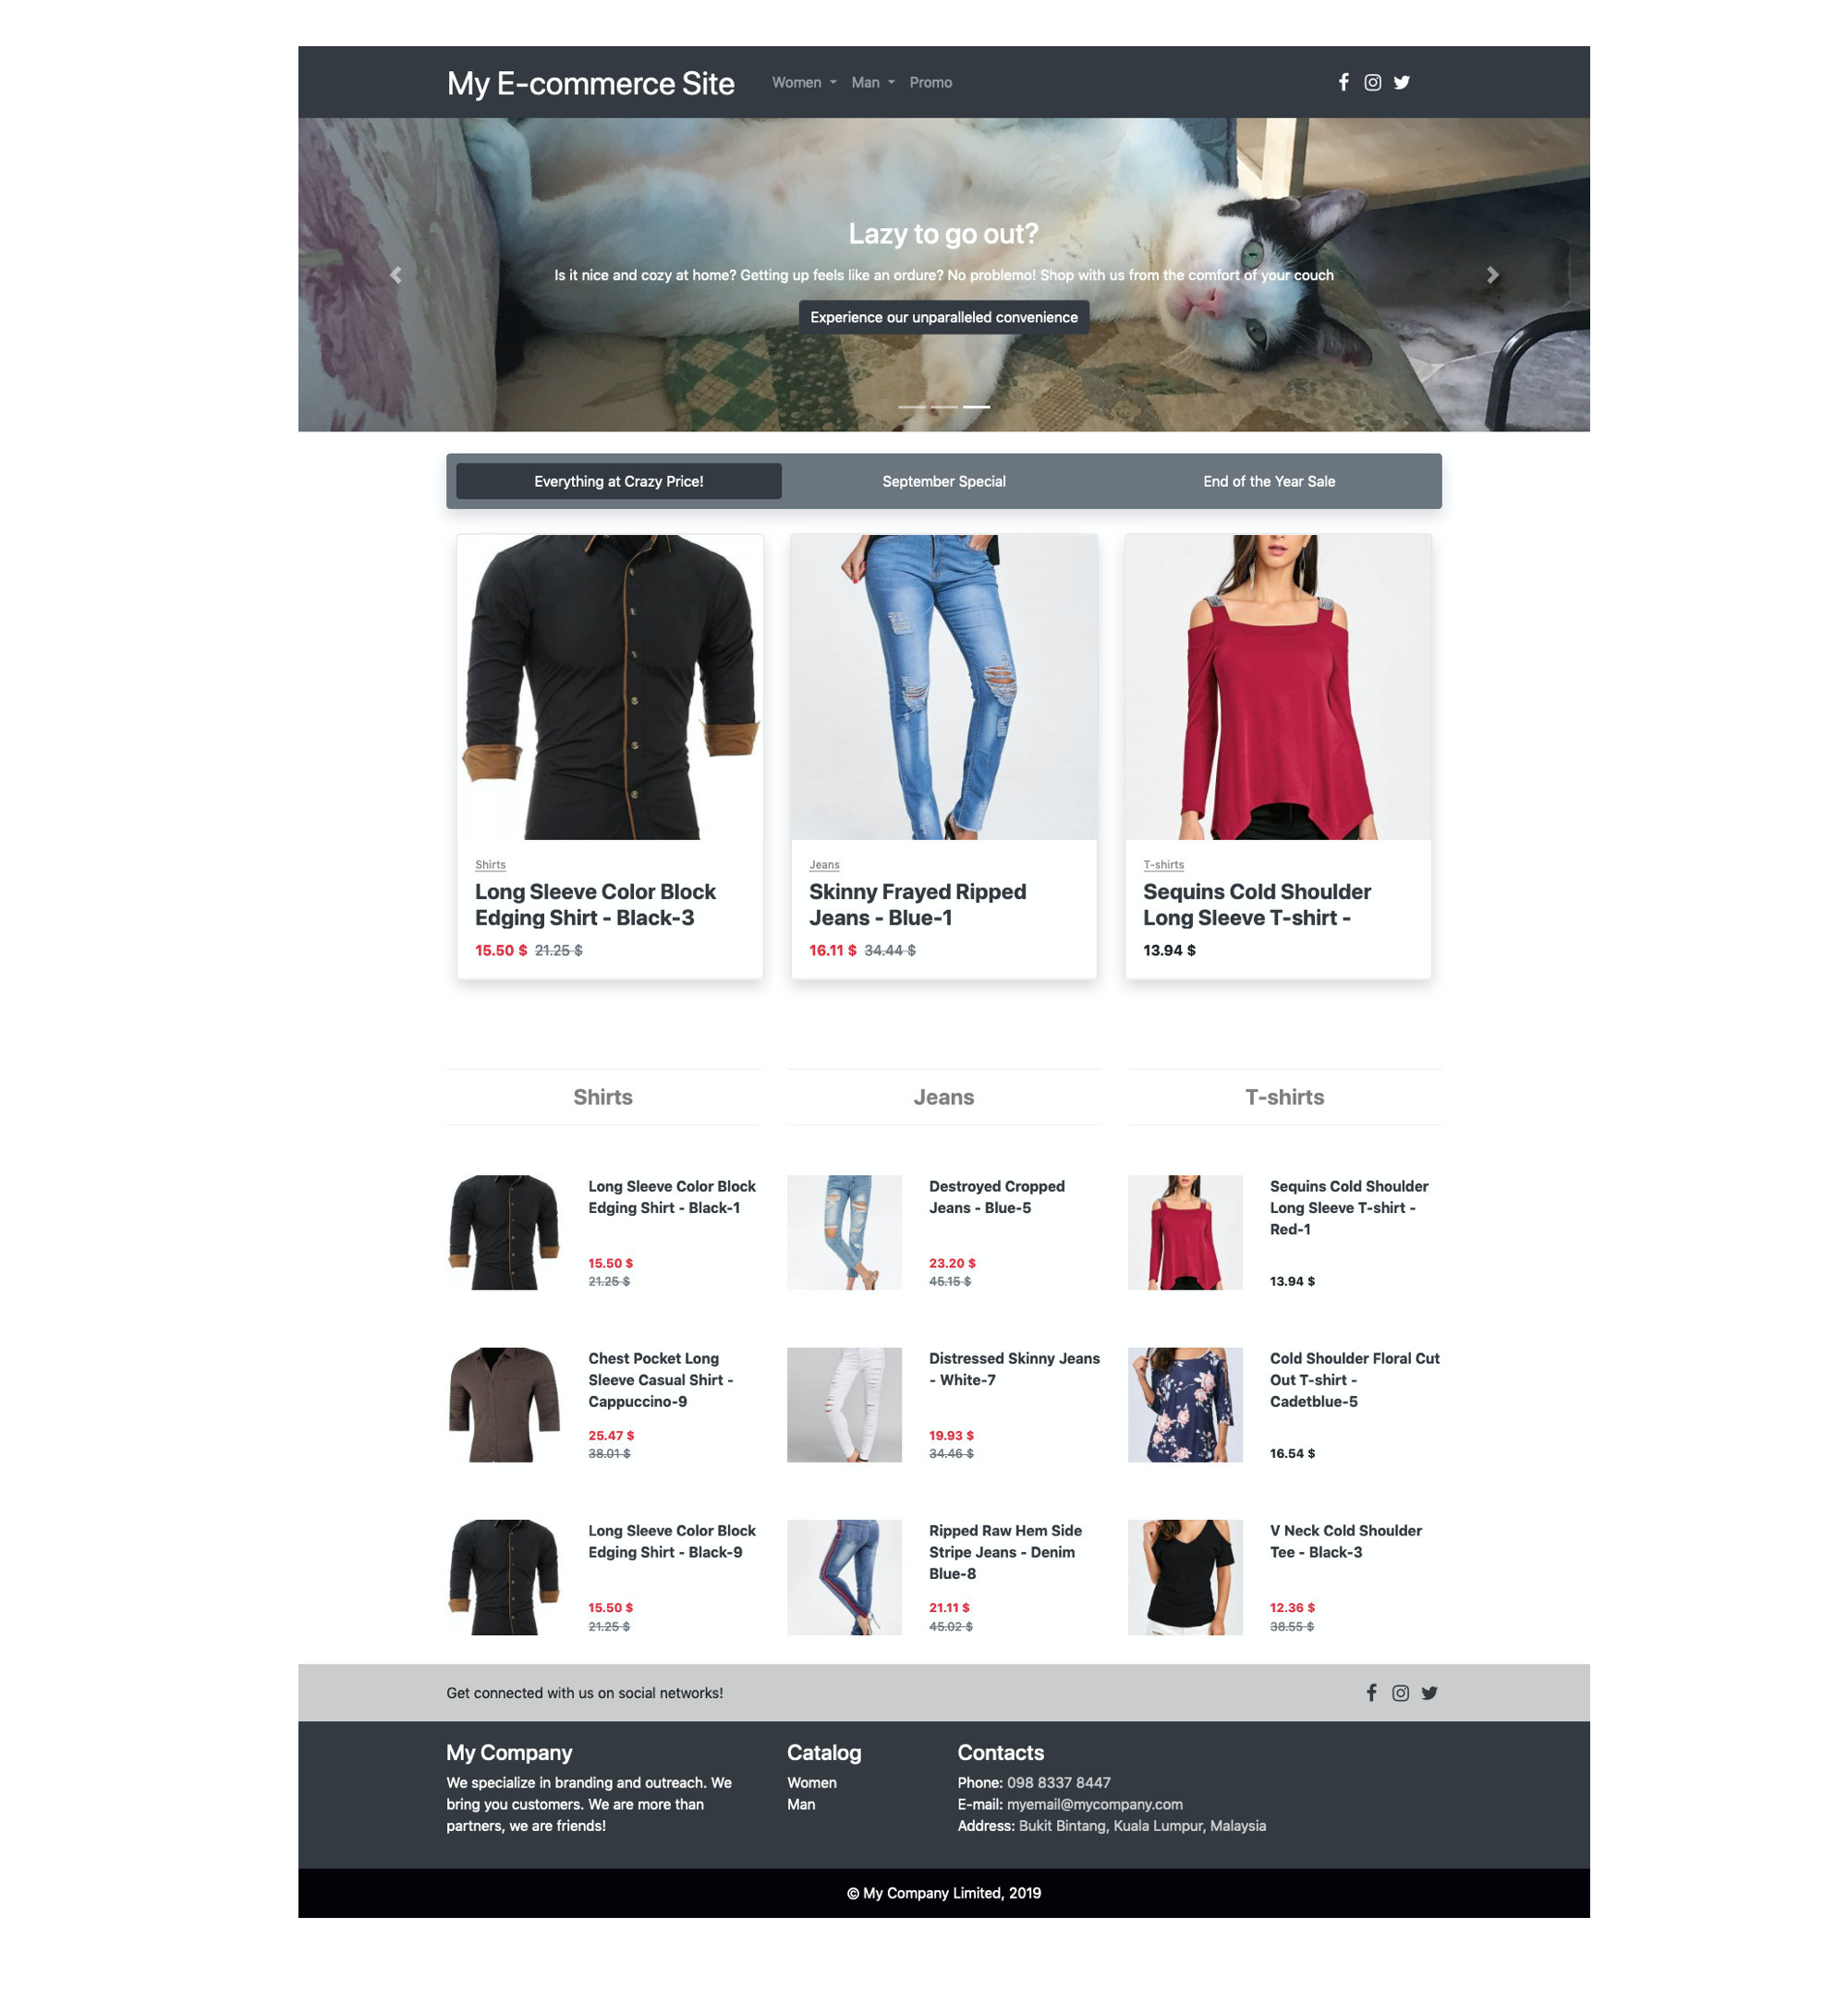
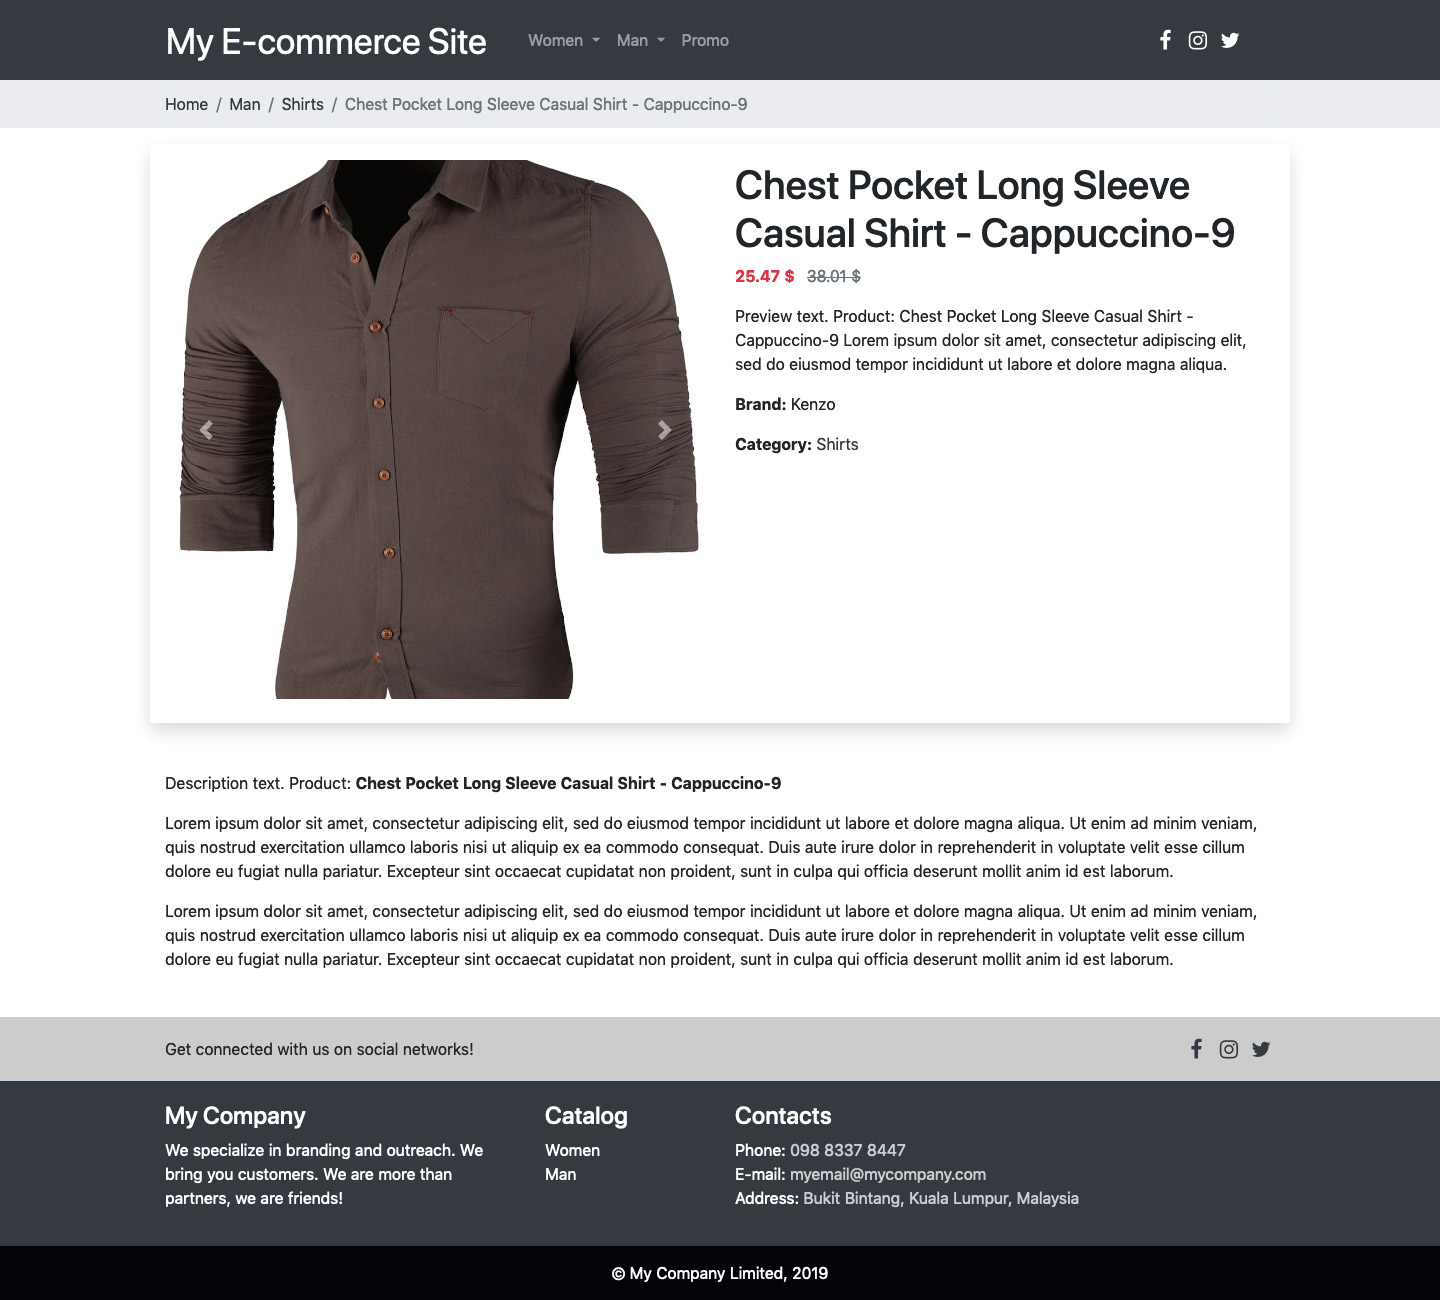
Now that we have some data, we can finish customizing how our front page will look like. For that, we go to section Settings => Front-end theme => Customize and we complete the information for all tabs (Header, Footer, Social, Main slider, Index page). Once this is ready, our e-commerce site will now be ready:
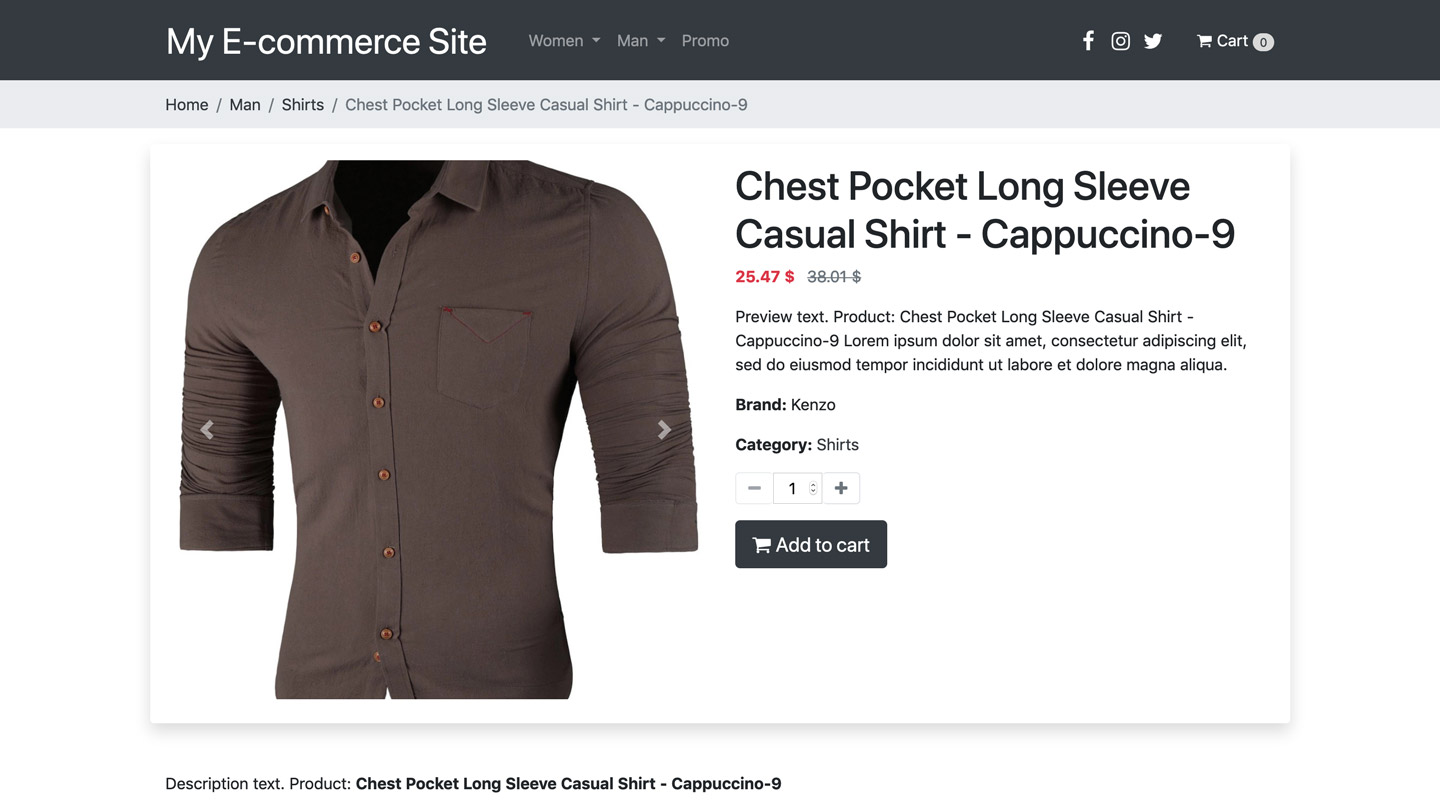
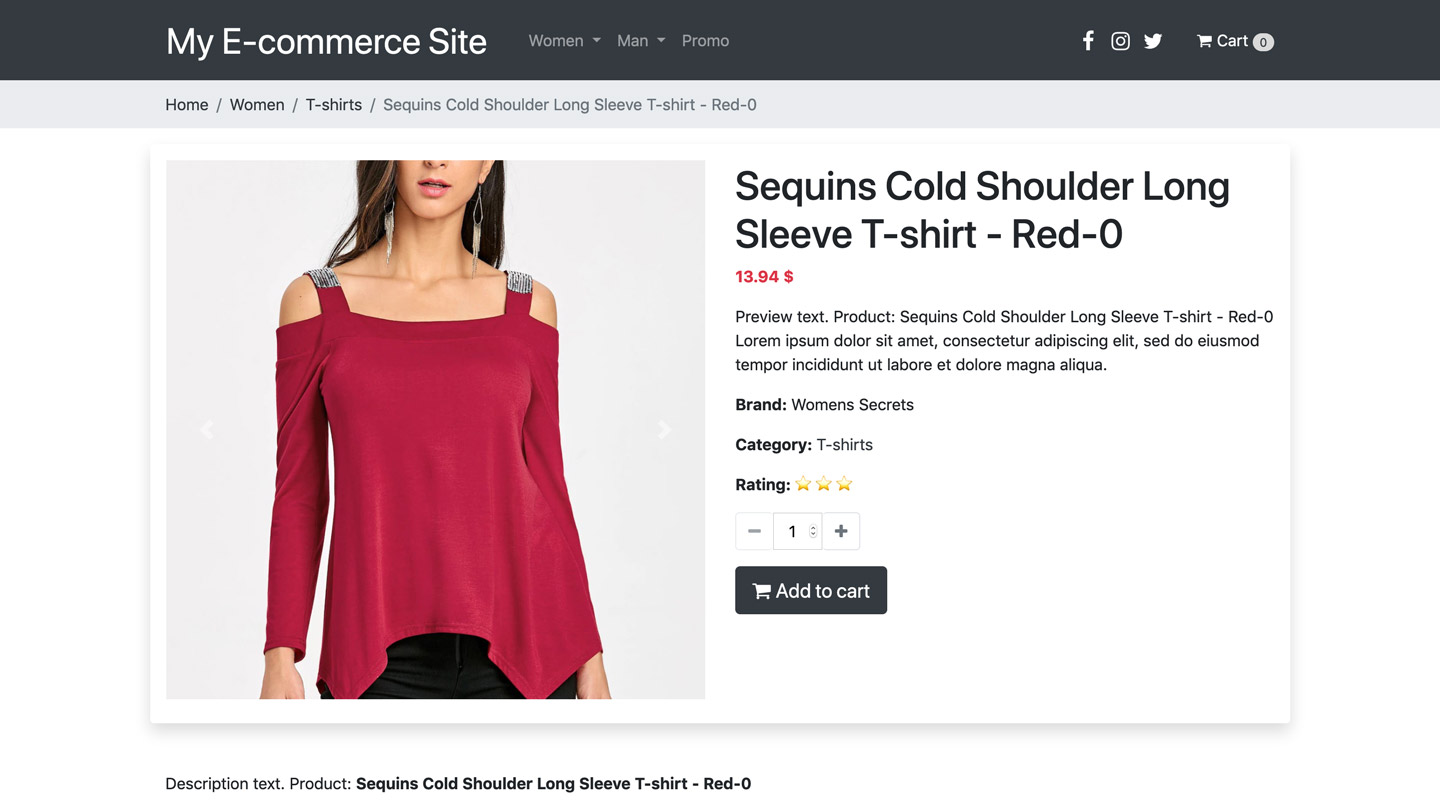
Clicking on a product, we can see how its page looks like:
Auditing The Speed And Reliability Of The E-Commerce Solution
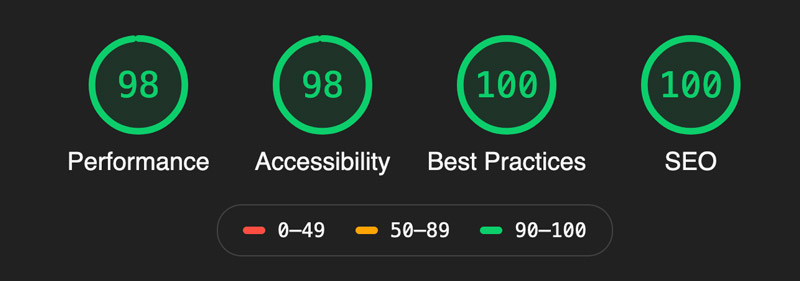
Because we want to sell our products, speed and a good SEO are mandatory, so let's make an audit using Google Chrome's Lighthouse on the product page to make sure it runs fast and that it will score high with search engines. Running the audit against the live demo site, it returns the following report:
Equally important is that the site can withstand heavy load, so that if our product becomes successful and attracts plenty of traffic the server doesn't crash. For this, we can use the Load Impact tool to run a load test. Running the test using 50 virtual users for 12 minutes against the live demo site (which is hosted on DigitalOcean with a droplet configuration of Standard 2CPU/4 GB RAM) produced the following results:
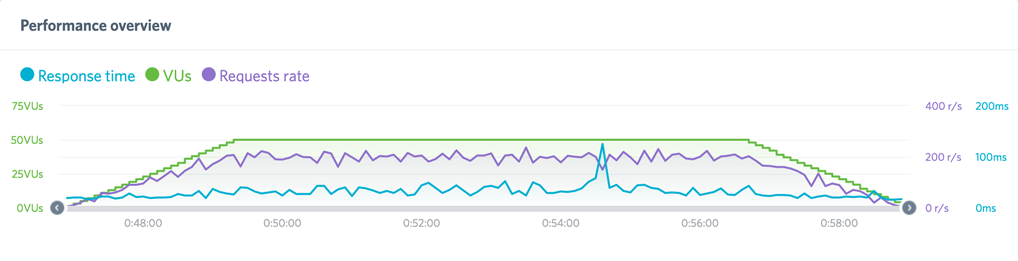
As can be seen, the website was able to sustain an acceptable response time throughout the load test, giving us the confidence that we can trust the e-commerce plugin when we need it the most: When it's time to sell the product.
Finally, we can also feel confident of the reliability of the software, since it is covered by unit tests.
Adding Extensions To Shopaholic
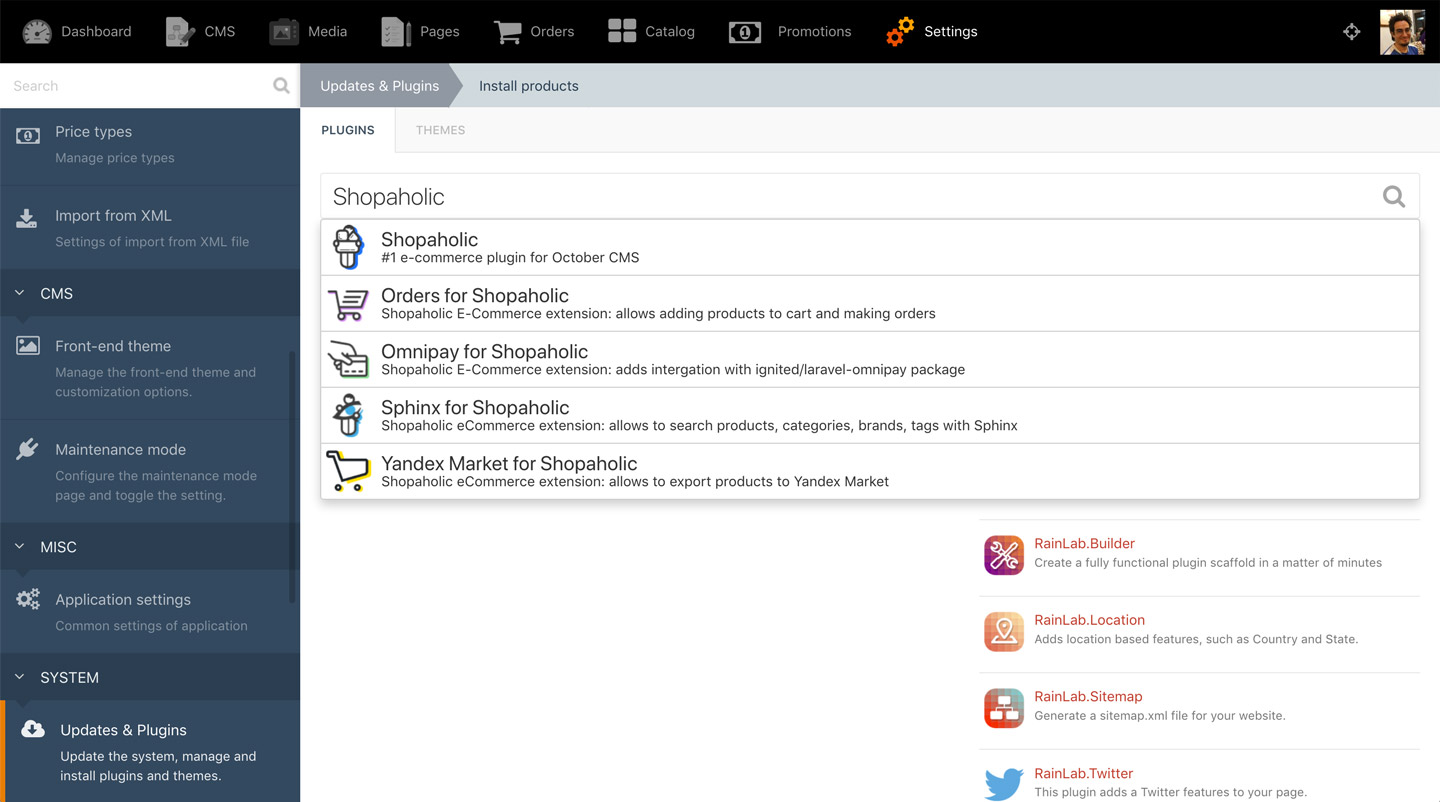
So far so good. However, as it can be seen on the screenshots from our website, there is still no way for the visitor to buy a product. Let's add this functionality by installing the following free extensions for Shopaholic: Orders, to allow to add products to a cart and make orders, and Omnipay, to process the payment. (For the other Shopaholic extensions, if they are not free and authored by LOVATA, you can use coupon "WELCOME" to get a 50% discount the first time you buy them.) To install these extensions, we head to Settings => Updates & Plugins, search for the plugin names, and click on the results to have them installed.
Once installed, we will see a new item Orders in the top navigation, where all orders will be stored, and items Payment methods and Shipping types in the Settings page, to configure the payment gateways (card, cash, etc) and how to deliver the product (by post, etc). We configure these and load again the product page. Now it shows an "Add to cart" button, allowing the user to place an order:
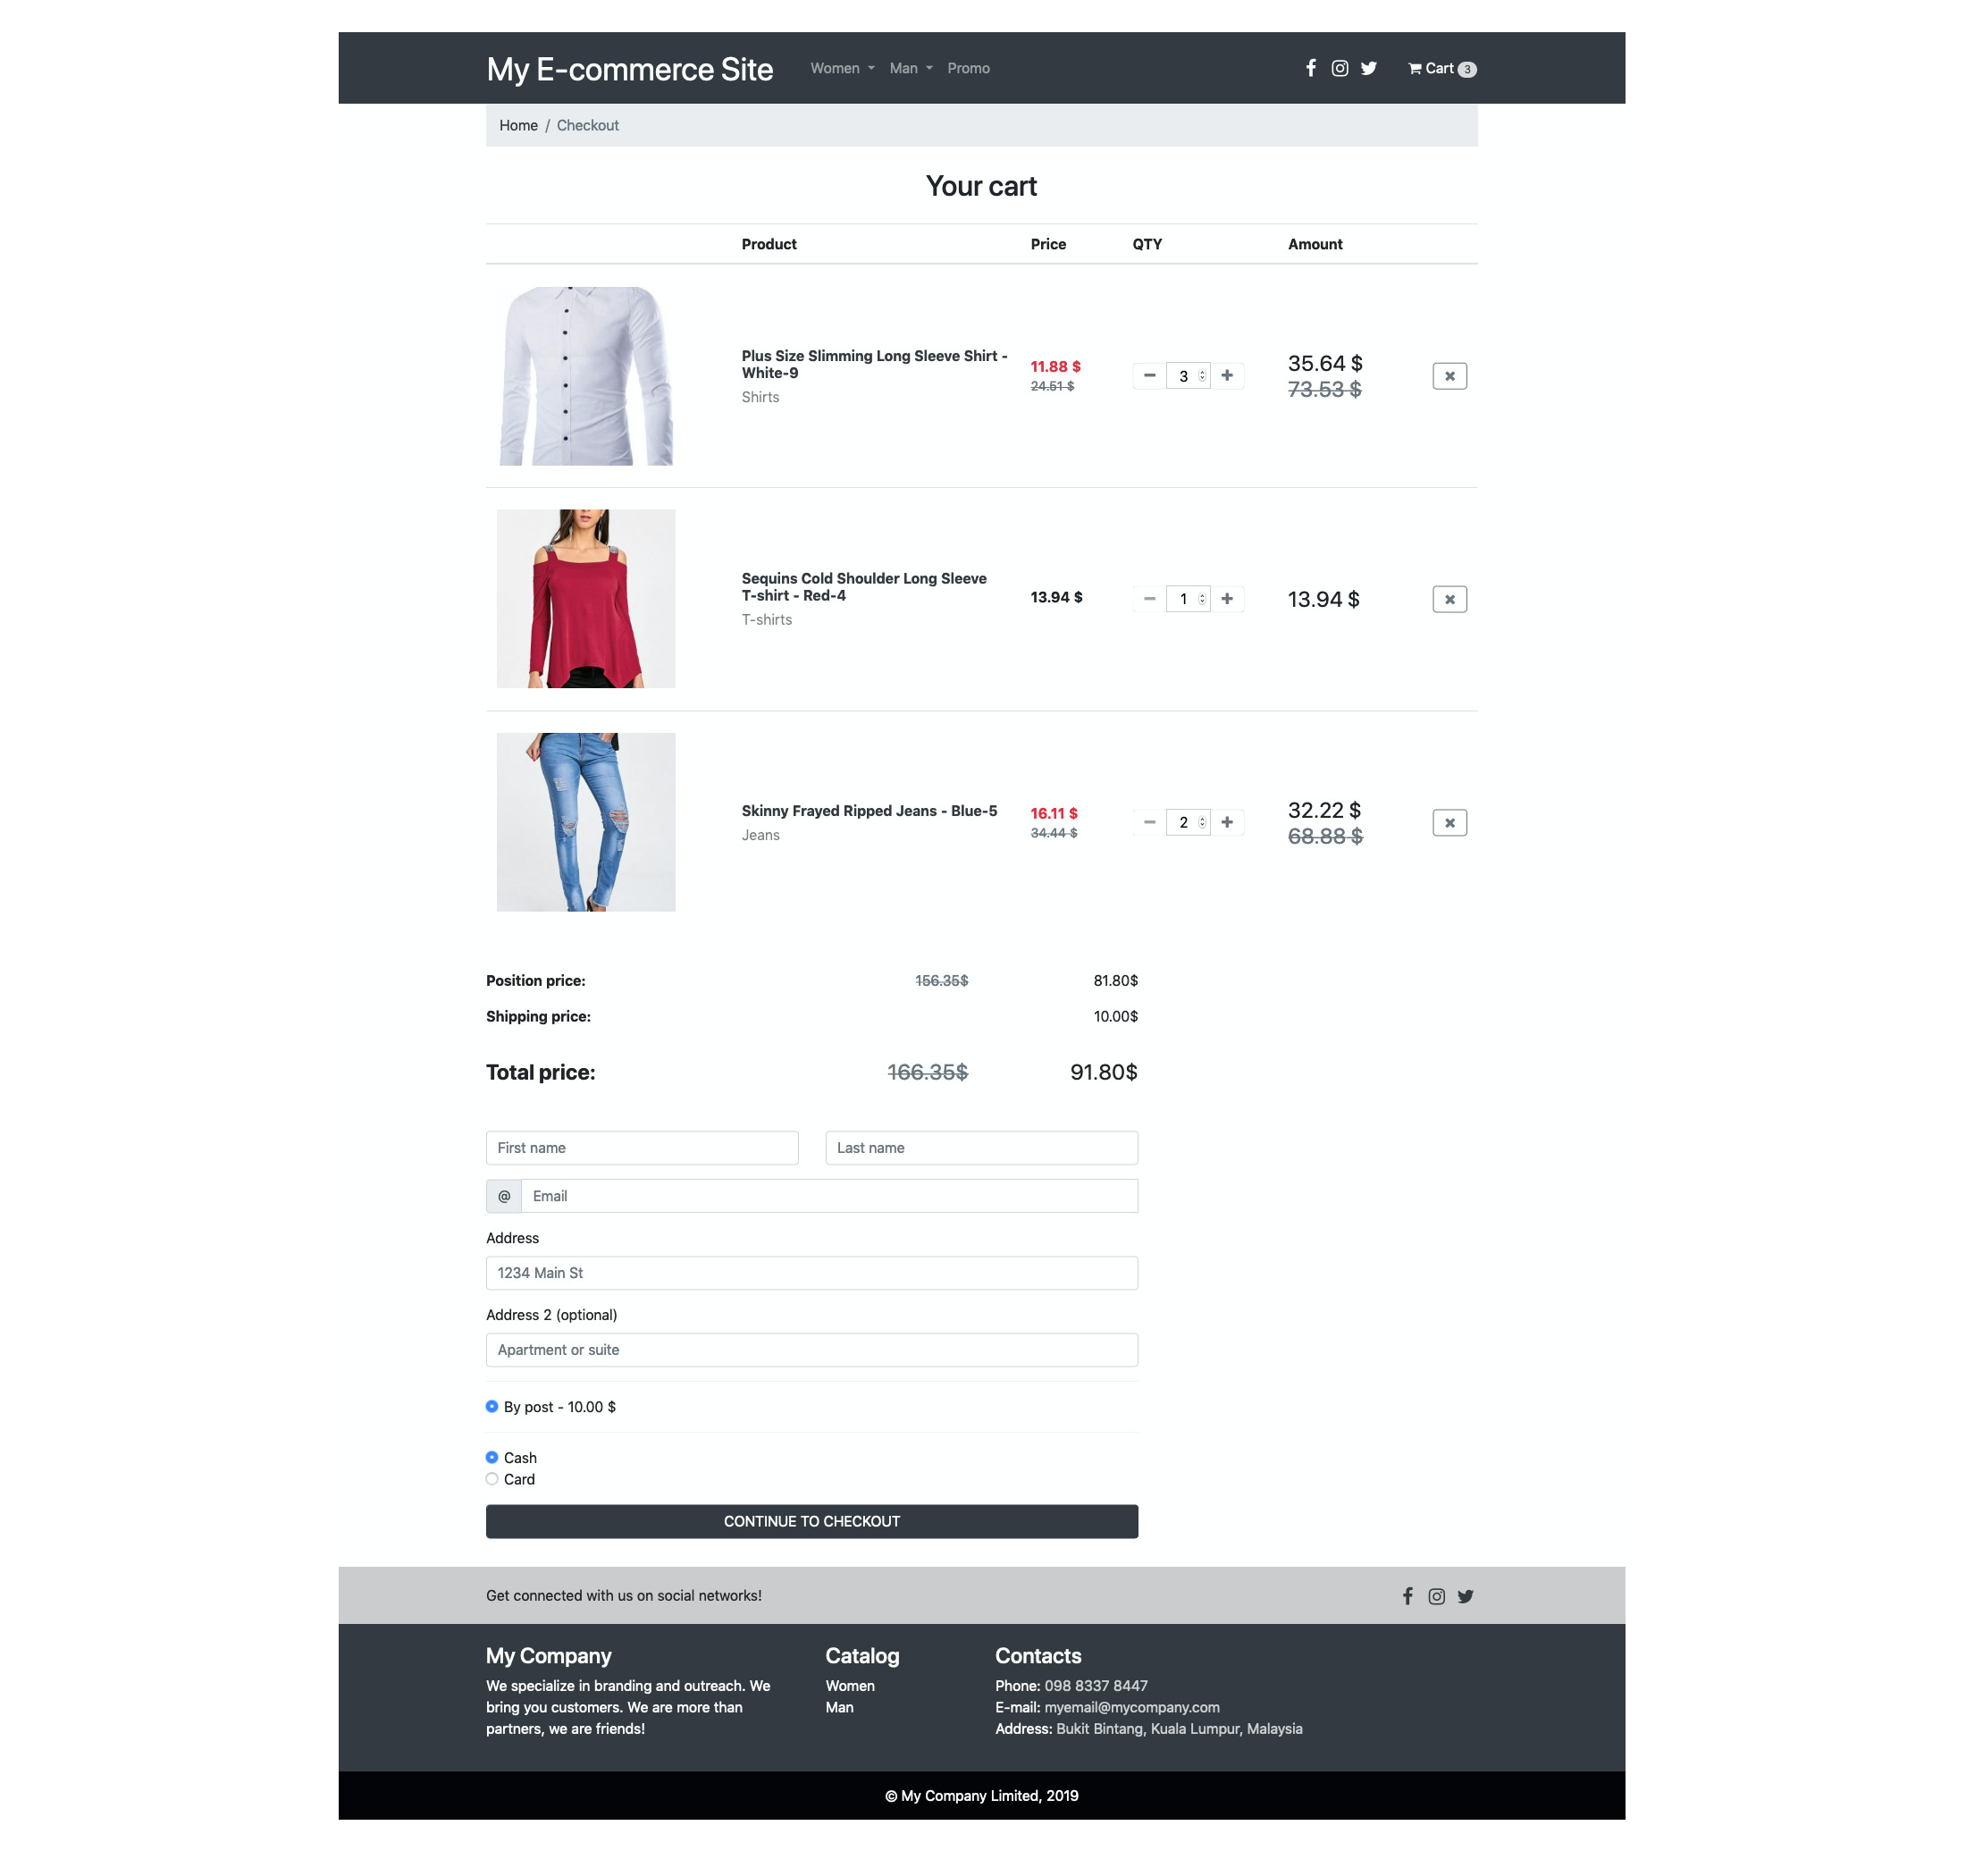
After adding several items to the cart, we can proceed to the check-out and complete the order:
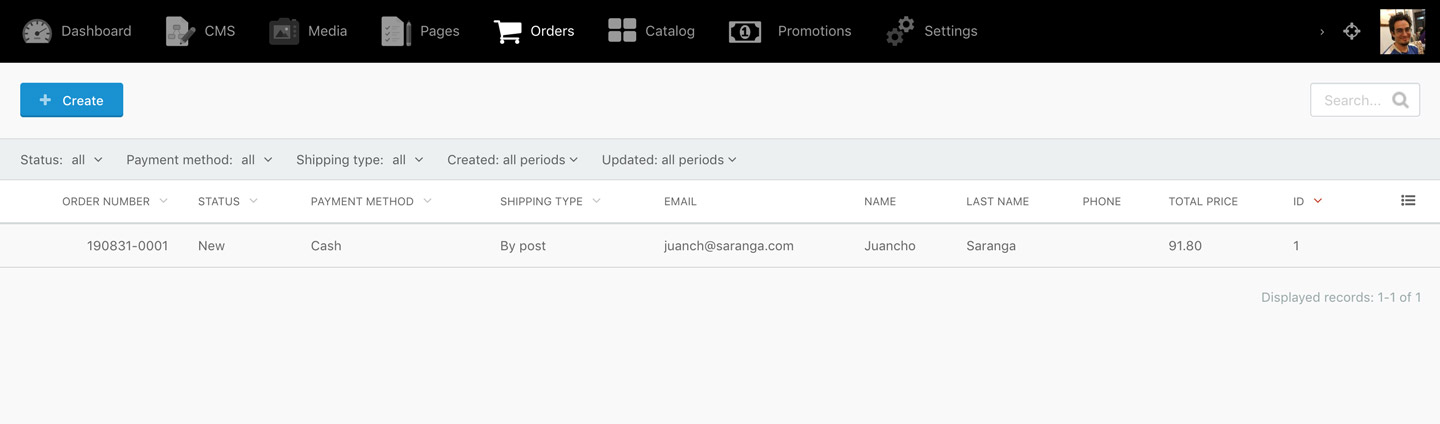
Once the user submits the order, the inventory will be automatically taken care of, updating the number of items for each product in stock, and we will receive an email informing us of the new order (if configured to do so). In section Orders on the admin panel, we can find all the information for the order (products sold, buyer information, method of payment and total, and others), and we can complete the transaction.
The basic work is done: In barely a few hours we managed to have a fully functional e-commerce sith with October CMS and Shopaholic.
Creating Our Own Extension
If none of the several extensions to Shopaholic on the October marketplace provides the functionality needed, we can also create our own extensions.
To do this, if you are comfortable with Object-Oriented Programming and PHP and, more specifically, with Laravel, then you are ready to do it. The documentation explains how to add an extension, step by step. For instance, following this tutorial, with barely a few lines of code we can add a custom field "rating" to our products:
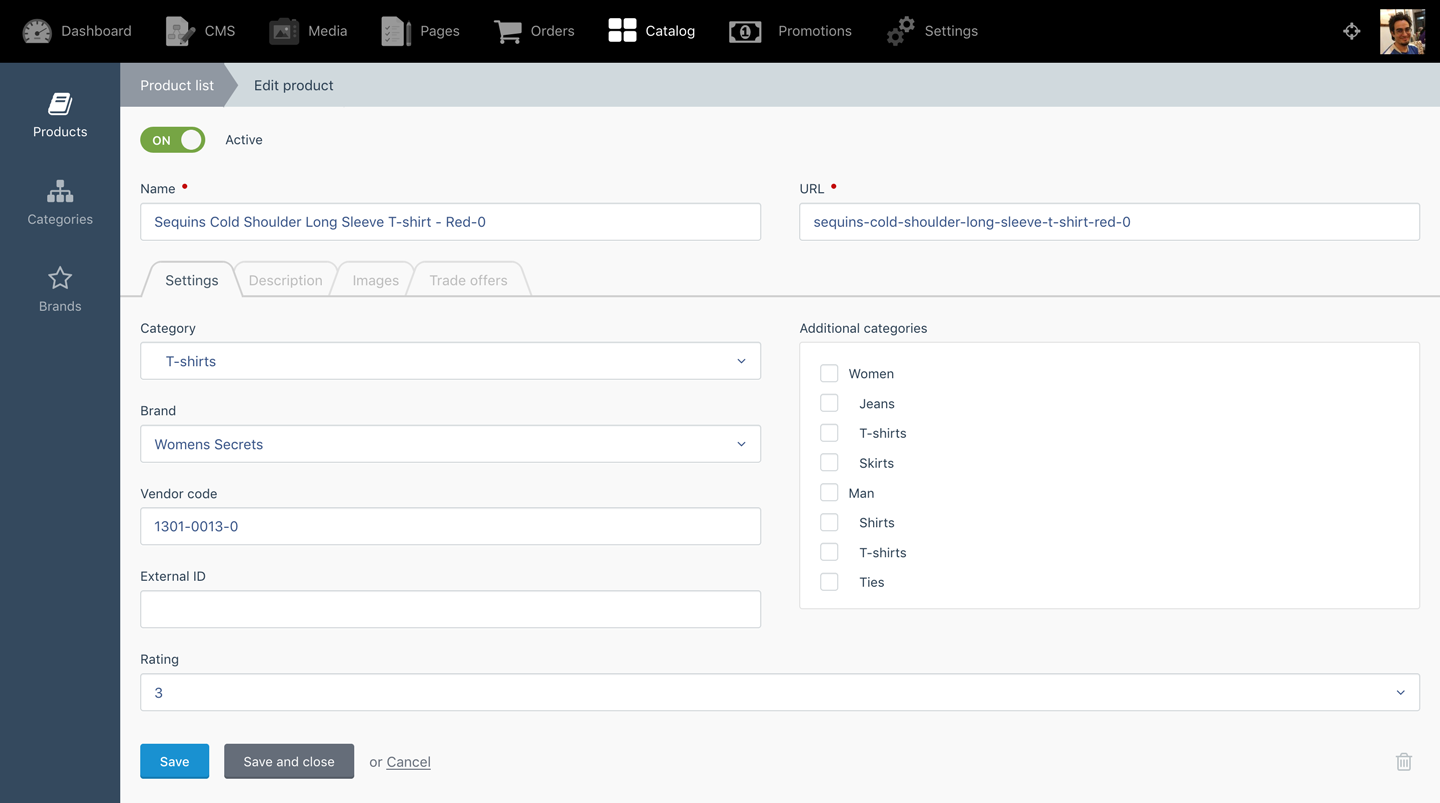
We can then retrieve the new "rating" field from the product and display it in the product template:
Extending Shopaholic is not difficult and enables us to fully implement our own e-commerce requirements, and personalize the site to suit our brand.
Conclusion
October CMS is a great candidate for building powerful sites in a very simple manner (showing that “web development is not rocket science”). It delivers the great developer experience granted by Laravel, and its marketplace (which is growing daily) provides a large number of ready-to-use themes and plugins, allowing us to build websites very quickly. One such plugin is Shopaholic, which converts the site into a full-fledged e-commerce platform.
Because of these reasons, building a site with October can be very cost-effective. As a result, it has gained some reputation (by winning the popular vote as best flat-file CMS from 2018) and has increasingly become a tool of choice for businesses and digital agencies crafting sites for their clients.
To find out more from the October community, be welcome to join the October CMS Slack workspace, which is where the creators of themes and plugins published in the marketplace hang out, so you can conveniently chat with them to get their help and advice.
Give October a try (it's free!), and let us know how it goes.